
"I wanna be claire danes!"
As I'm sure many of you know, Claire Danes went to the Met Gala in a beautiful fiber optic dress designed by Zac Posen. This started me thinking... I know a bit about fabric. I know how to code LEDs... I wonder how this could become a reality!
Dress design and concept: Annie Locke Scherer and Benjamin Munday
With assistance in LED coding from Ka-Ping Yee and Iulian Belea
research
I began by talking extensively with Lumigram. They are the sellers of the fiber optic fabric that was used in Claire Danes dress. I learned a immense amount of information that really helped me choose the right size of fabric that I needed.
this fabric is woven, with the fiber optics in the vertical direction and a silver grey thread in the horizontal direction
all the dimensions of fabric listed on the website are priced by width and they have two standard loom heights (85cm and 150cm). Therefore if you buy a piece that is 86 tall or 150 tall it is the exact same price.
there are a lot of details about where you can cut the fabric, how to be careful not to break the fiber optics, and lots of other little details seen in this video.
this fabric is pretty stiff, so don't expect it to flow very well
this product ships from france, and can be ordered with about 8-10 days lead time
Instructions for connecting standard optical module to fiber optic fabric
After learning this, I went ahead and ordered a 184cmx150cm piece from here
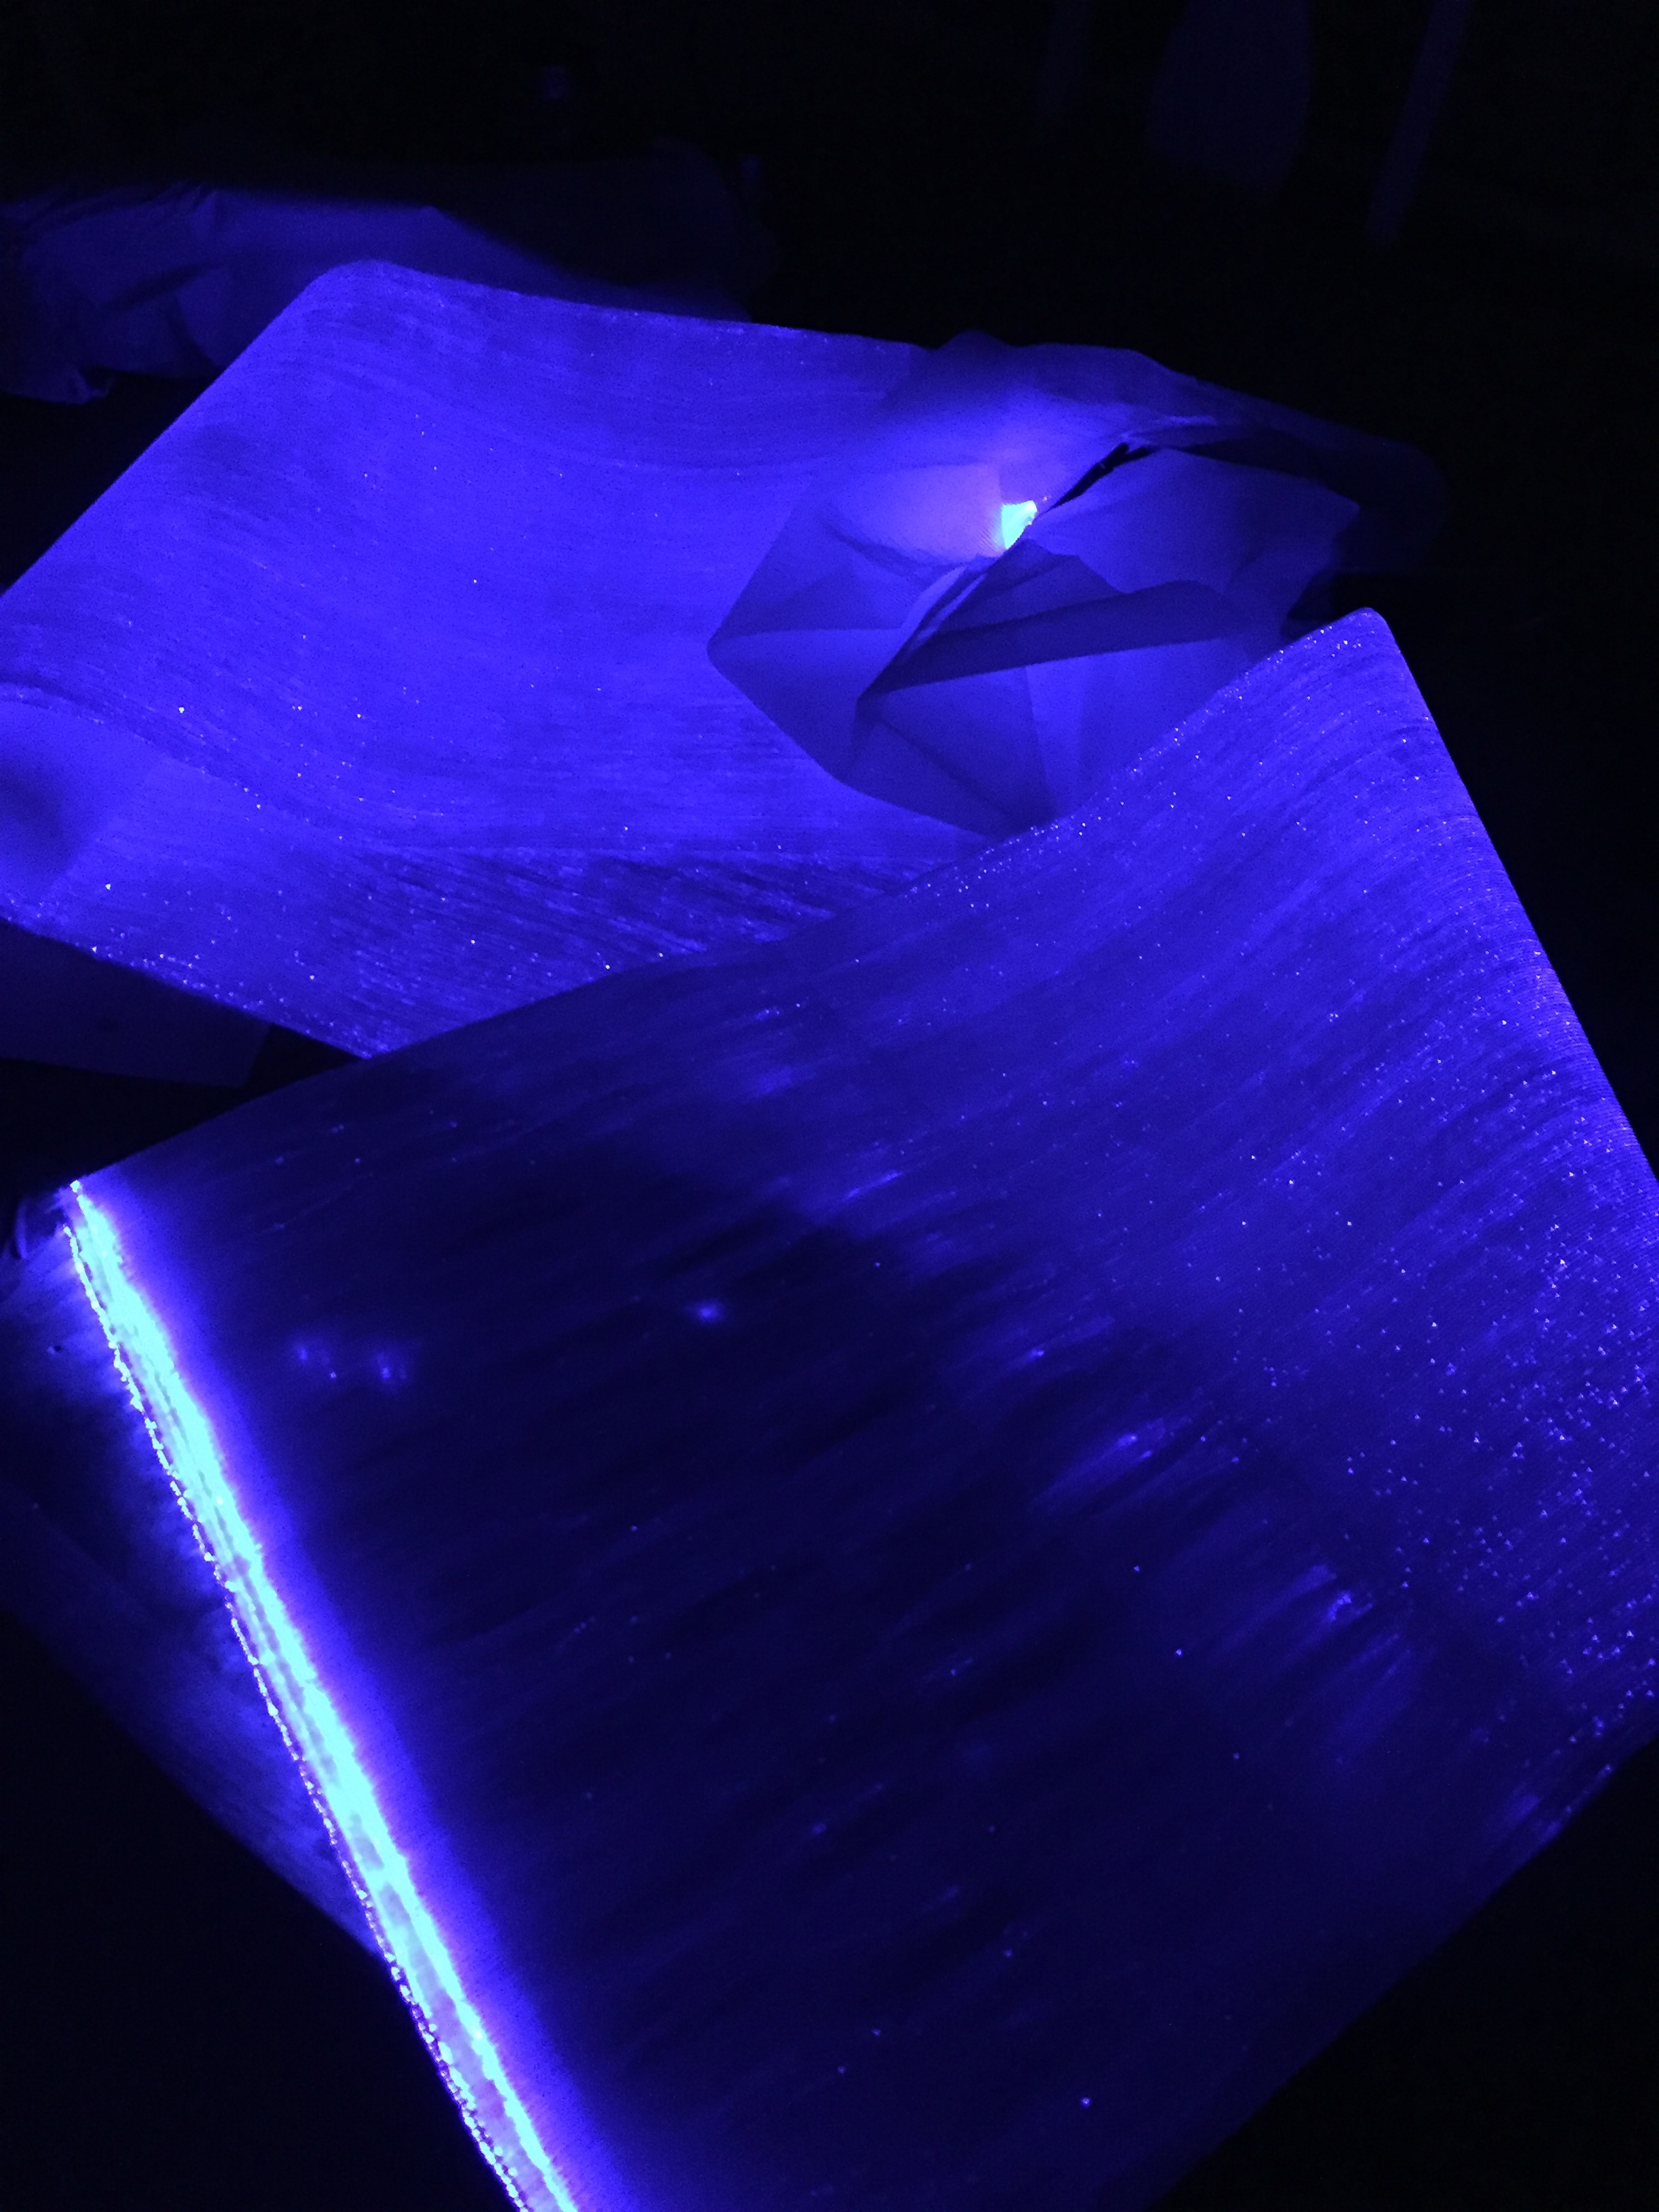
it arrived!

prototyping the dress design
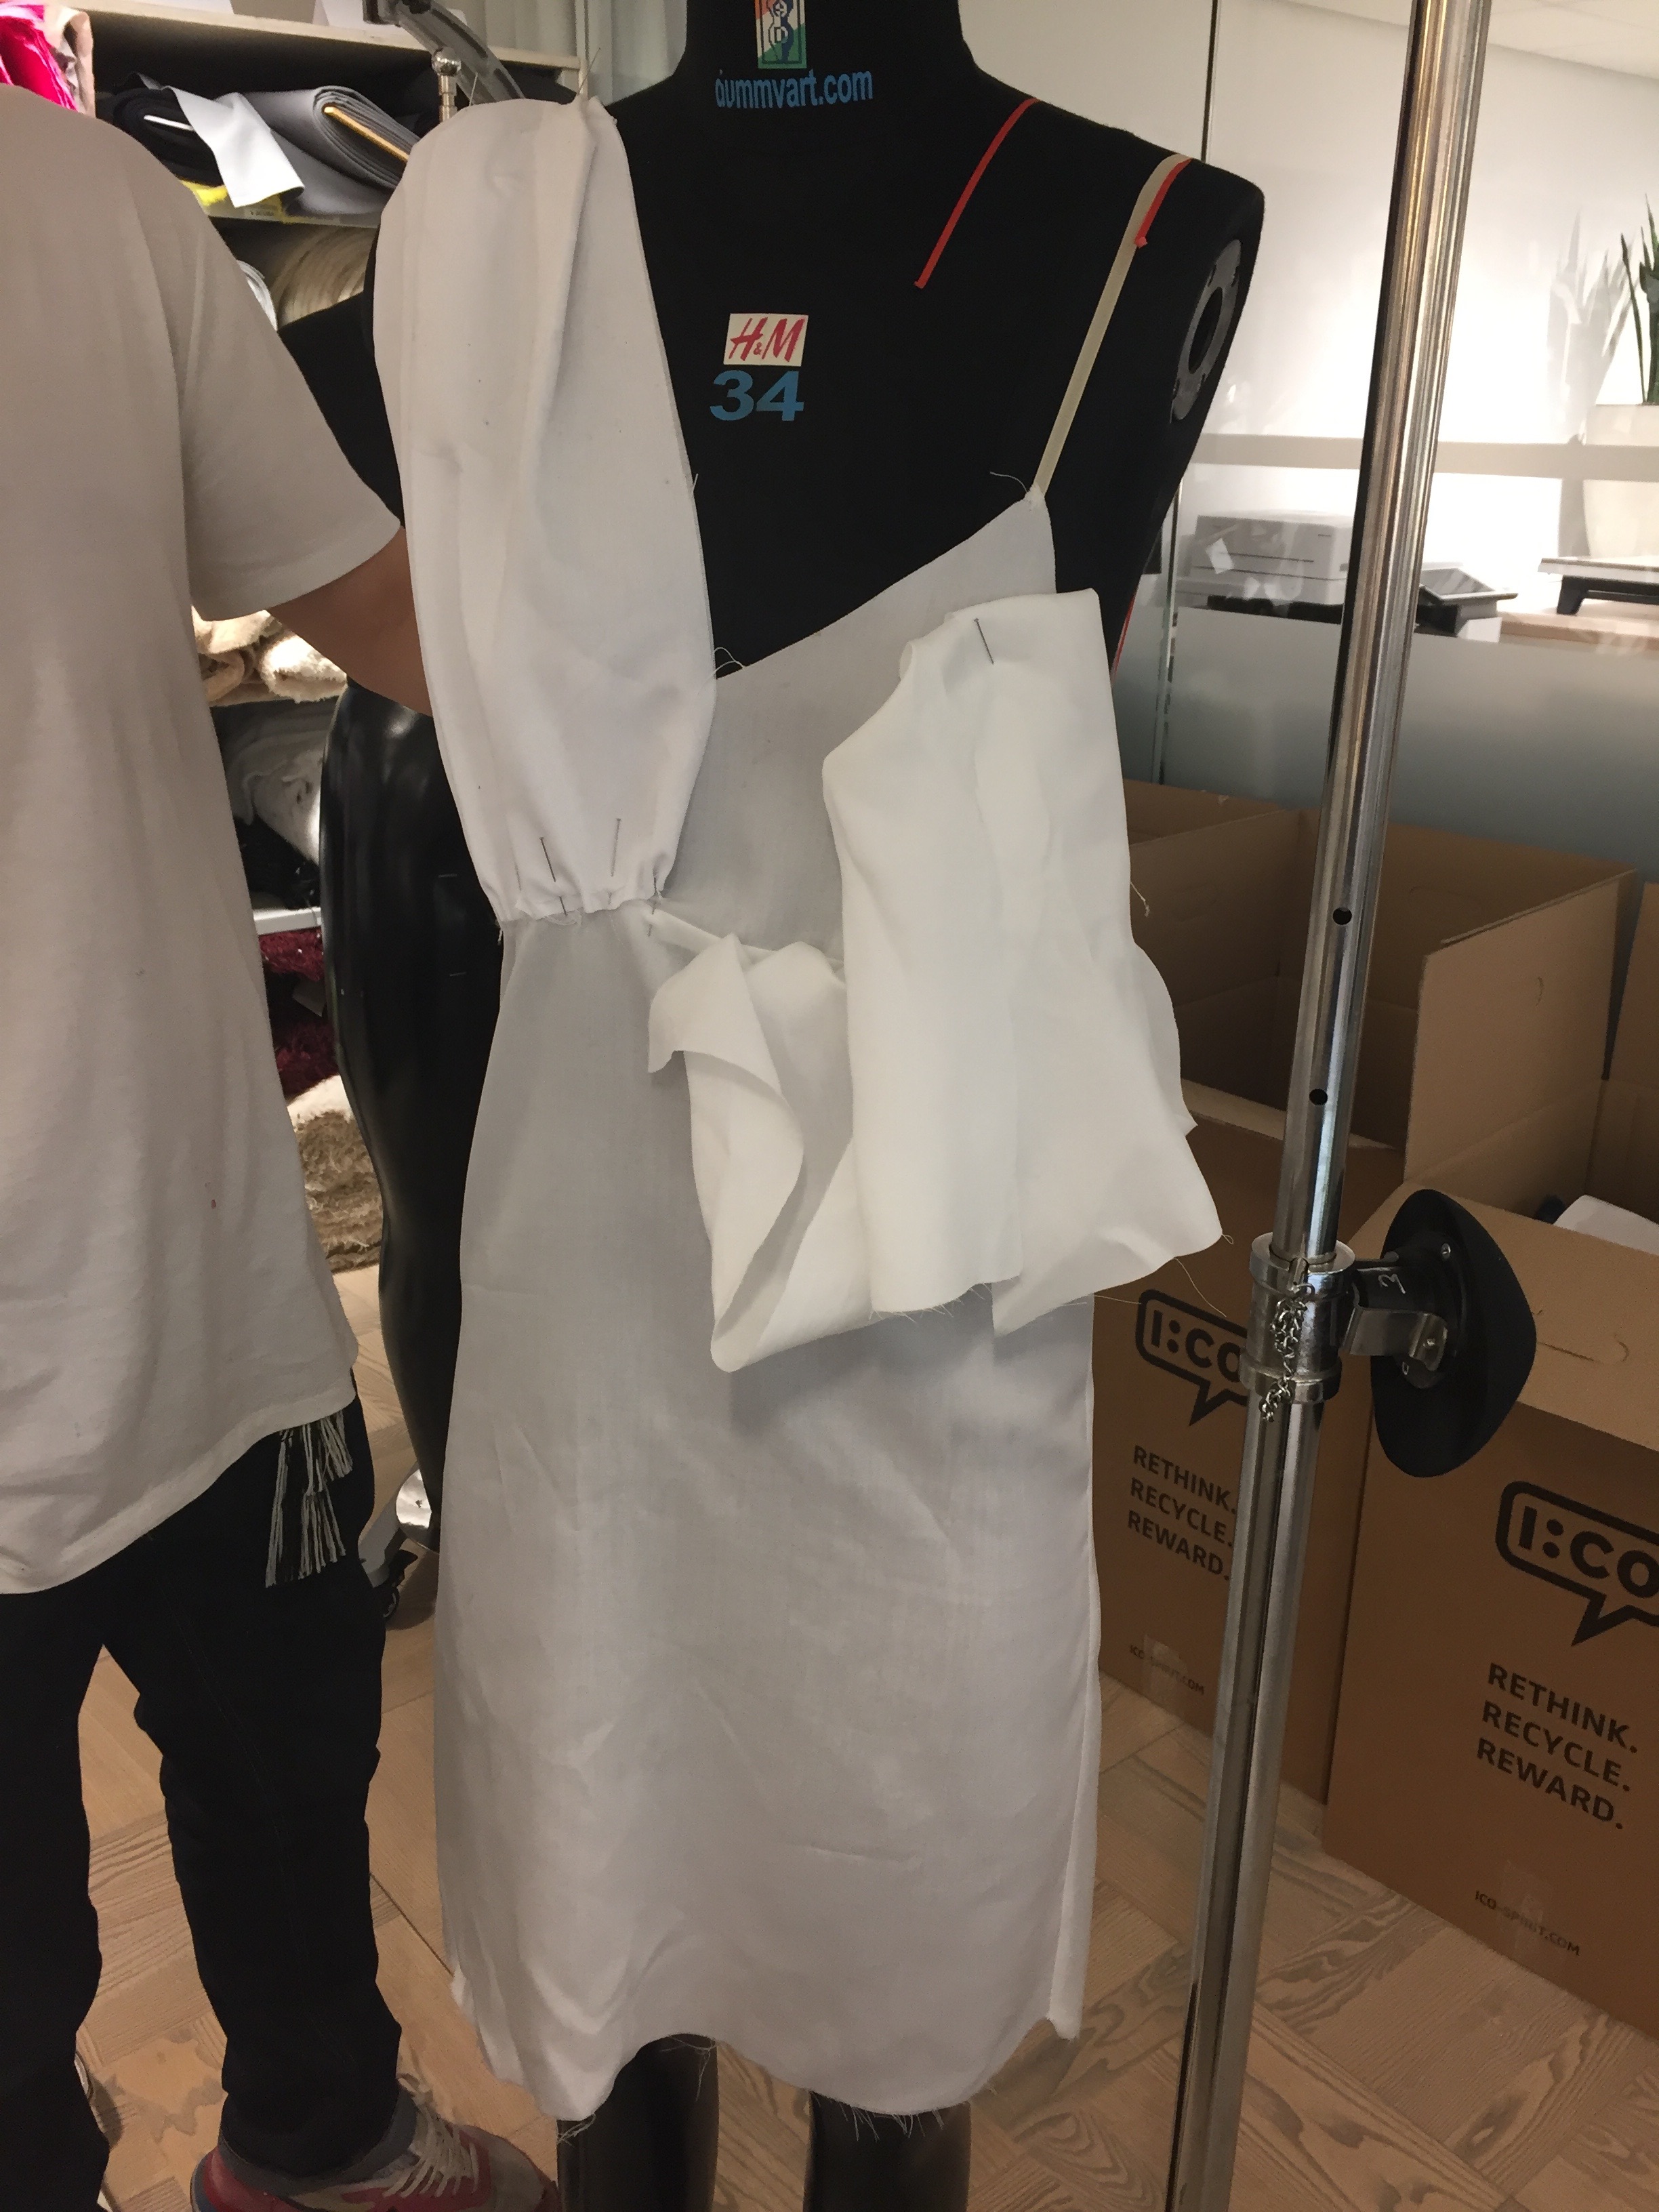
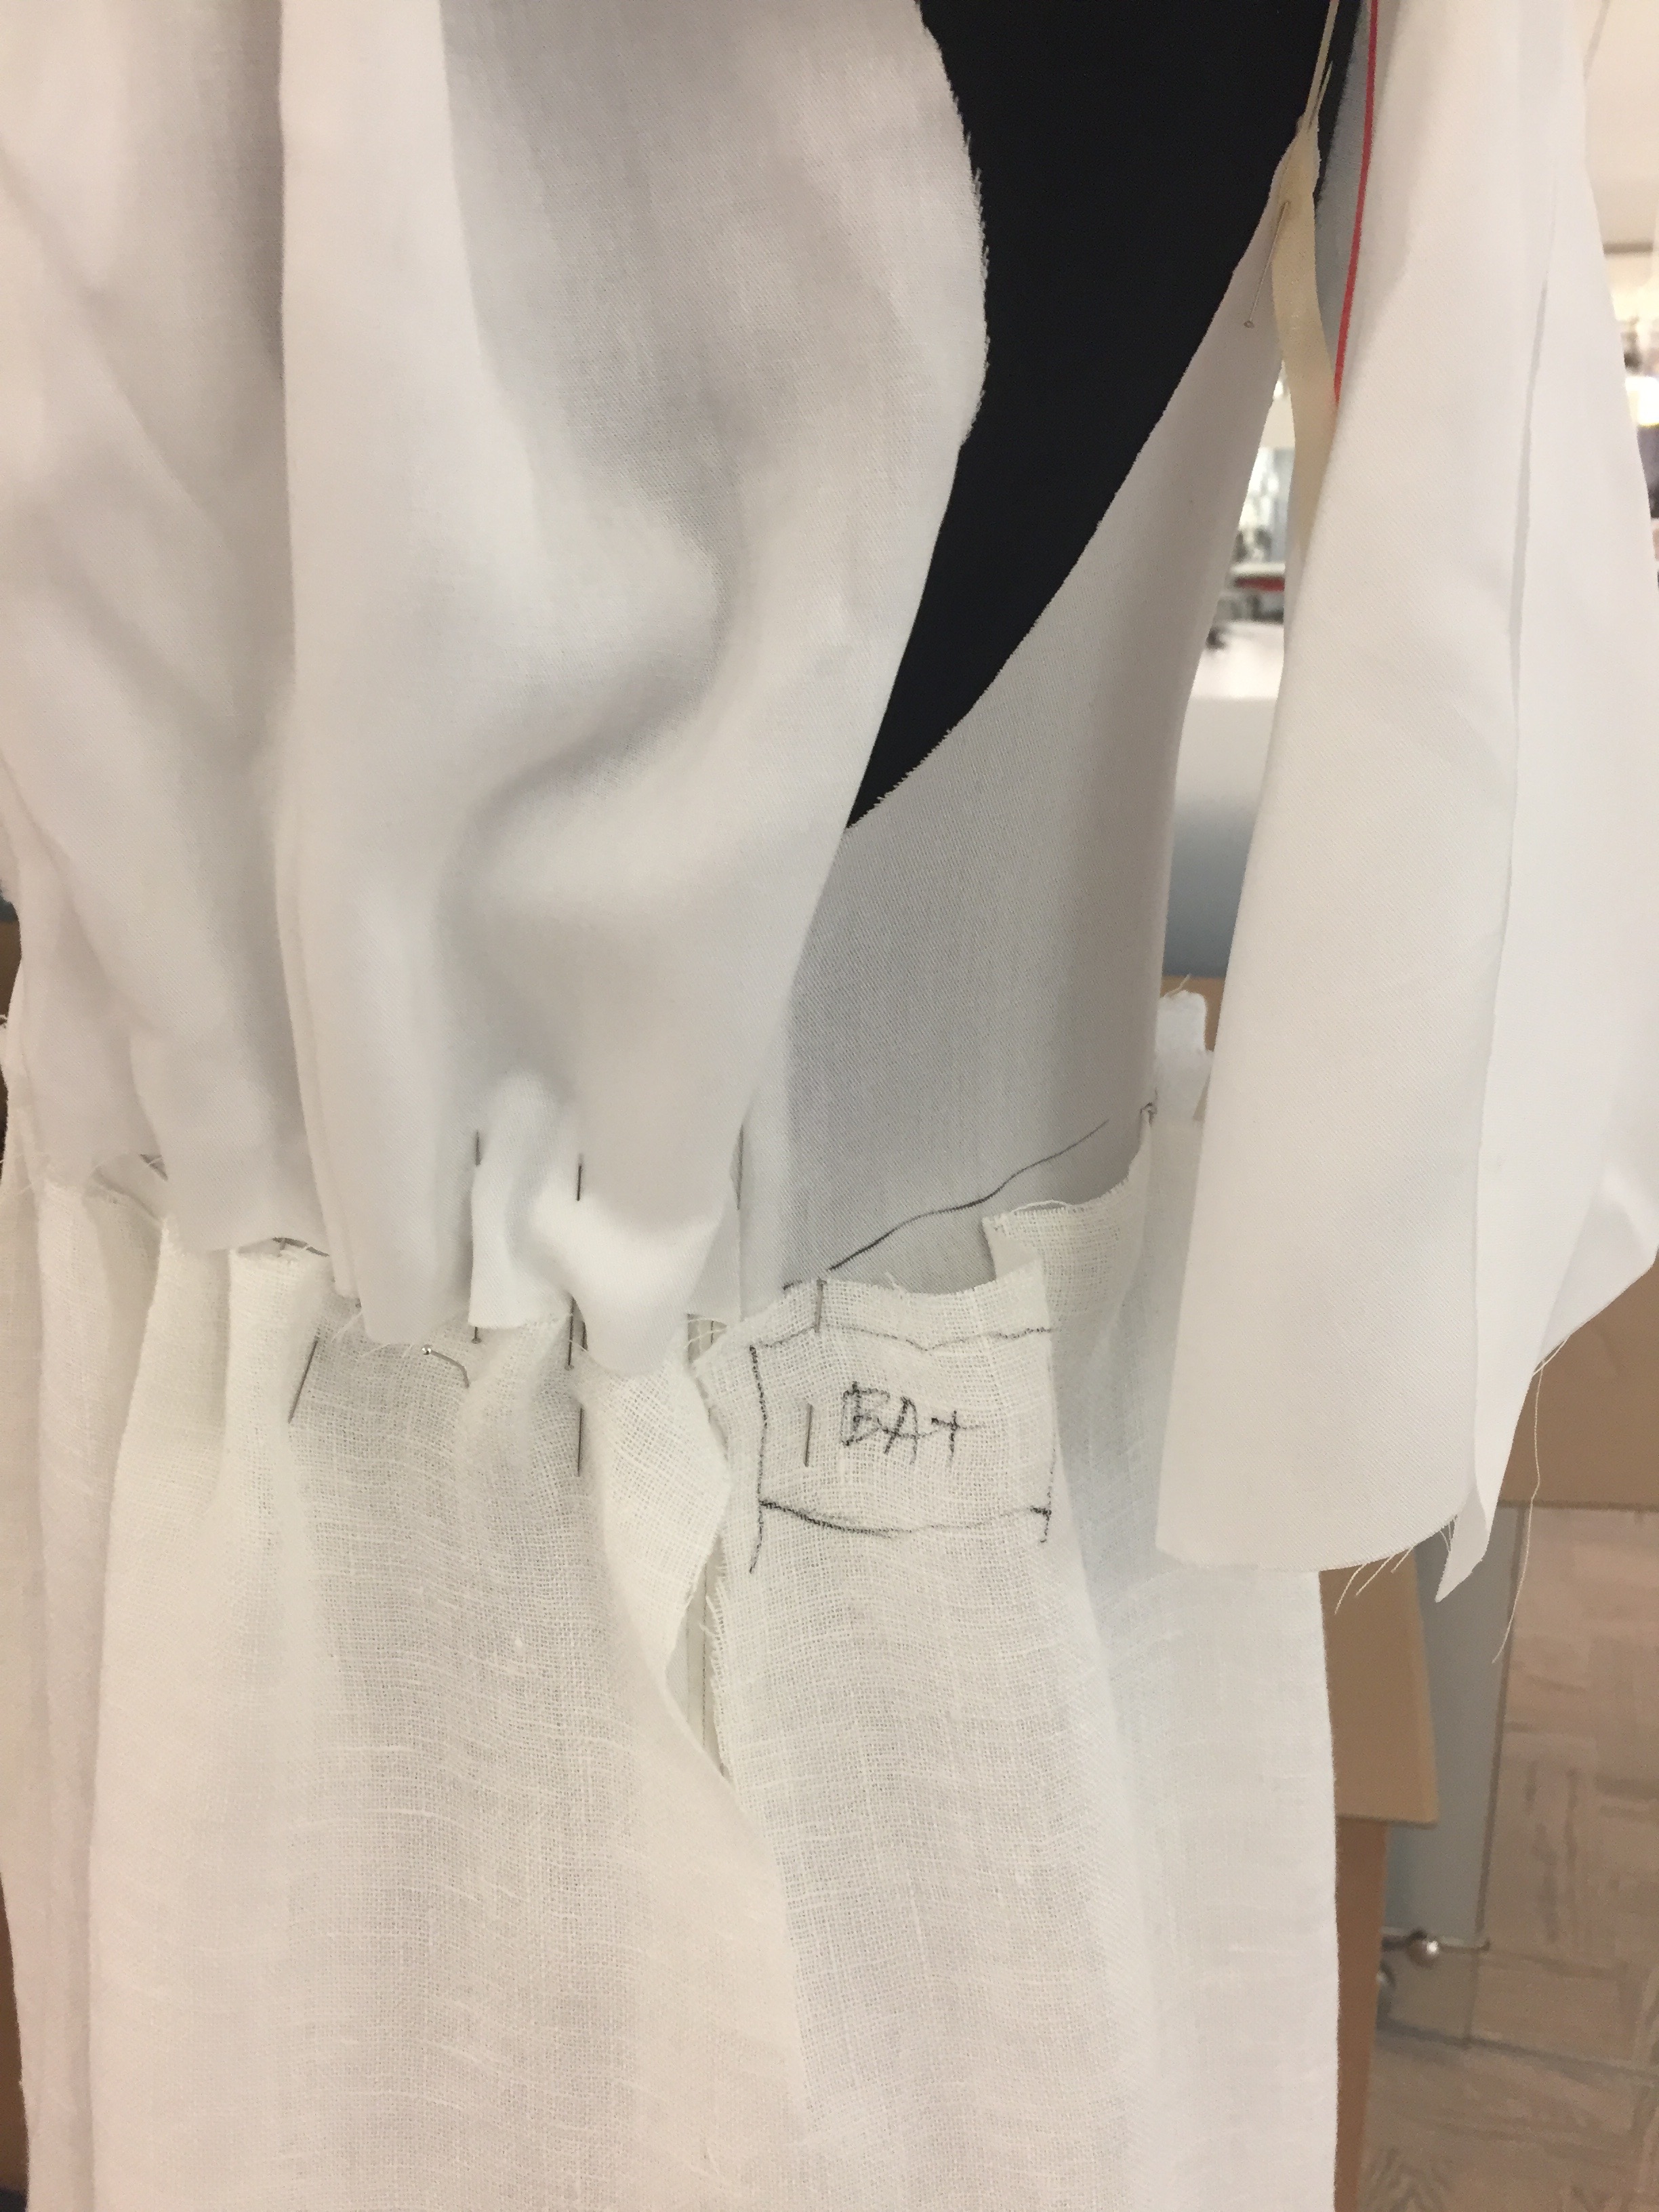
I am very lucky to have such wonderful pattern-making friends. After much discussion, we decided to go for a Helenistic dress look. He took my measurements and whipped up a slip pattern for me. Since my research (see Concrete Form[ing]work page) works with a fabric pinching technique called smocking, we decided to integrate this into the dress. This would allow us to light everything from the waist/belt from one end instead of both ends of the fabric. Our prototype helped us figure out the final pattern dimensions, battery pack location, and amount of smocking to get the right width of the shoulder pieces.


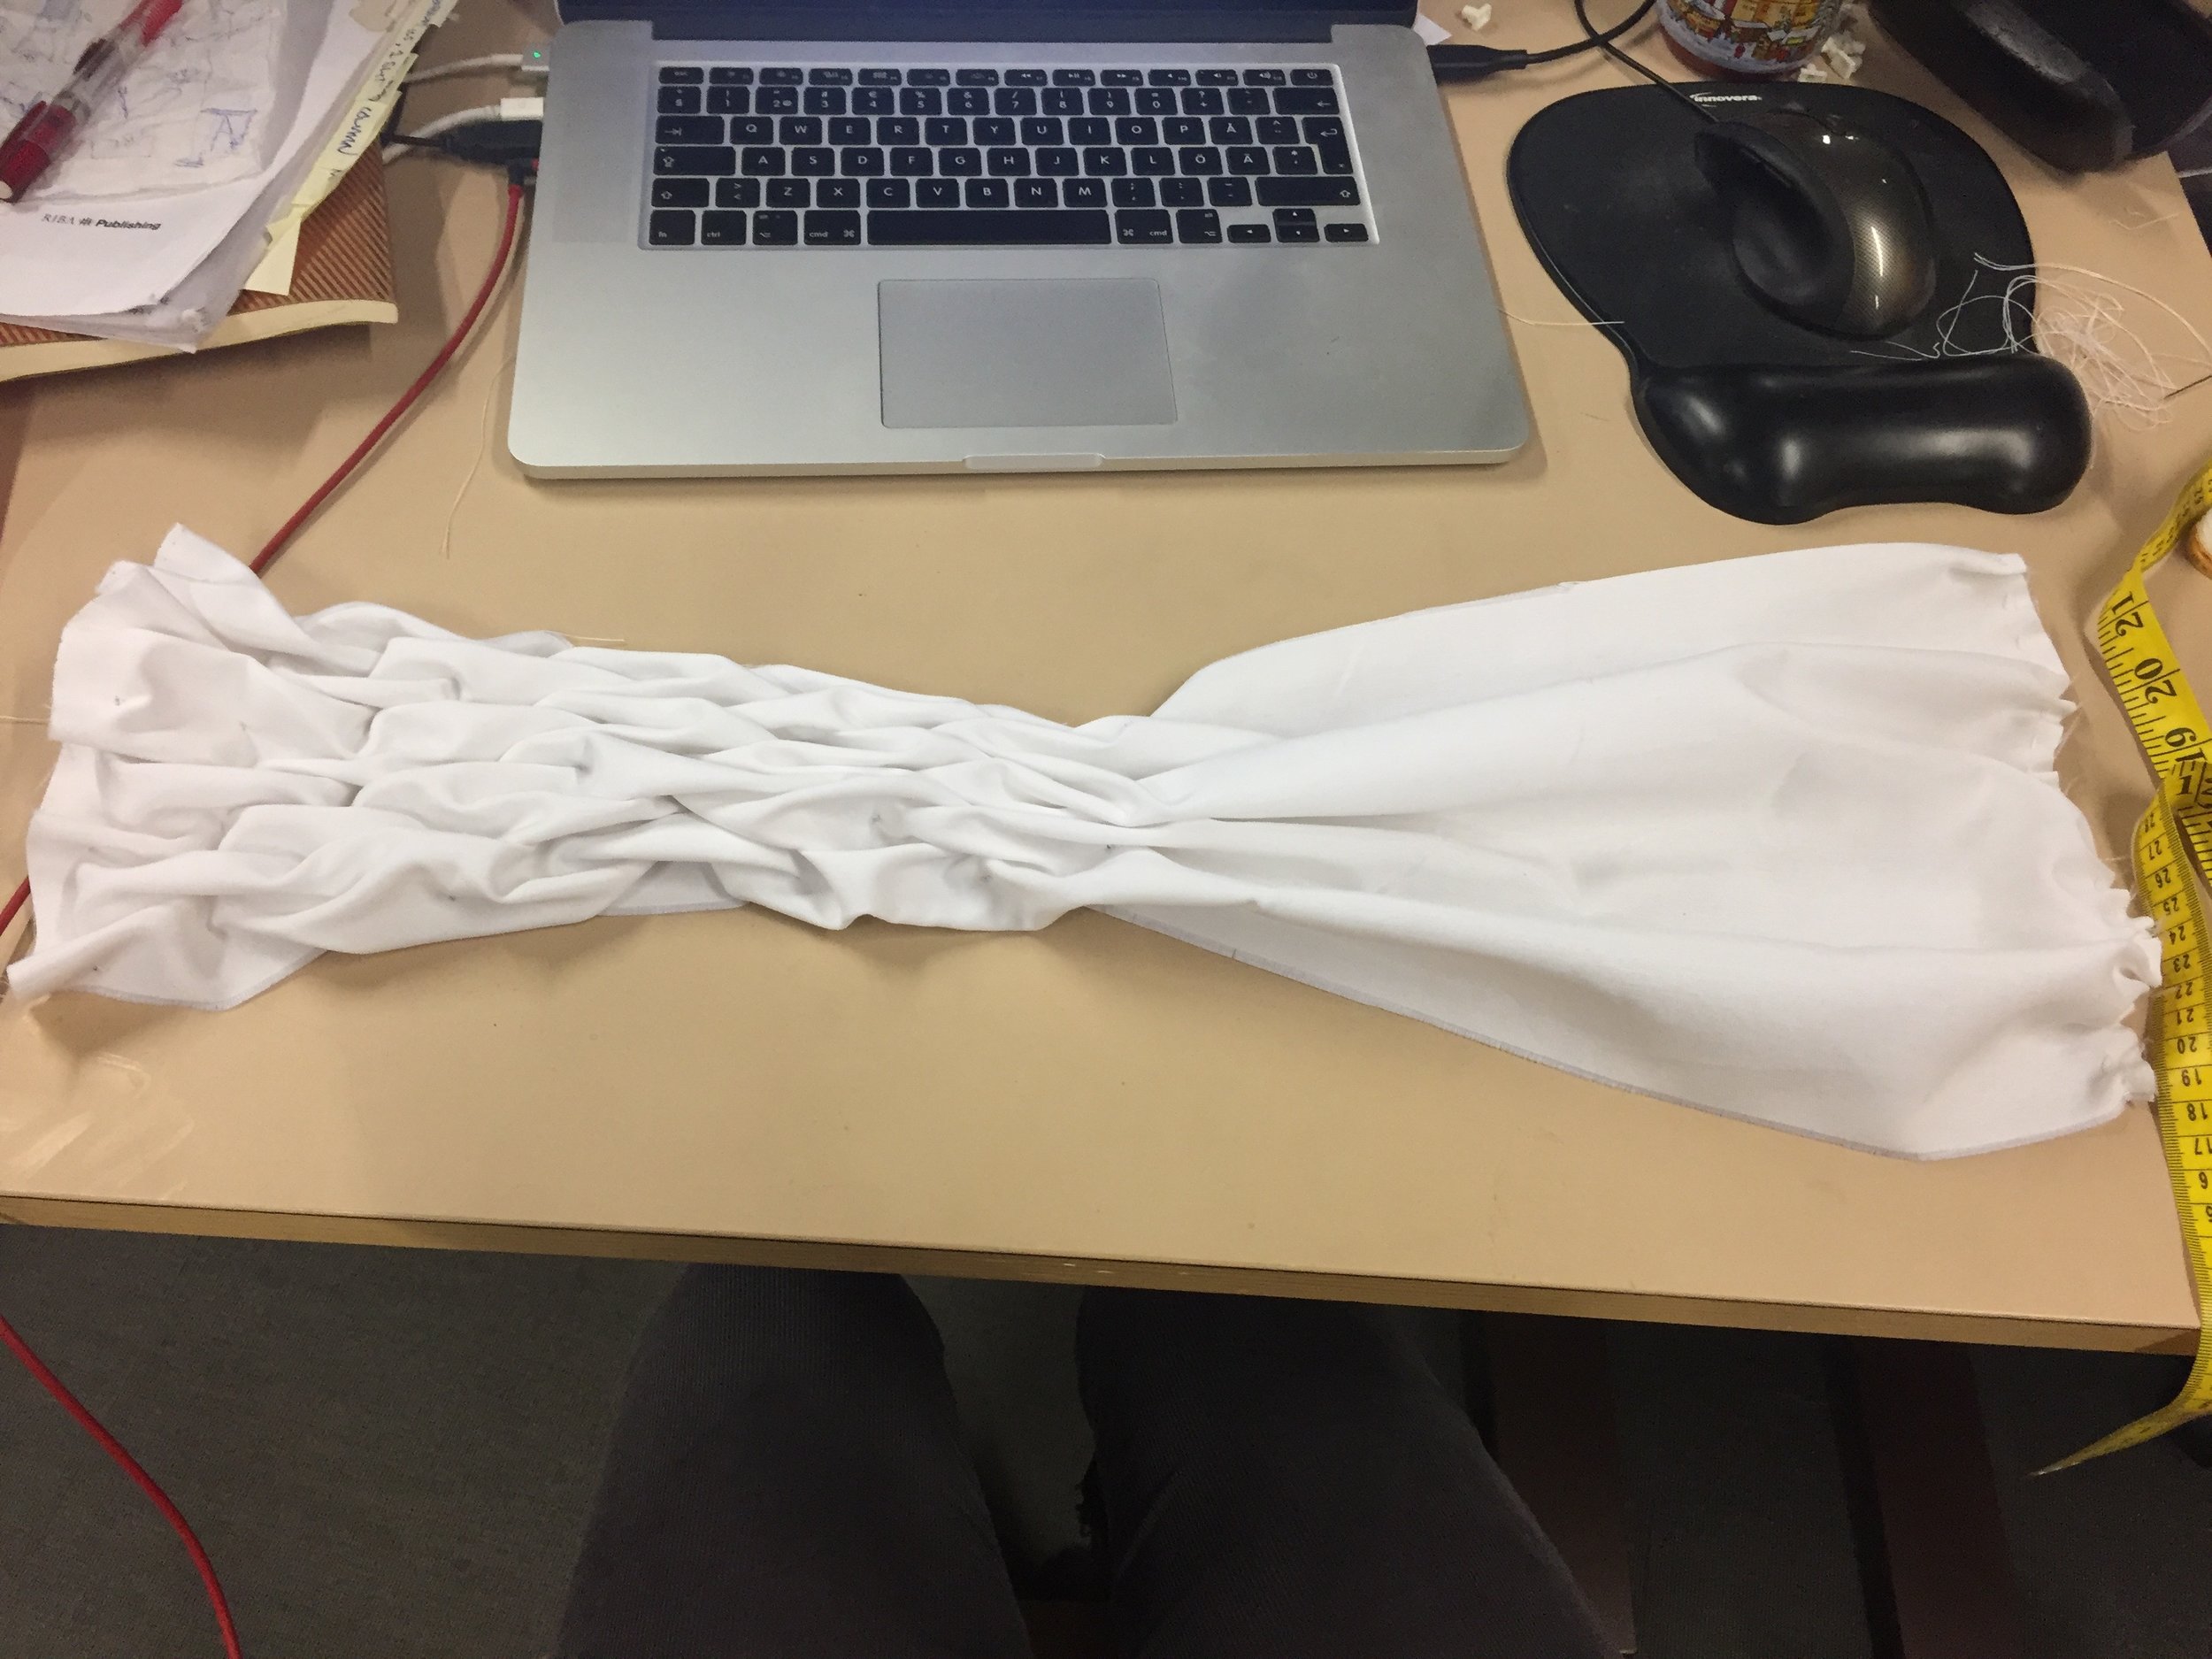
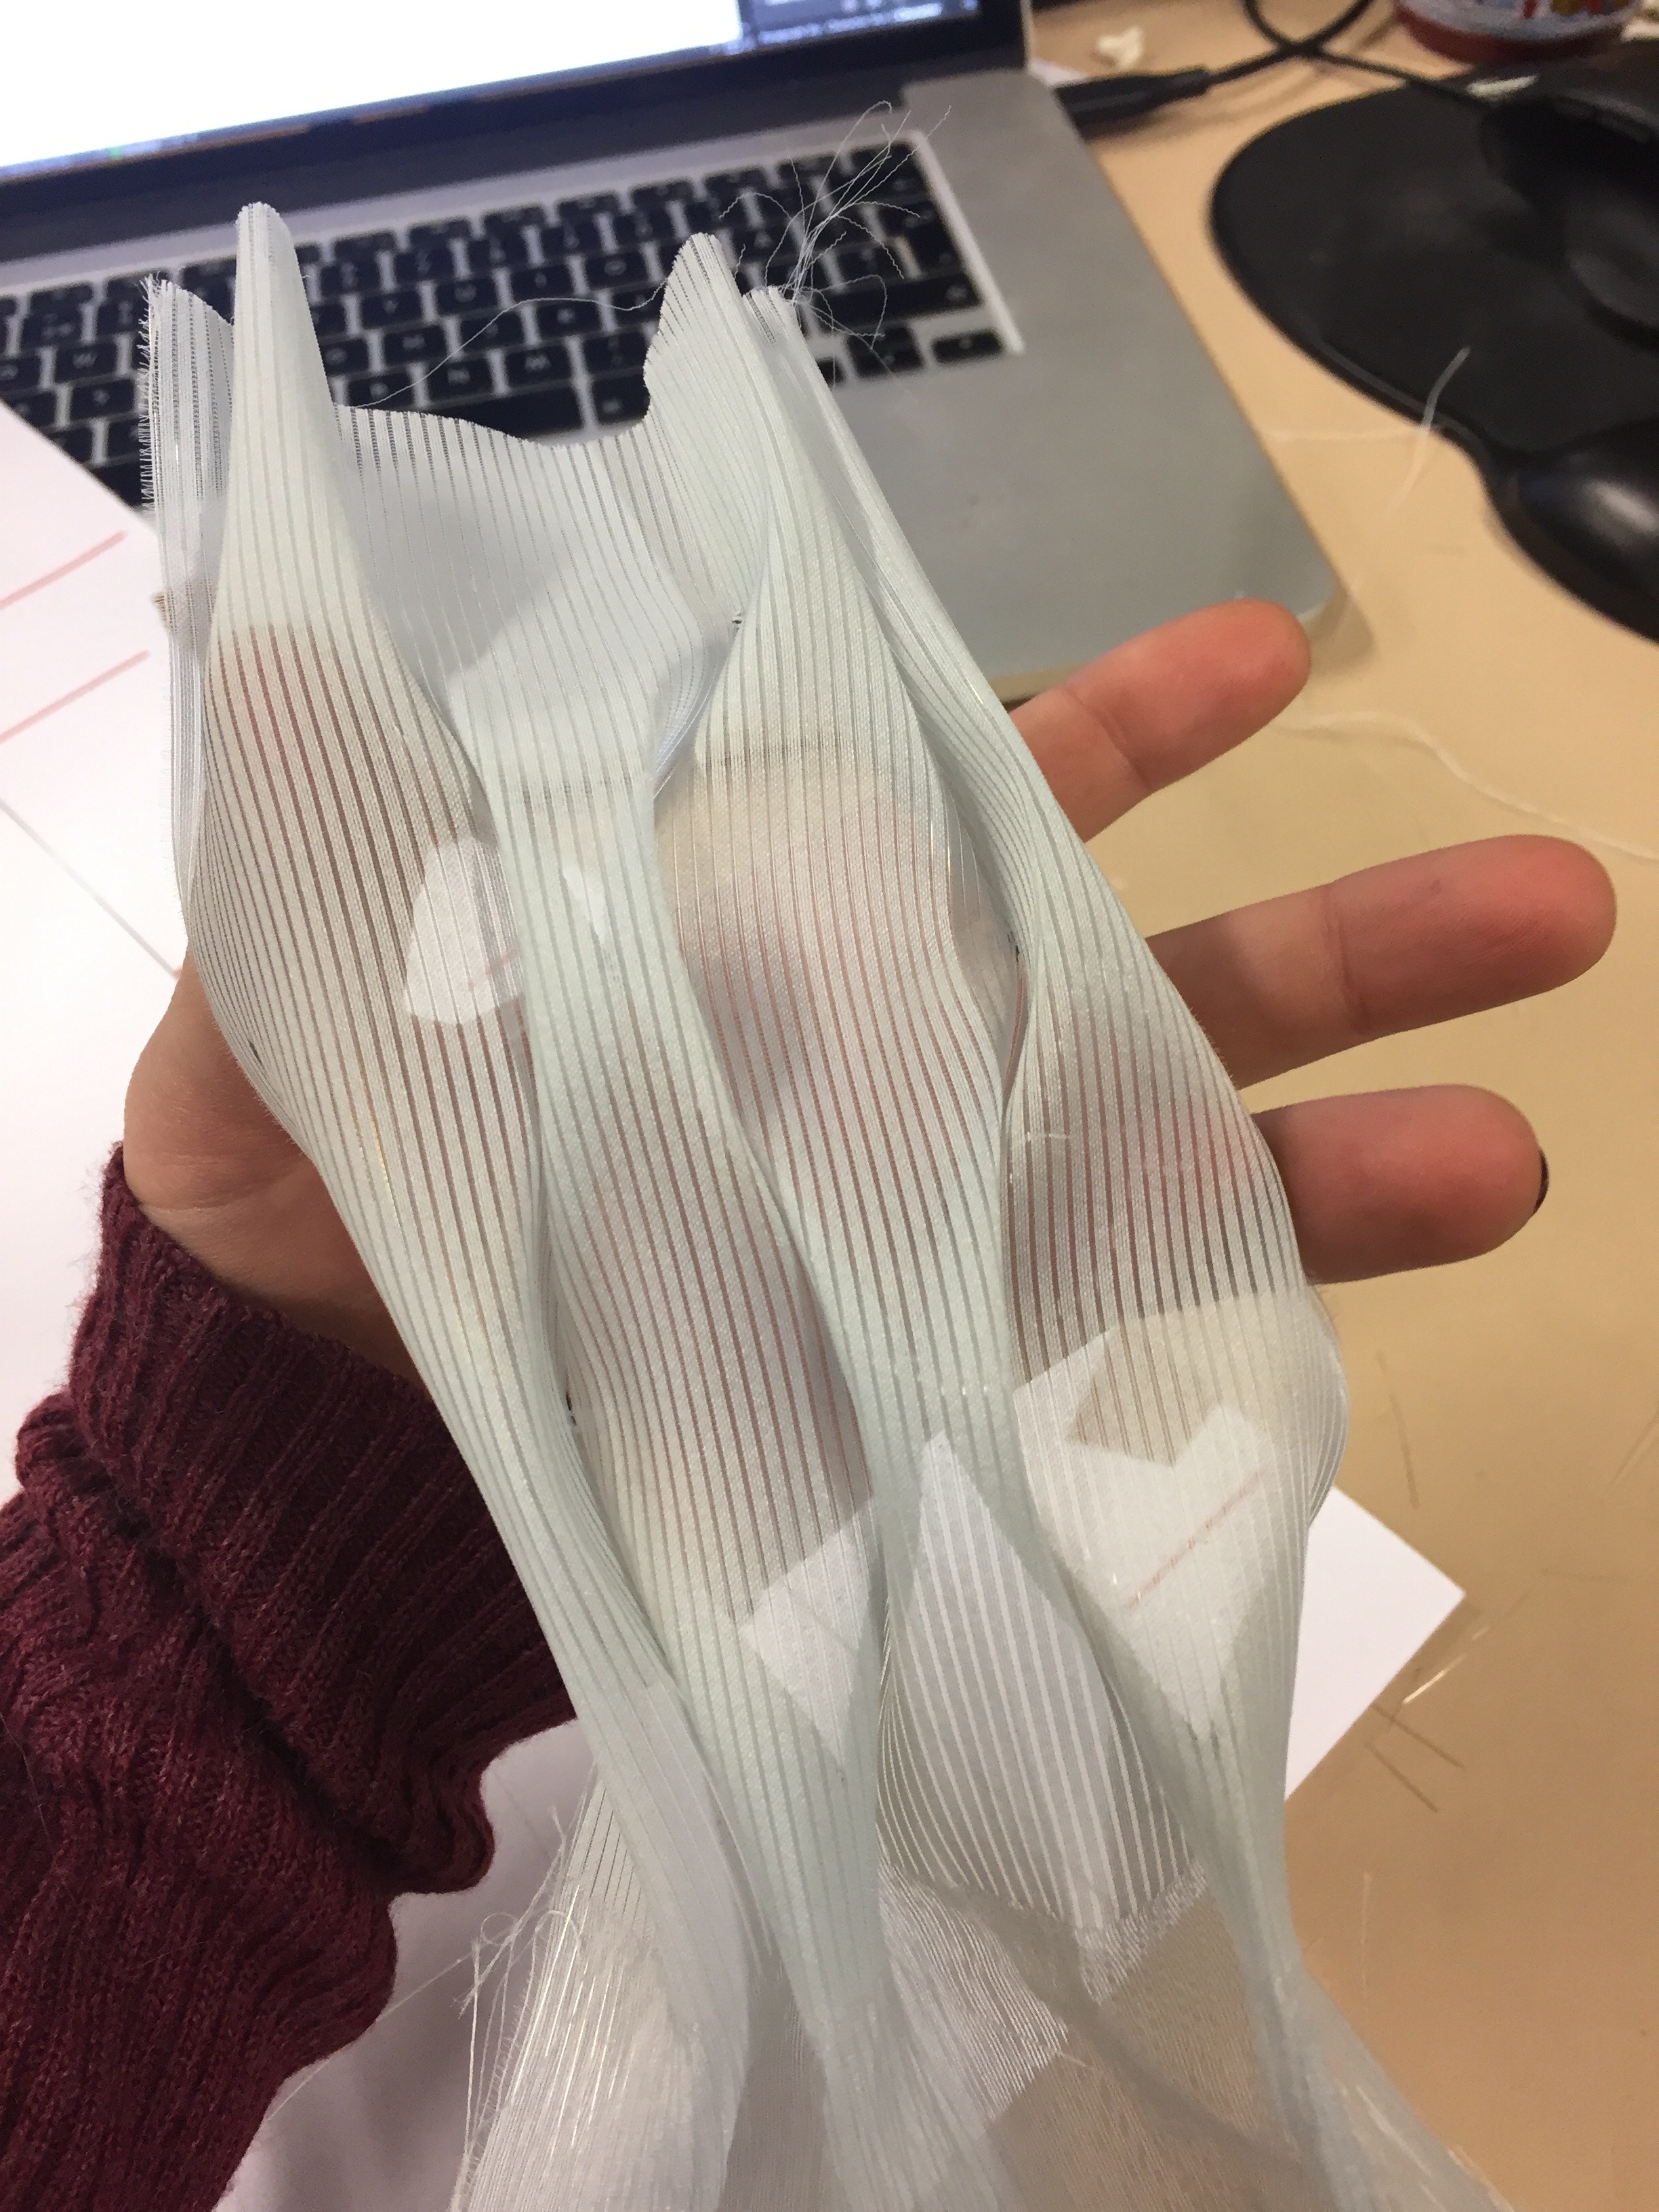
using smocking to tailor the shoulders
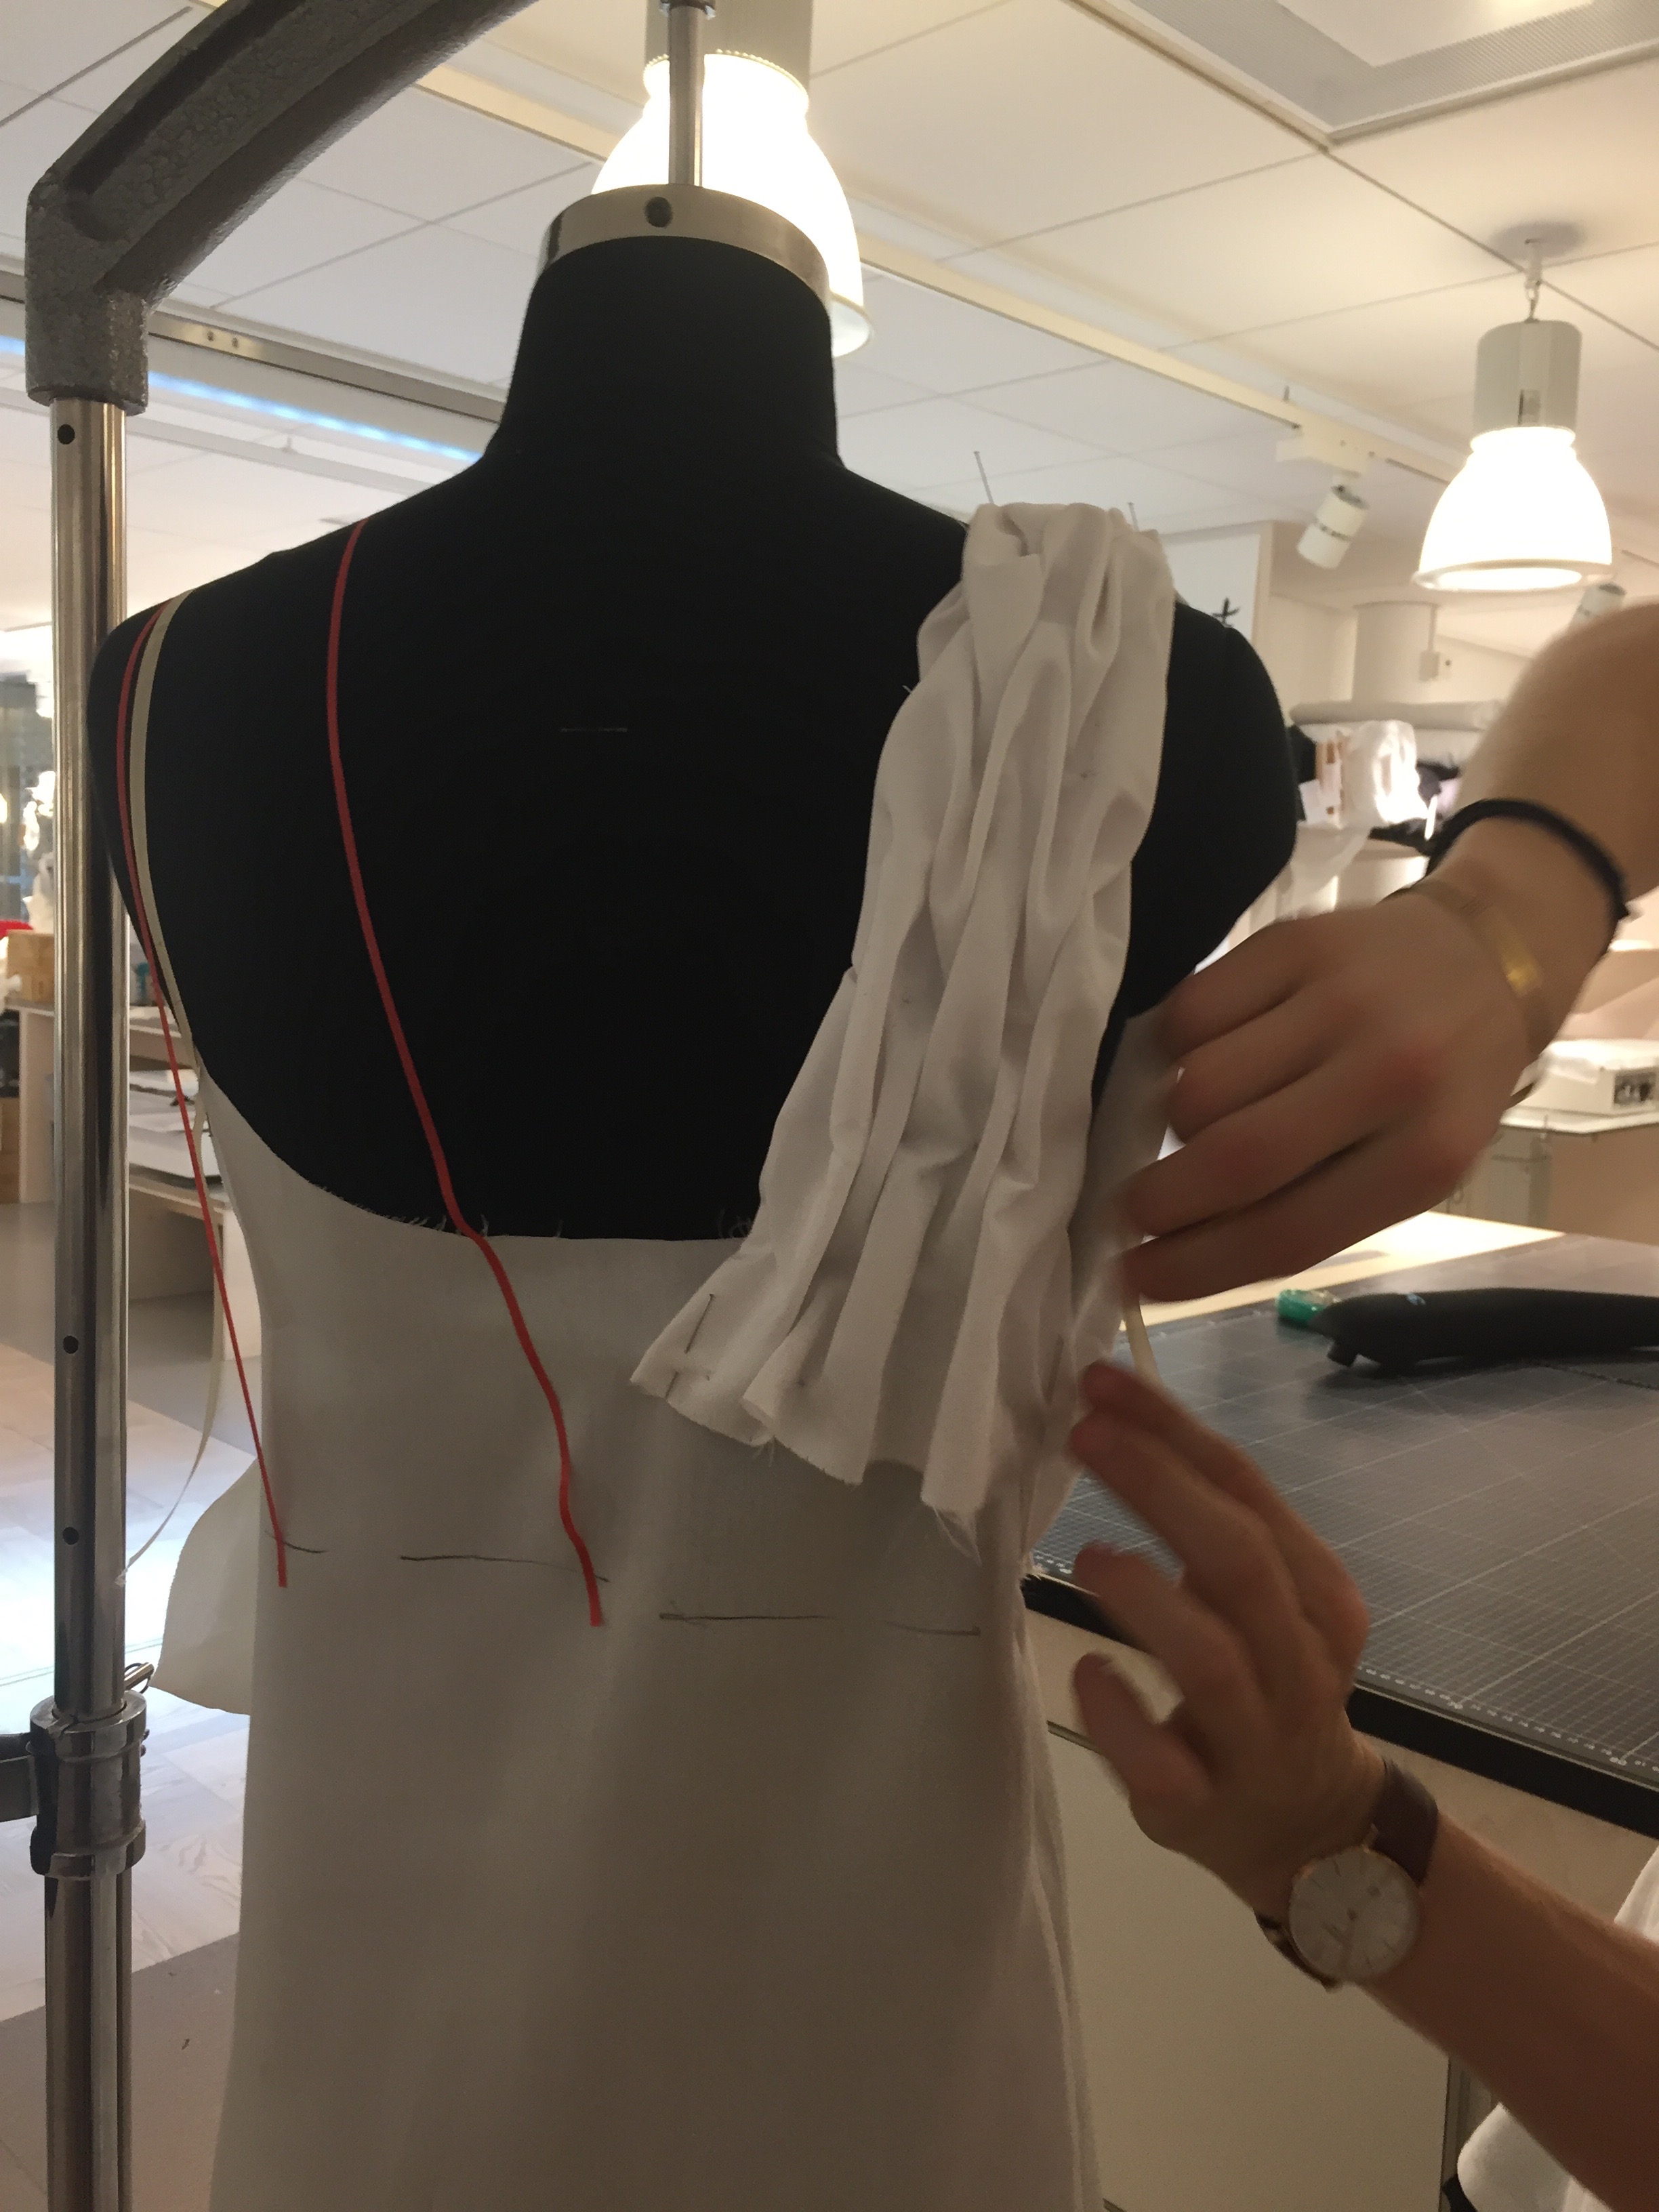
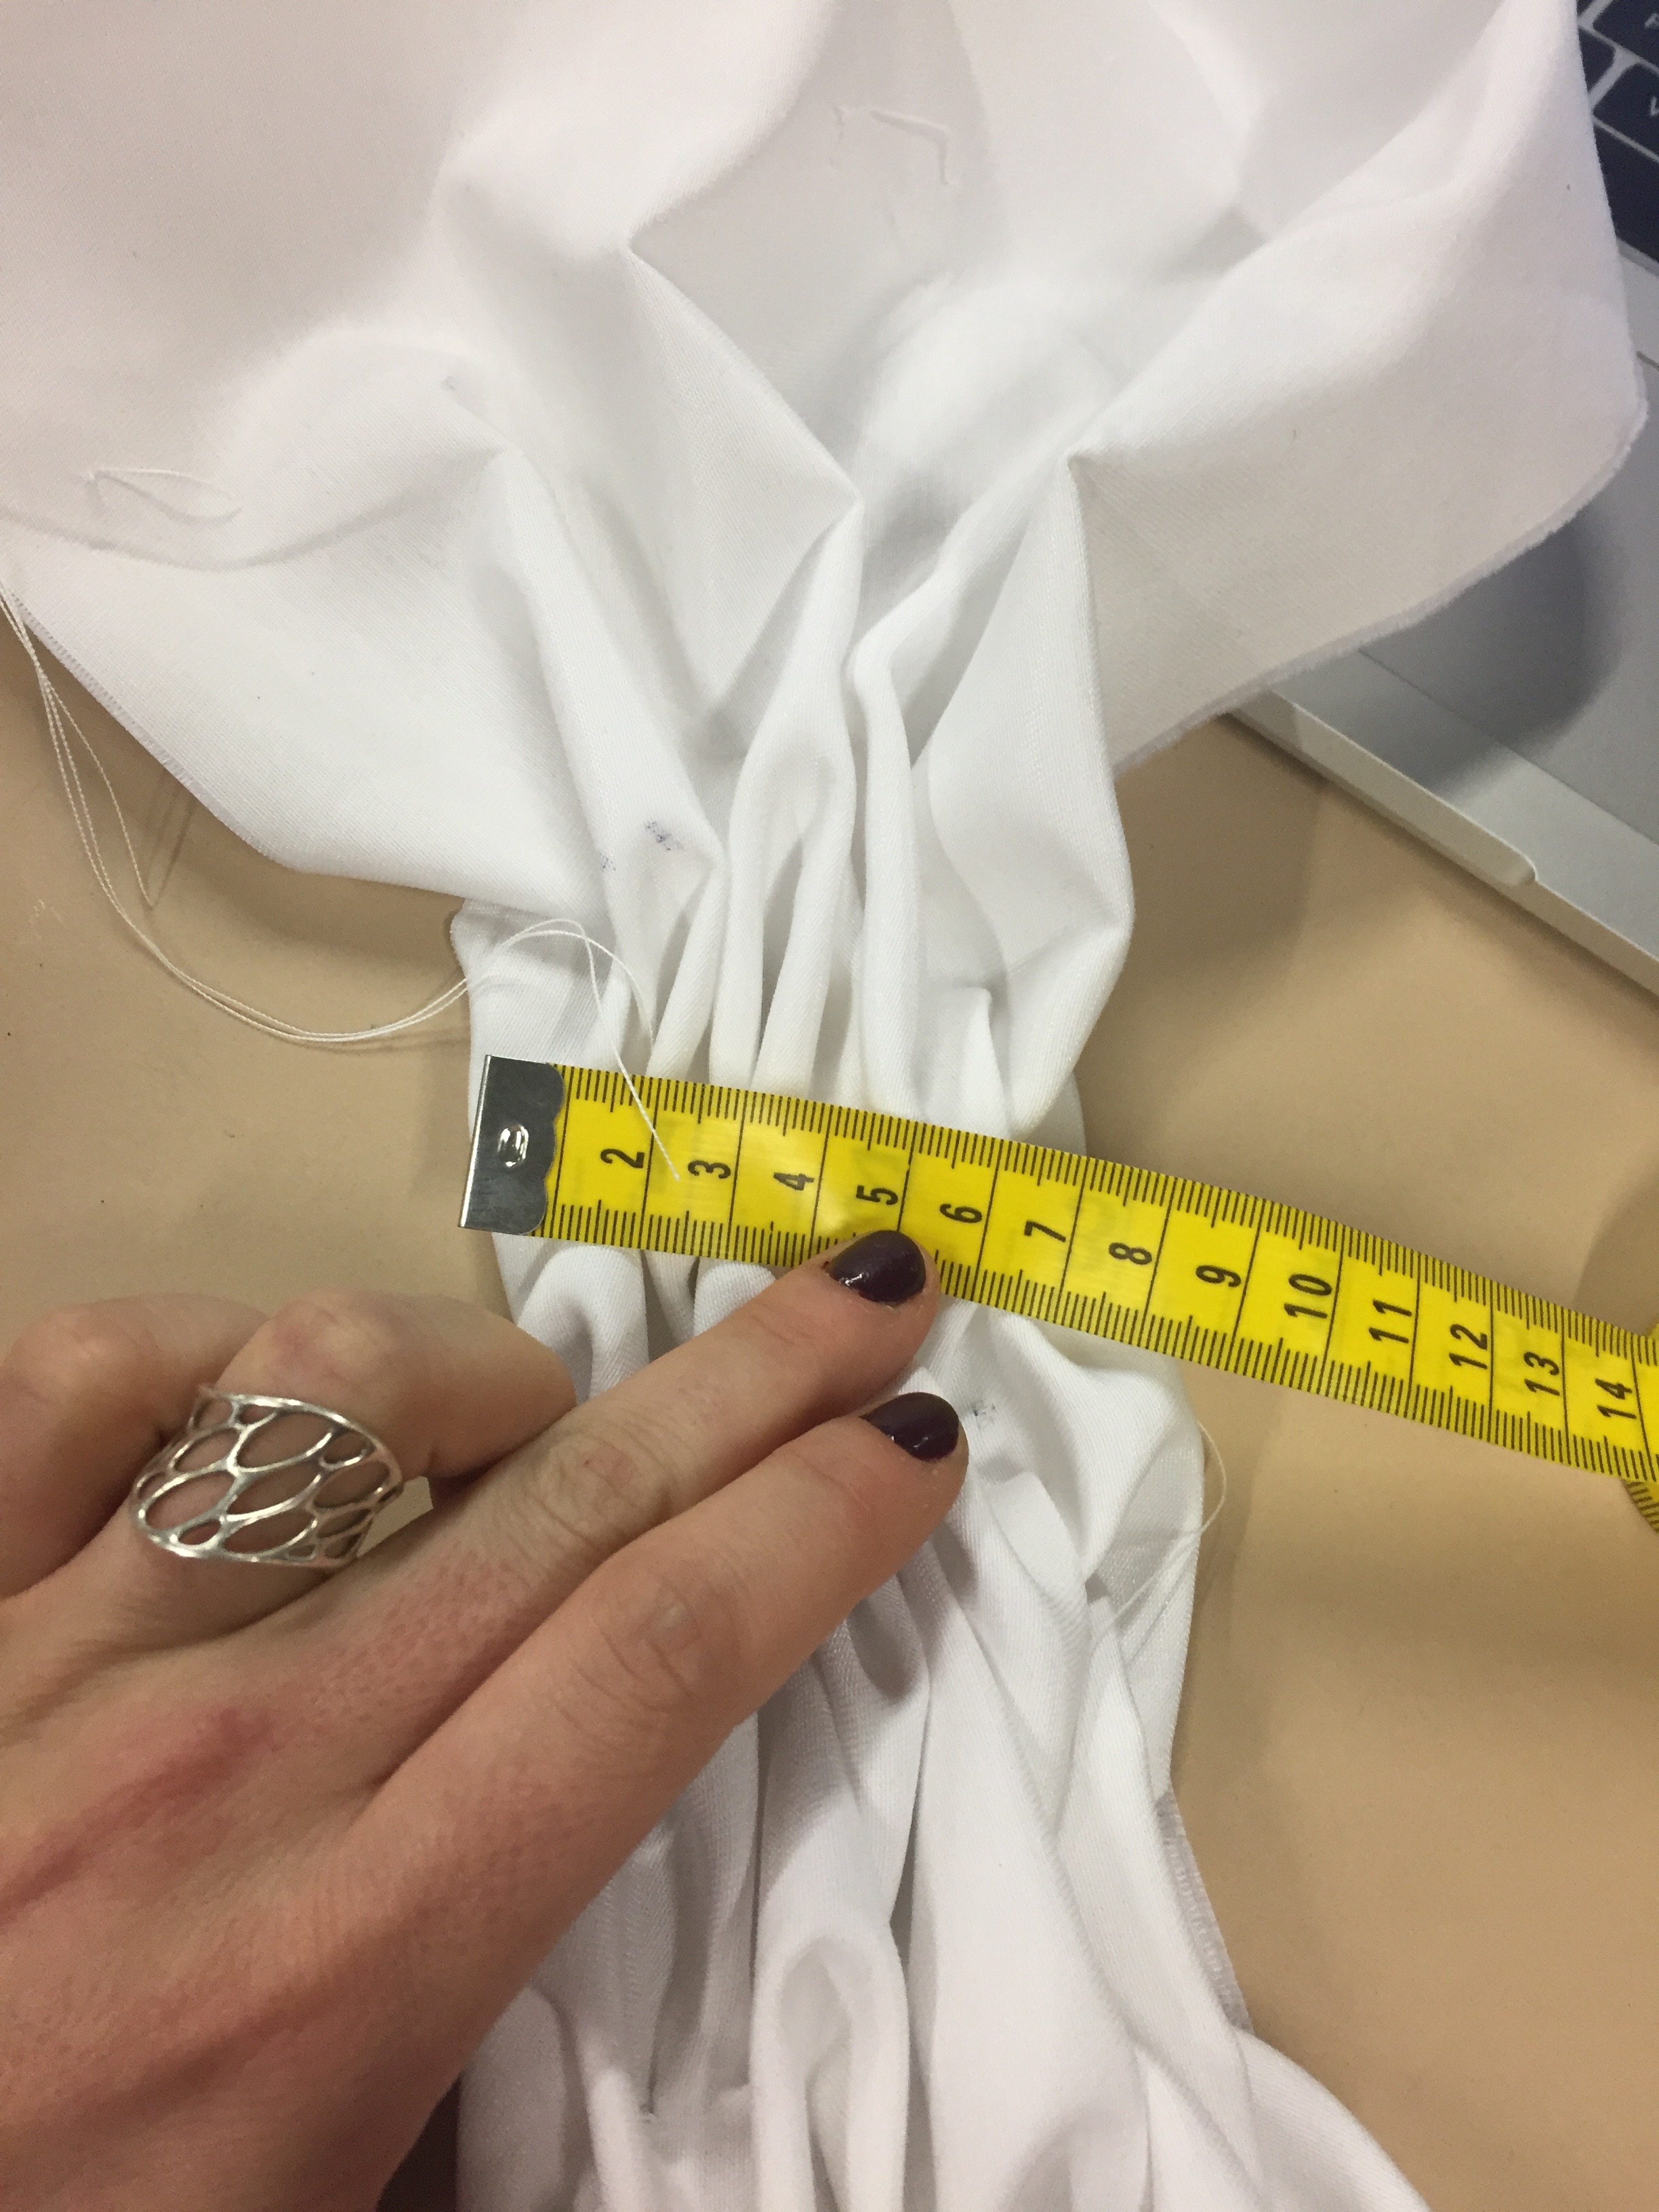
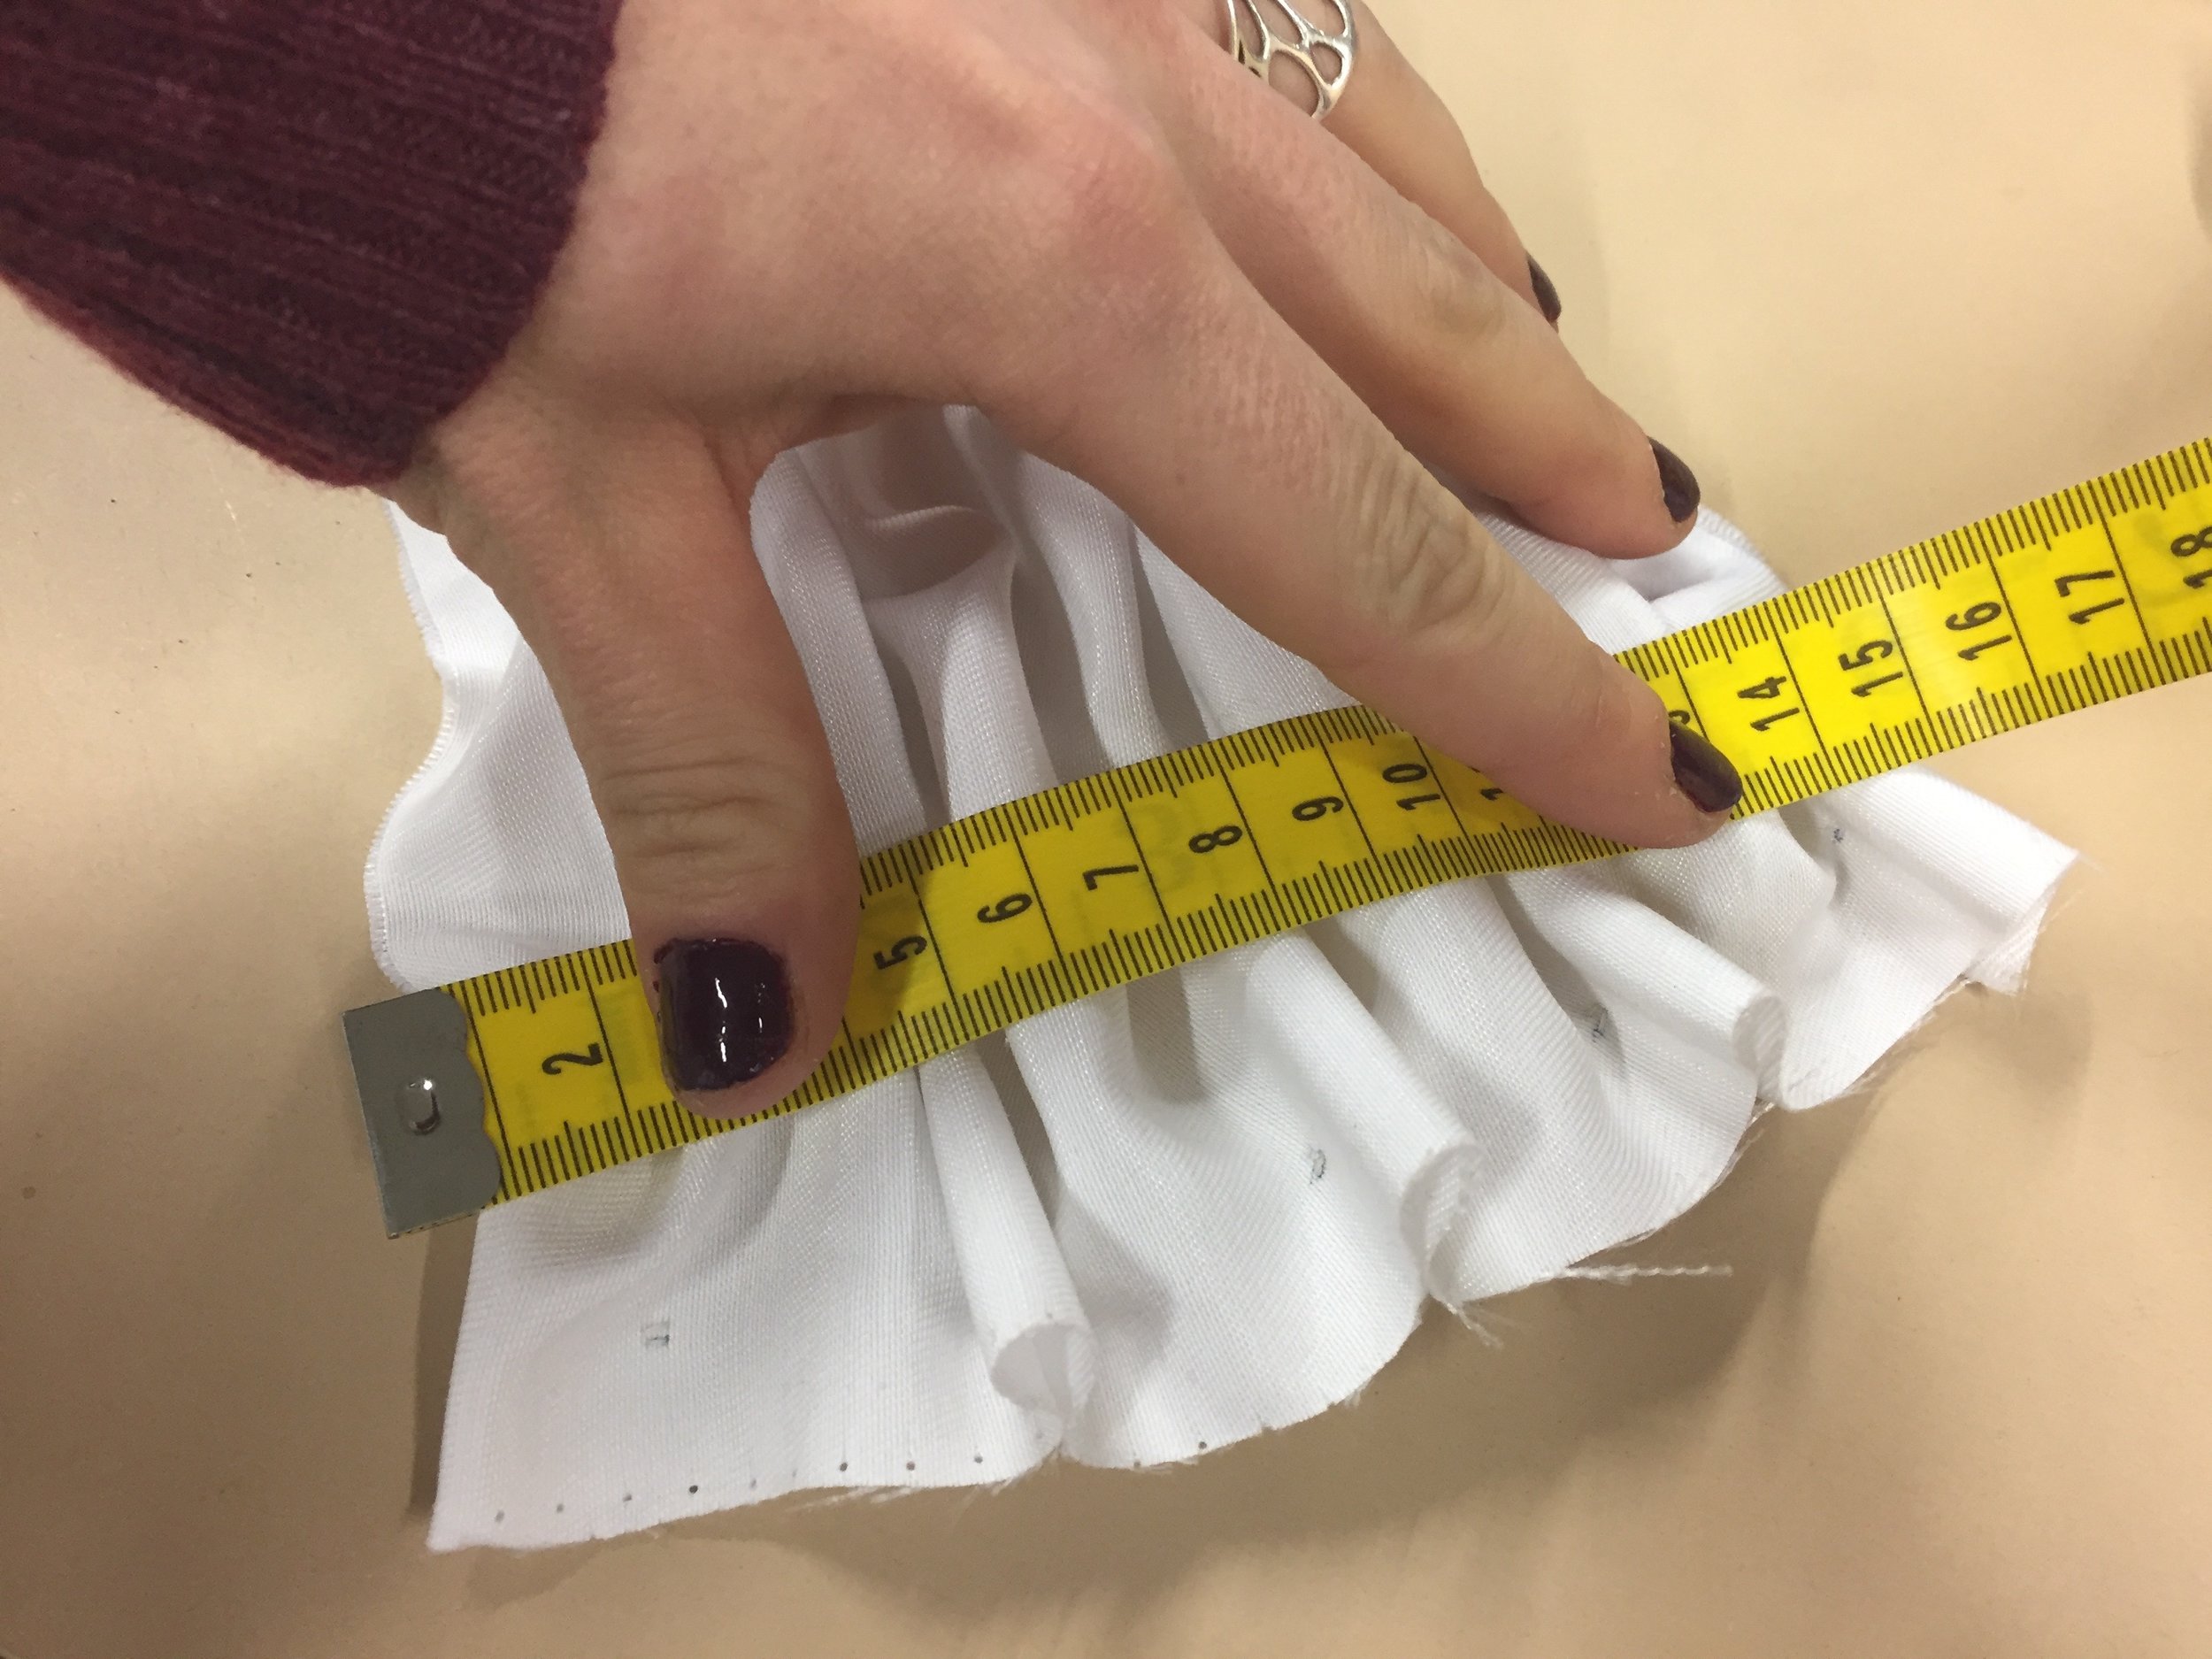
Smocking is a fabric pinching technique to tailor fabric. Because I wanted to decrease the width, I used a simple lozenge pattern. As you can see from the pattern, we took a piece of fabric that went from 34-21-21cm and was 80 long and tailored it to be 18-7-15cm. The dashed lines on the pattern are the resulting size of the fabric after the smocking.
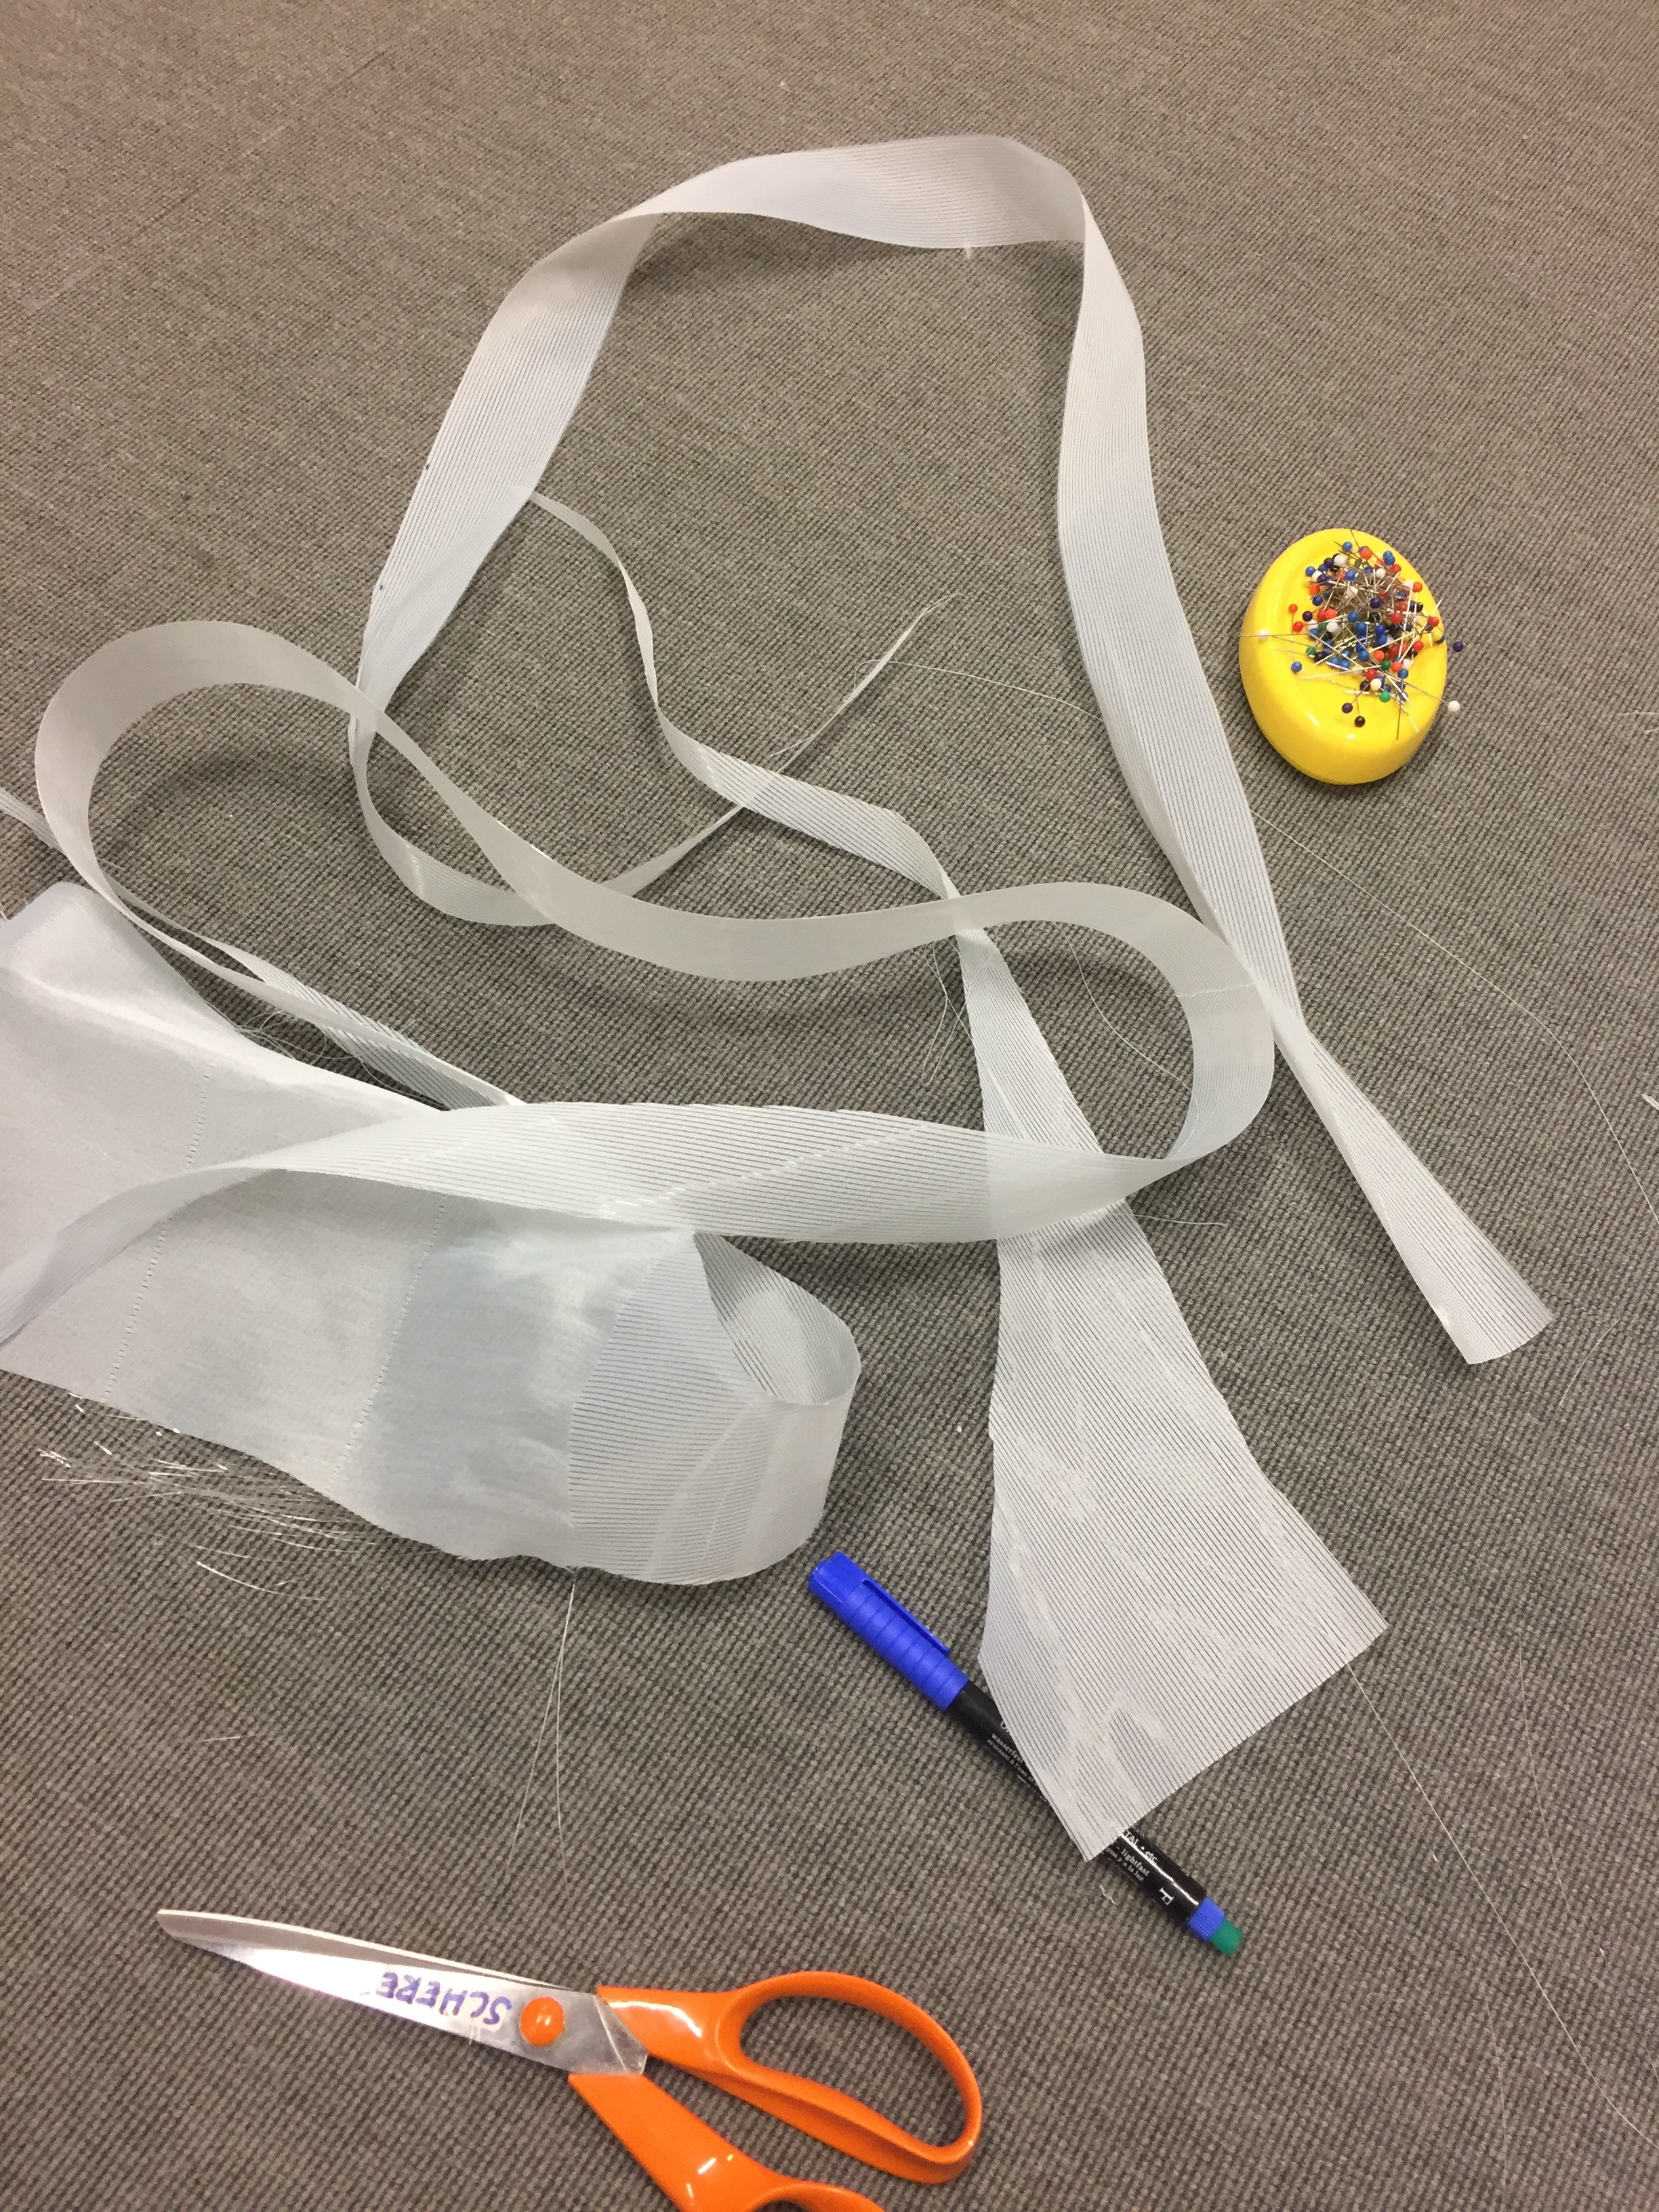
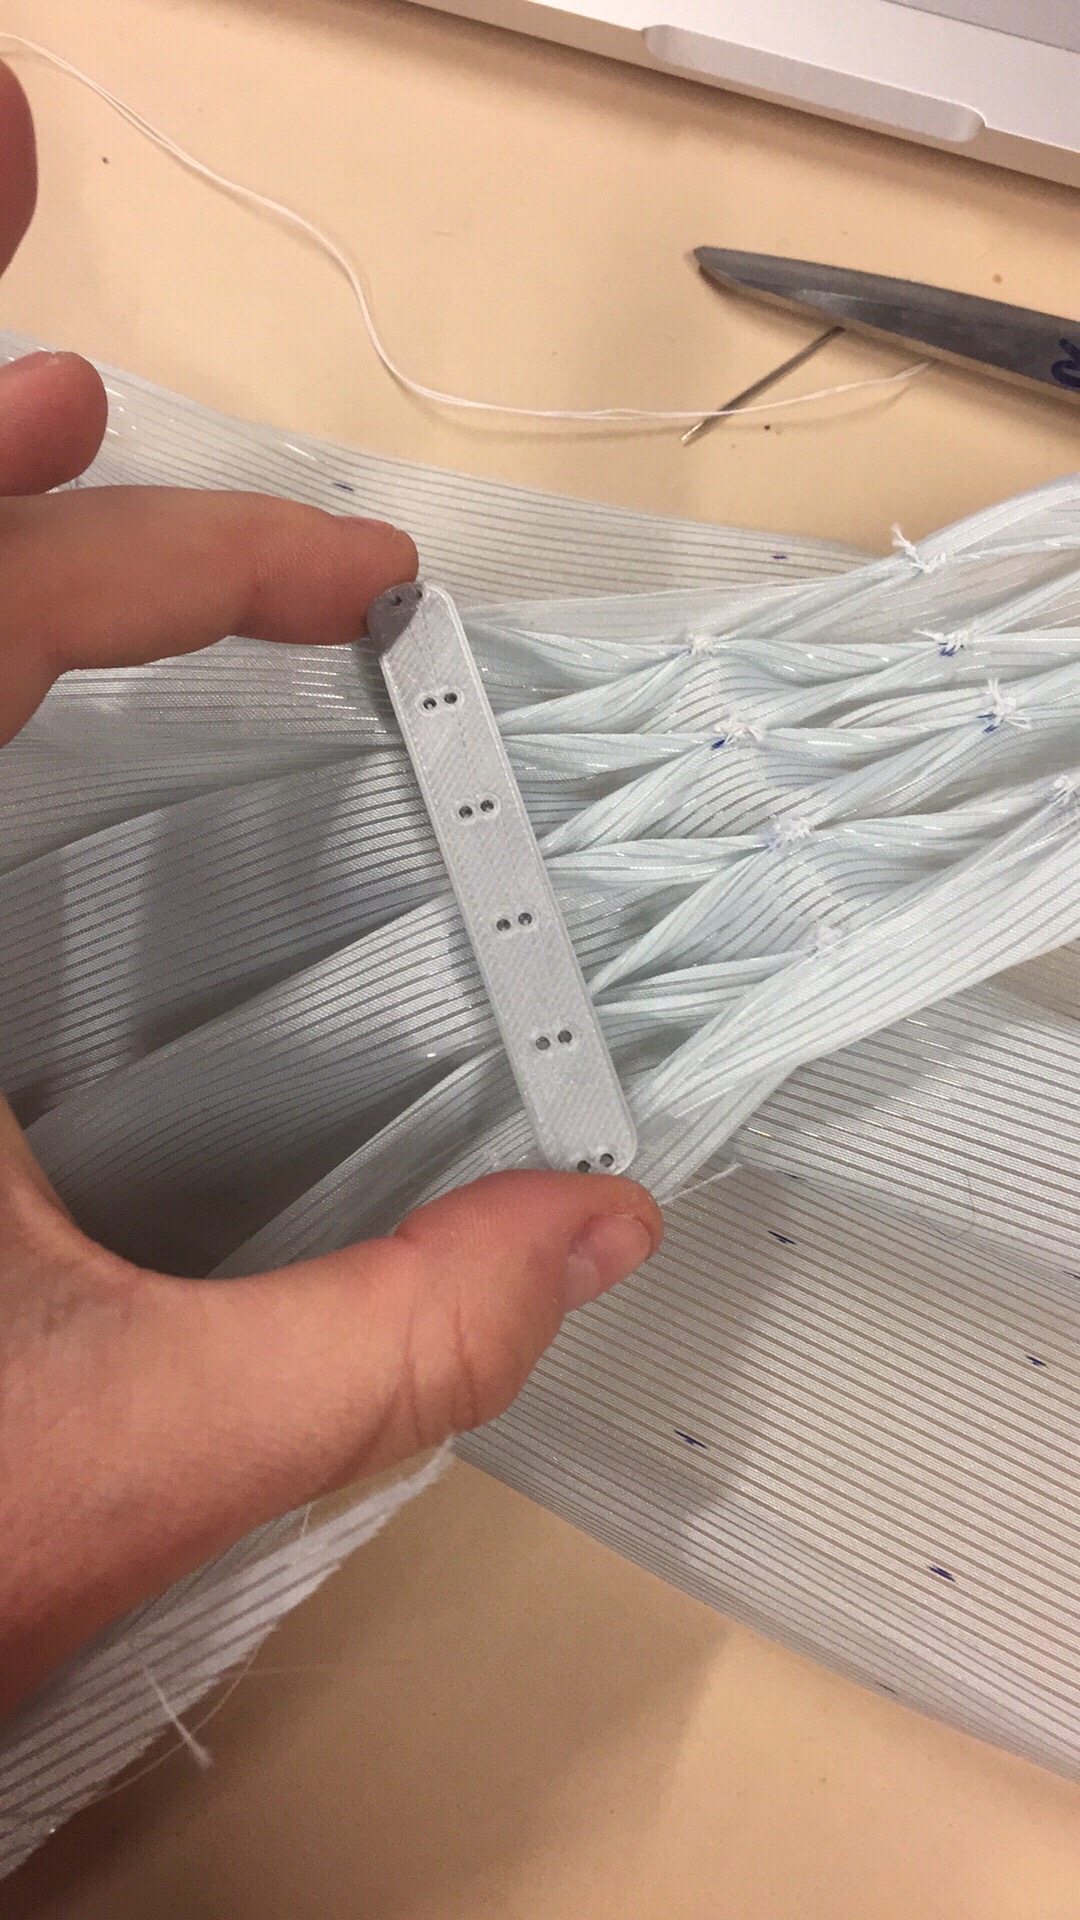
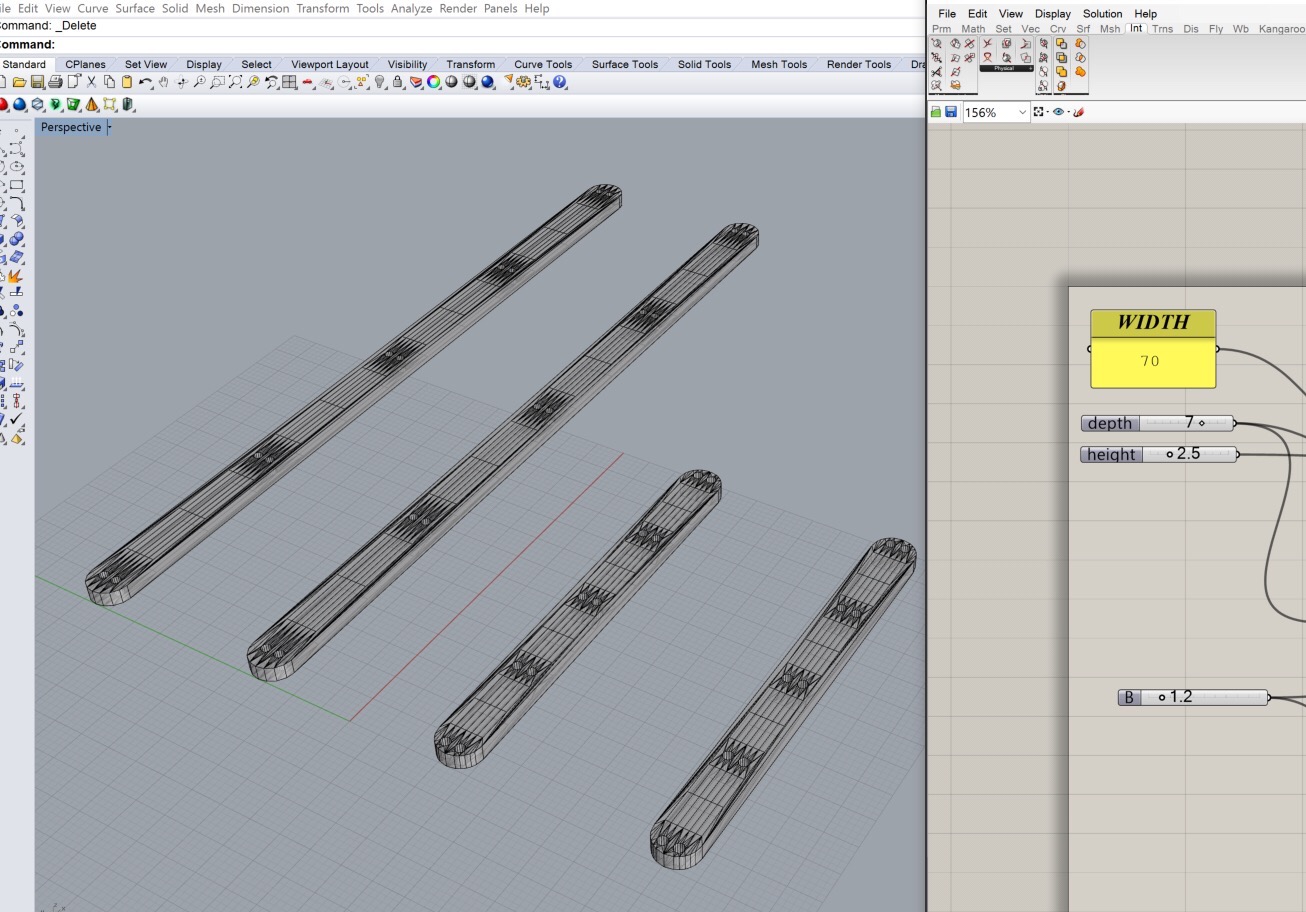
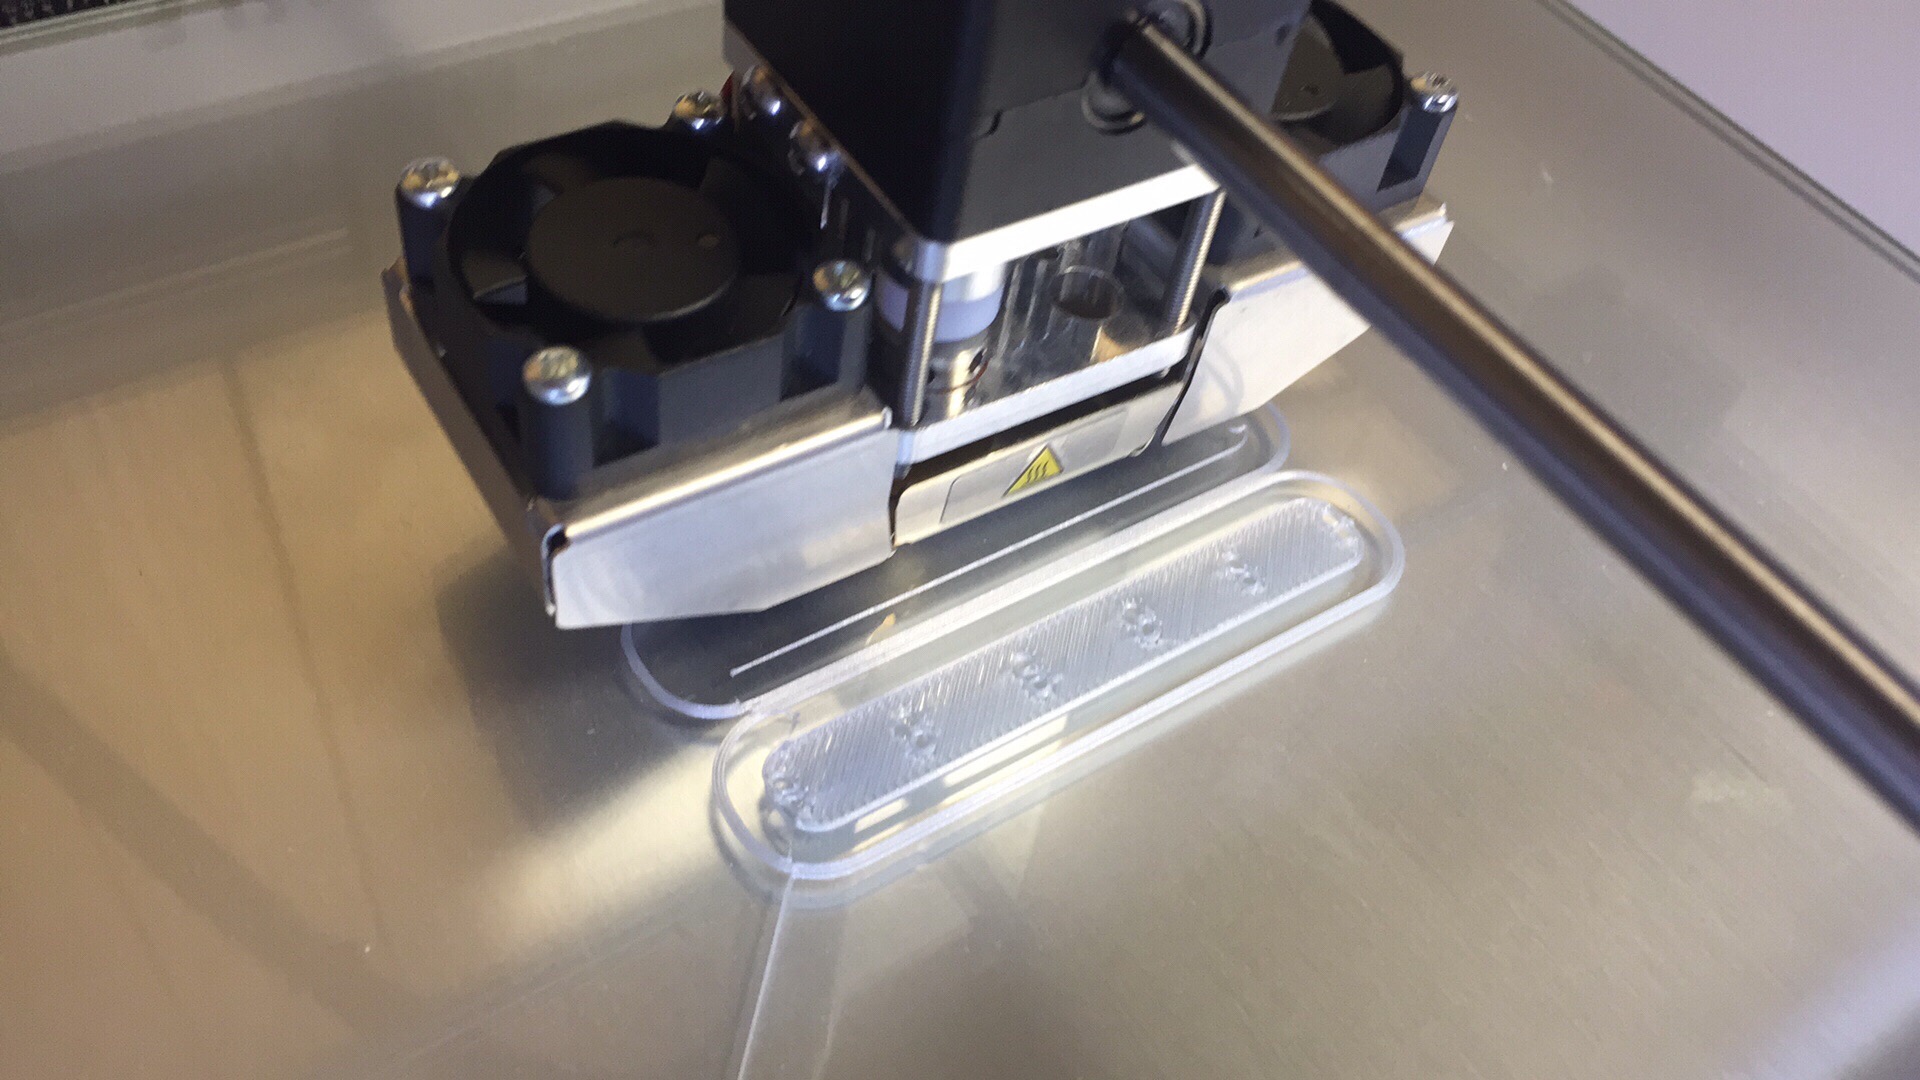
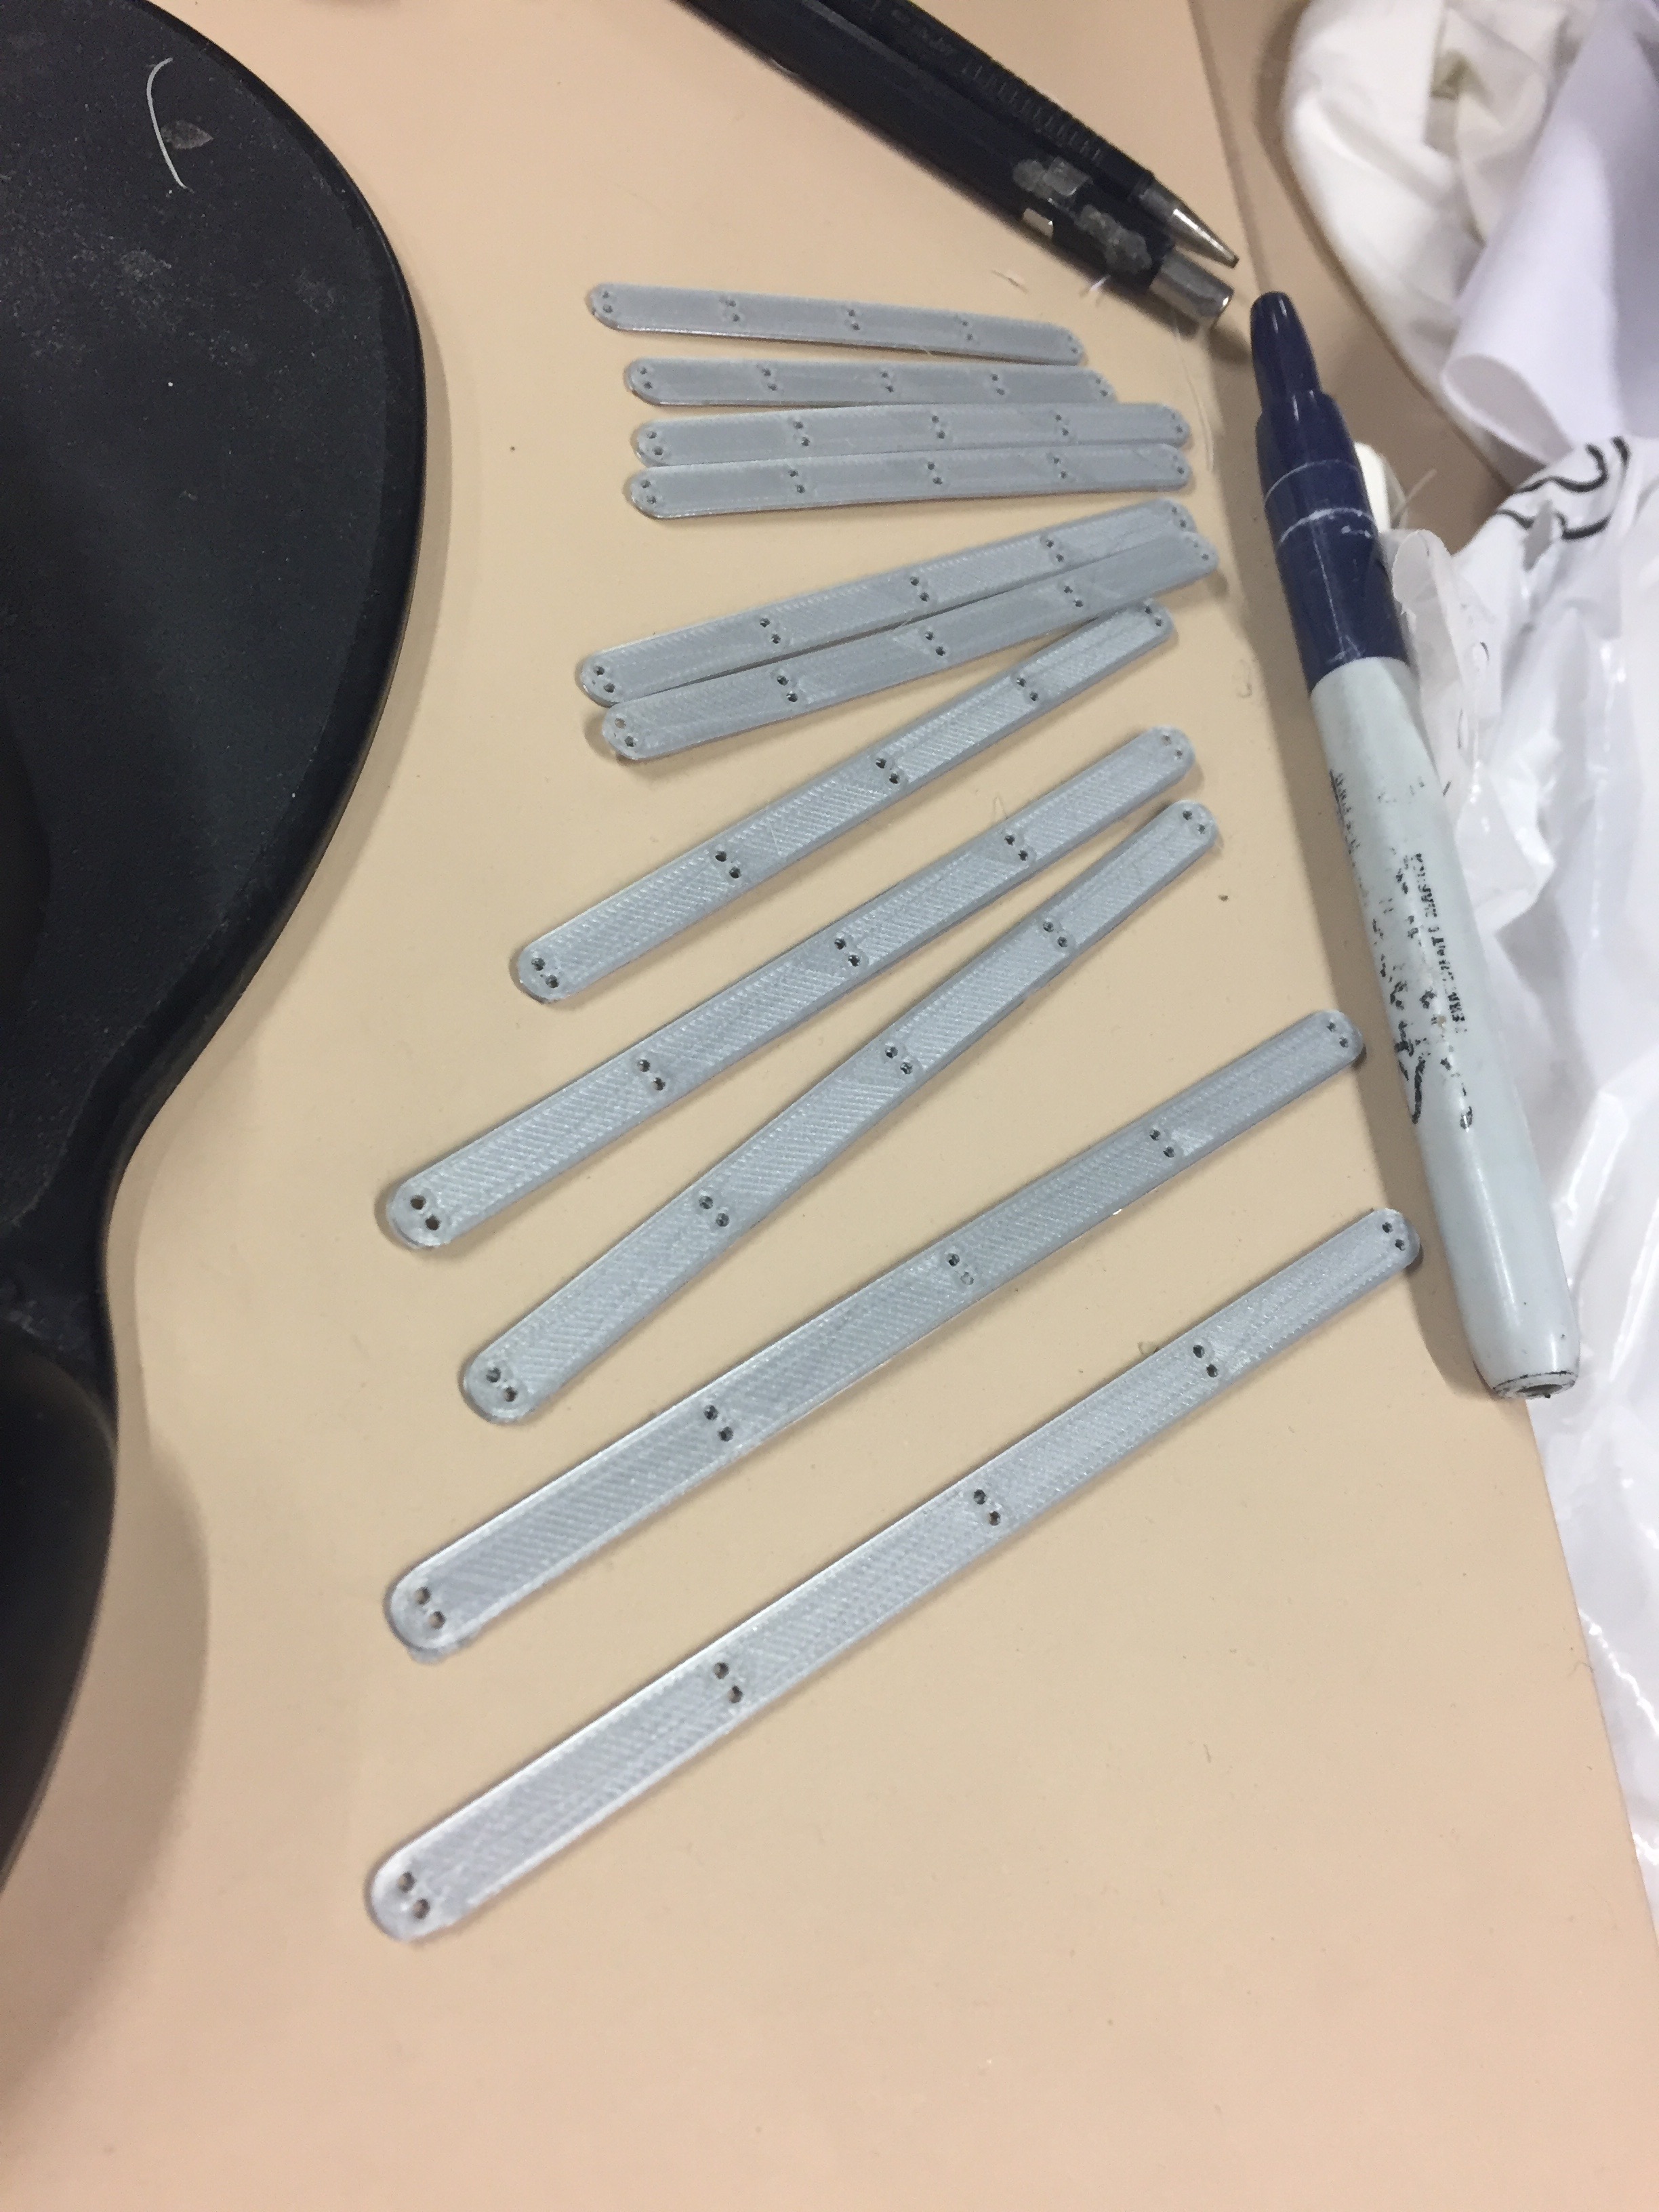
Next I (really carefully!) cut a small 18x16 piece from the corner of the fabric to test the smocking on the fiber optic fabric. It worked beautifully, but I noticed because the fabric is so stiff, its important spread the smocking, otherwise it bunches up. Good thing I have a handy dandy 3D printer to help me out in this situation and make some custom pieces!


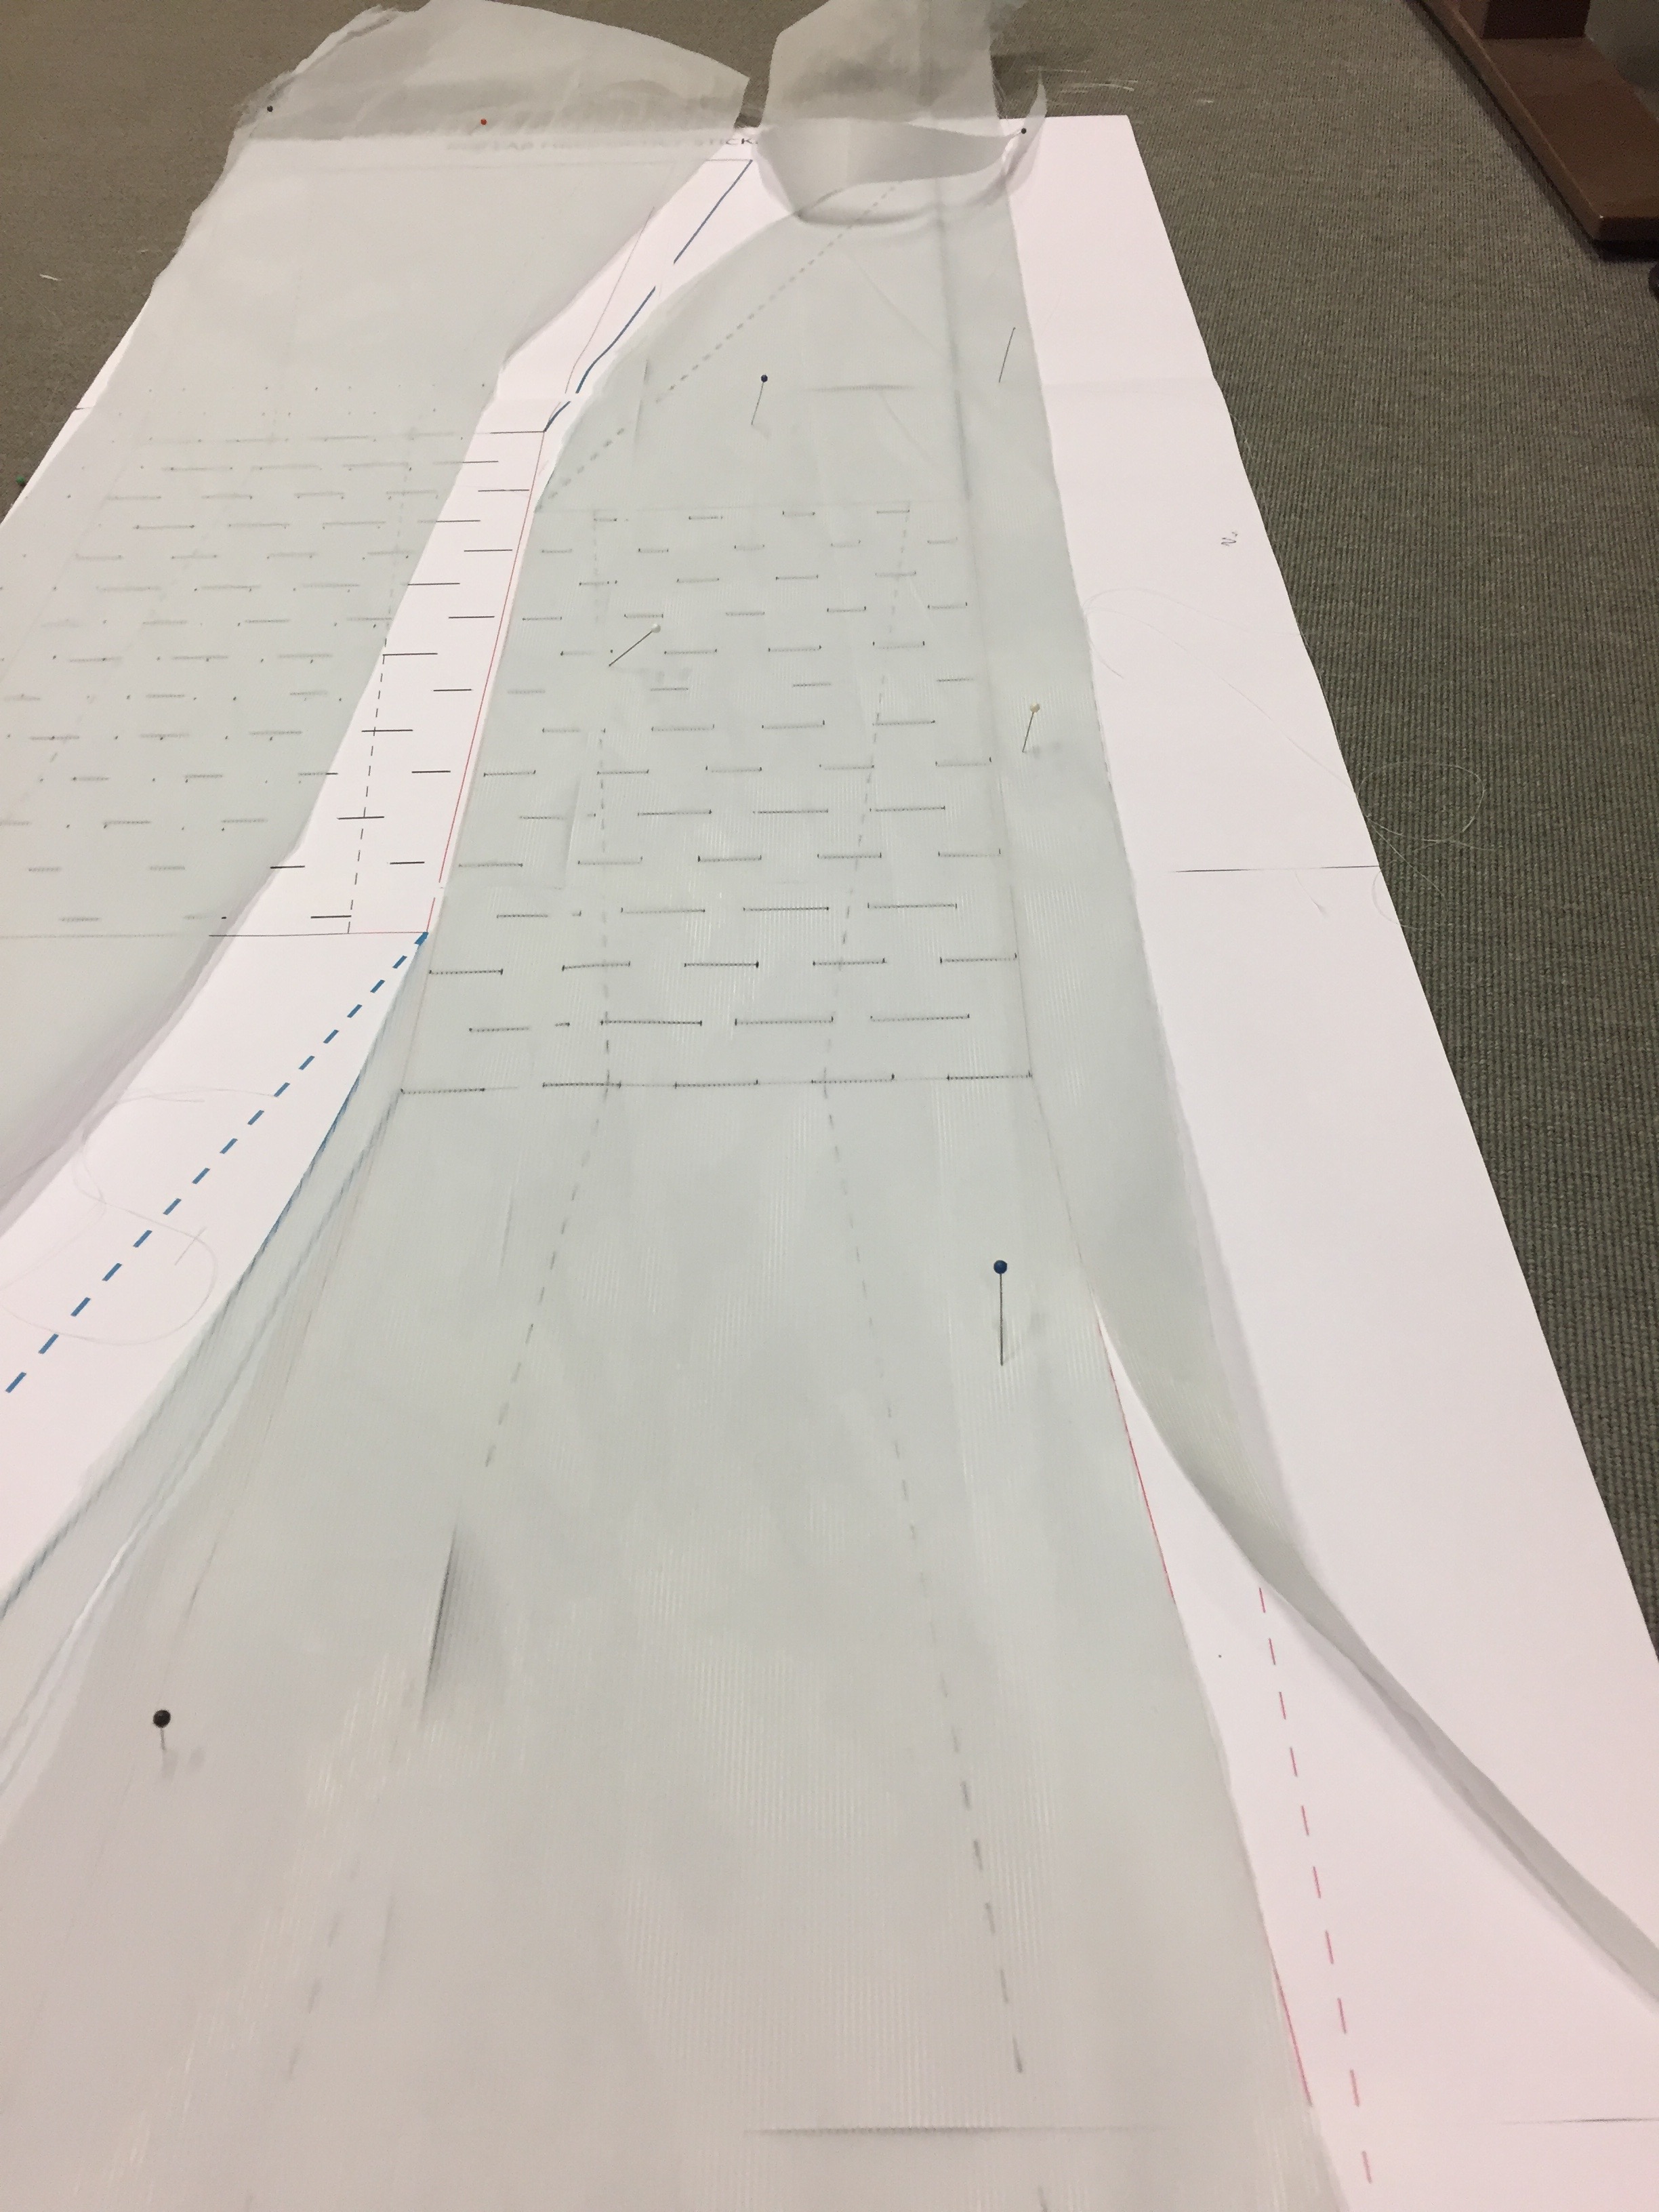
Making the pattern
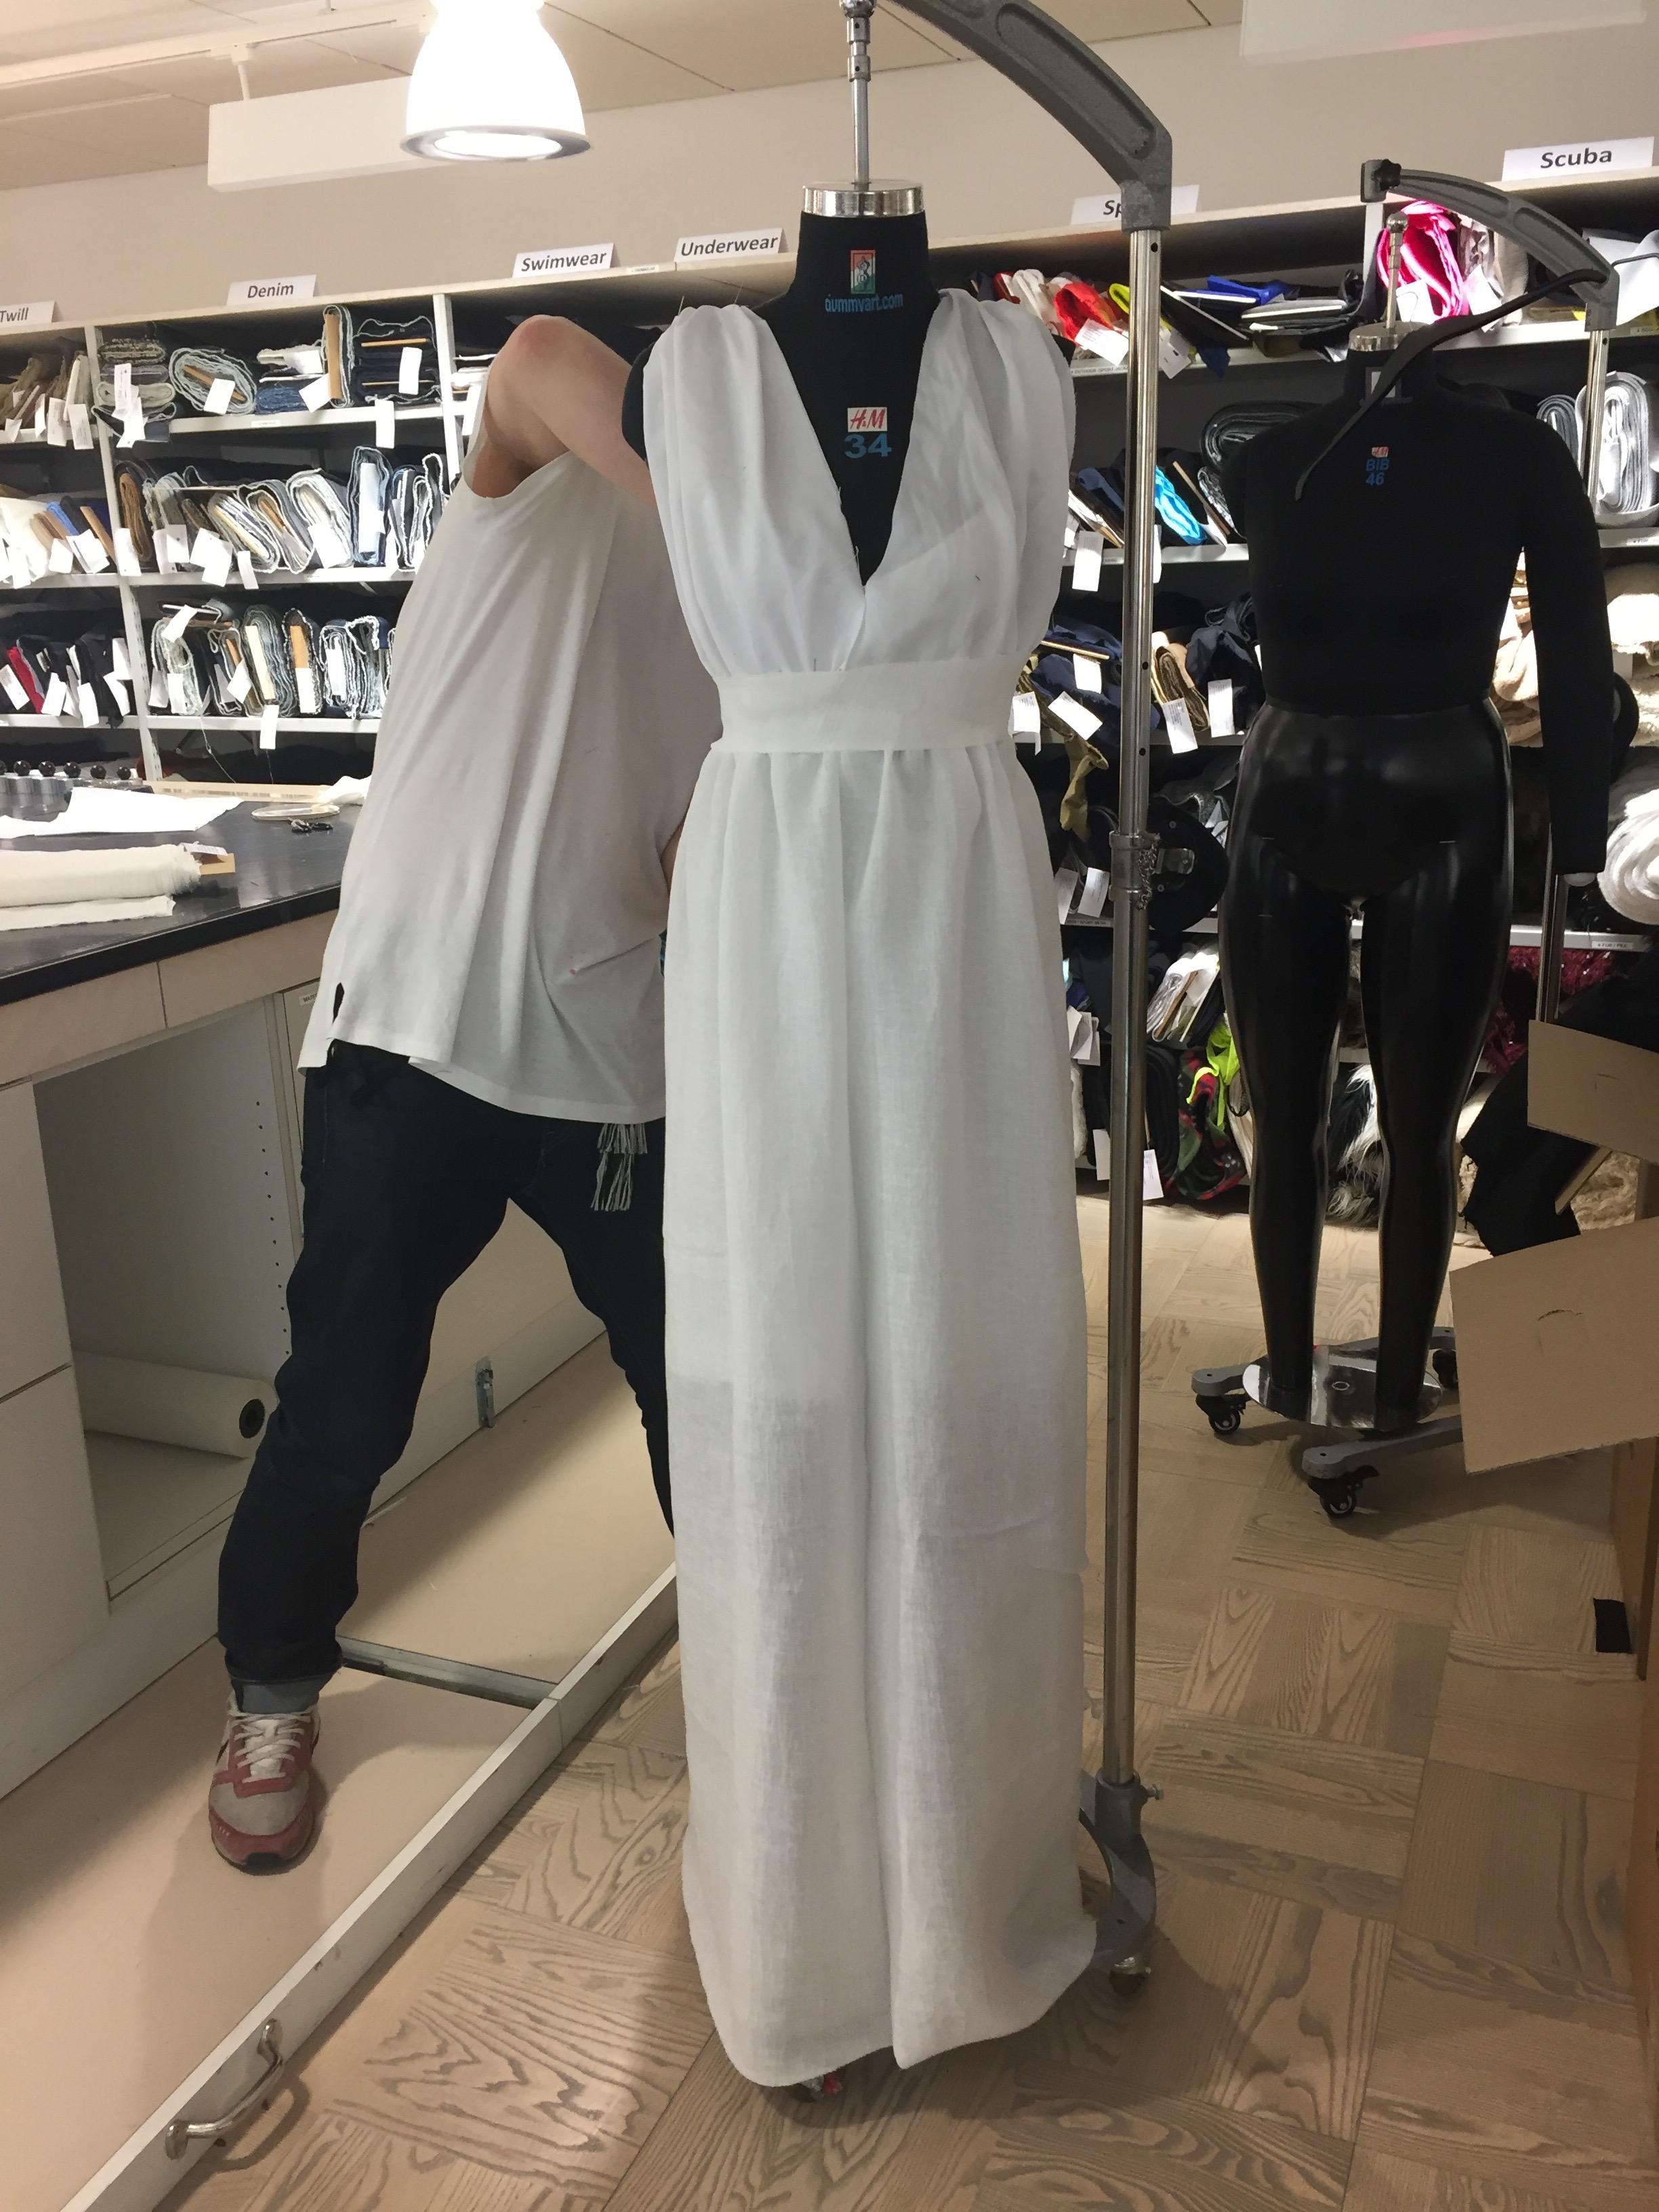
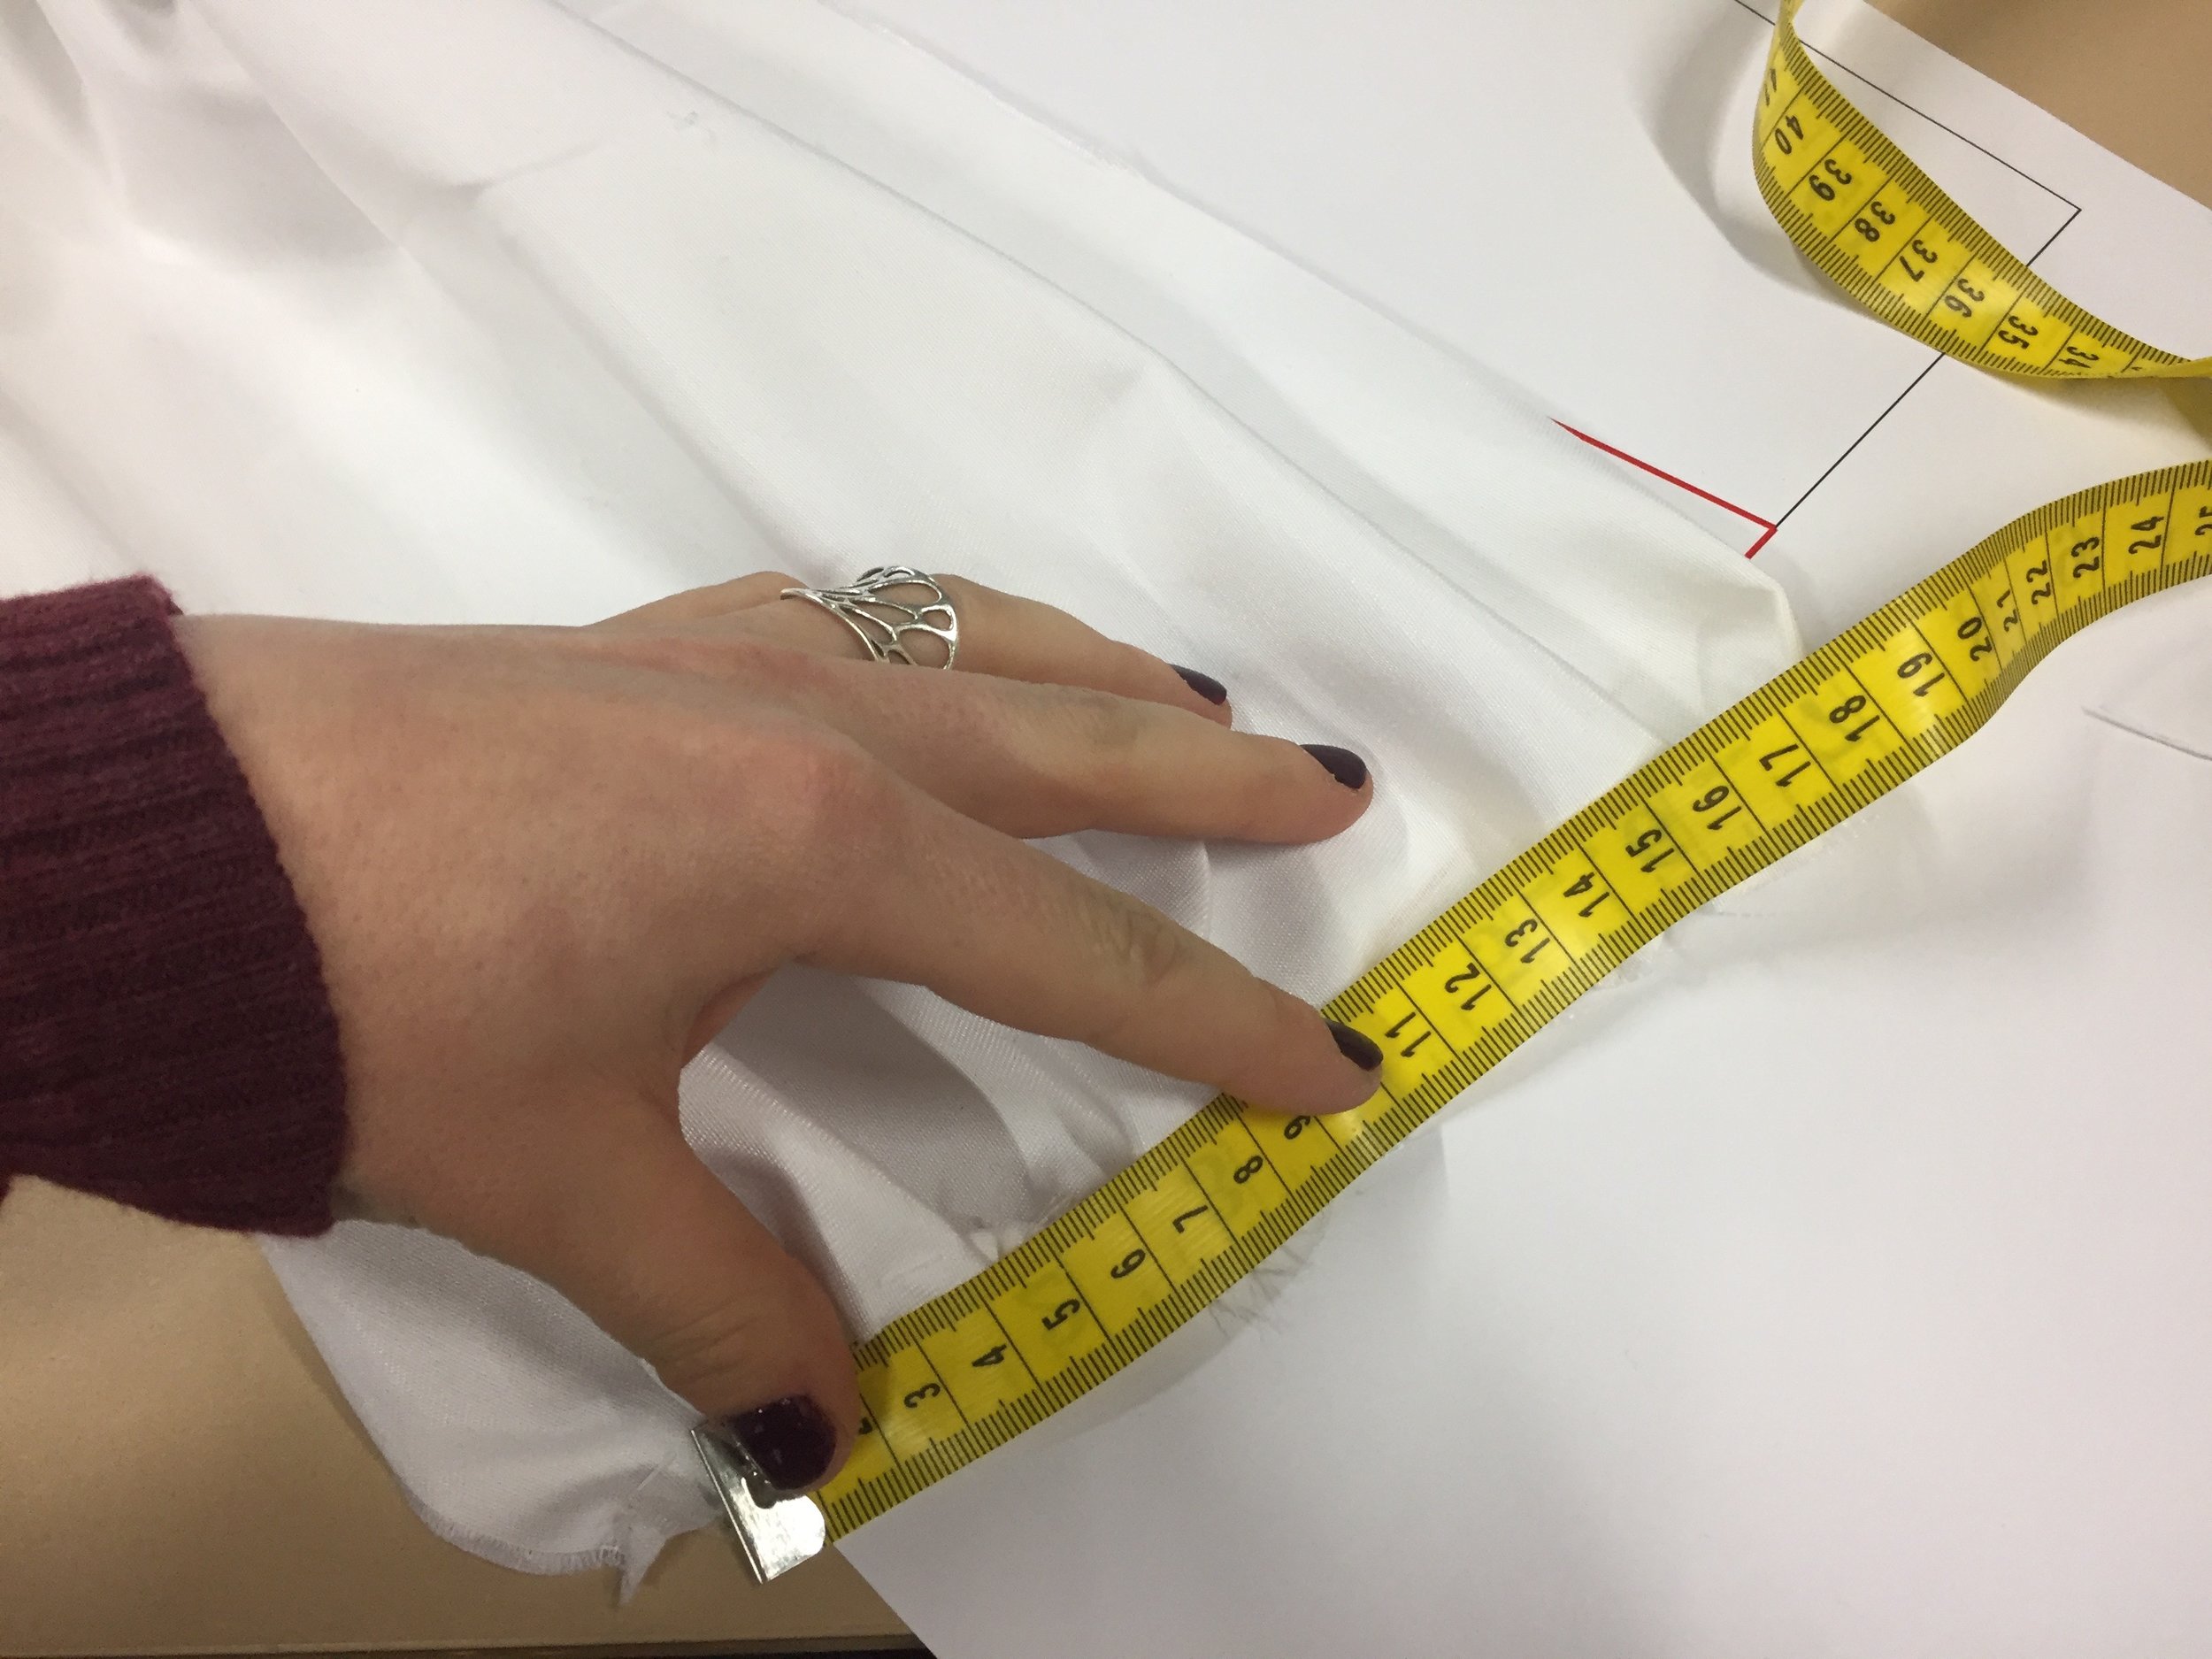
Here's the final cut pattern for the fiber optic fabric. We took measurements of the prototype and made small adjustments to make sure everything fit and as little fabric as possible was wasted. Notice one of the shoulder pieces has space for the fiber optics coming out past the seam - this was important so that we had enough room to connect the LEDs to the fibers.
Pdf file for the pattern is available here
smocking the shoulders
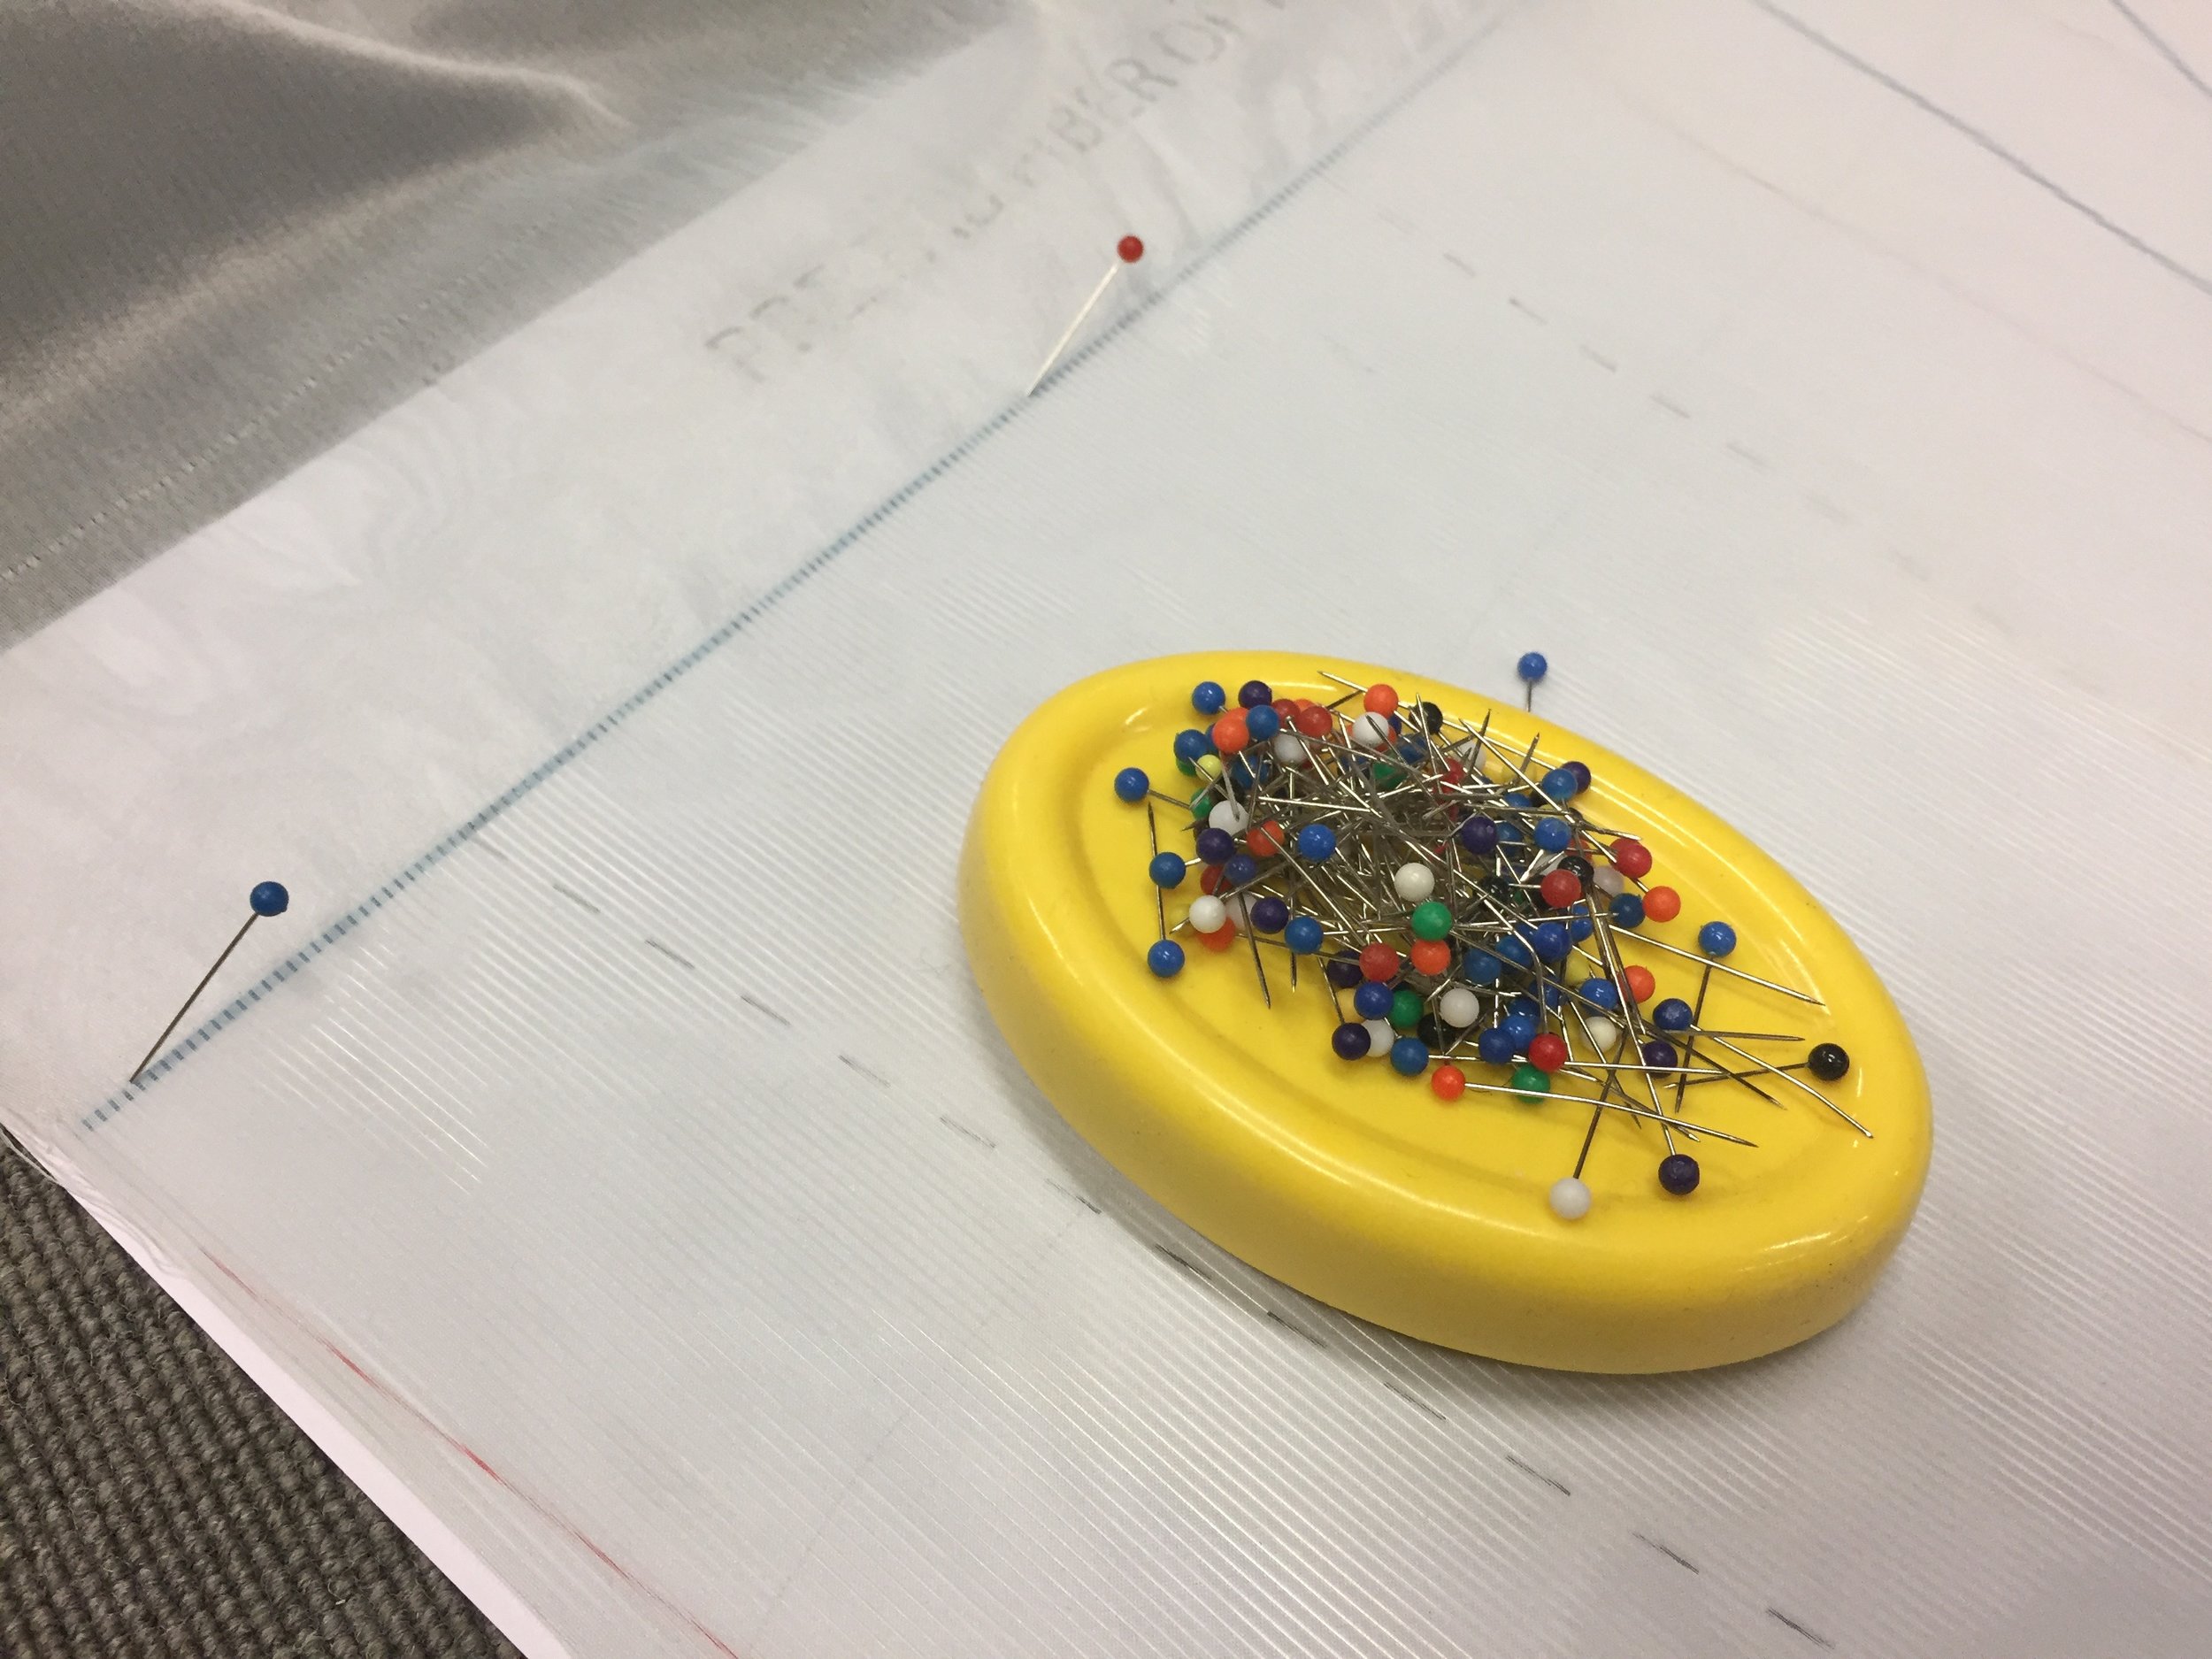
I printed out the pattern on A3s and taped them together, while pinning the fabric down (and making sure not to pin the fibers - they are very delicate). I marked out the smocking pattern and started sewing.

pinning
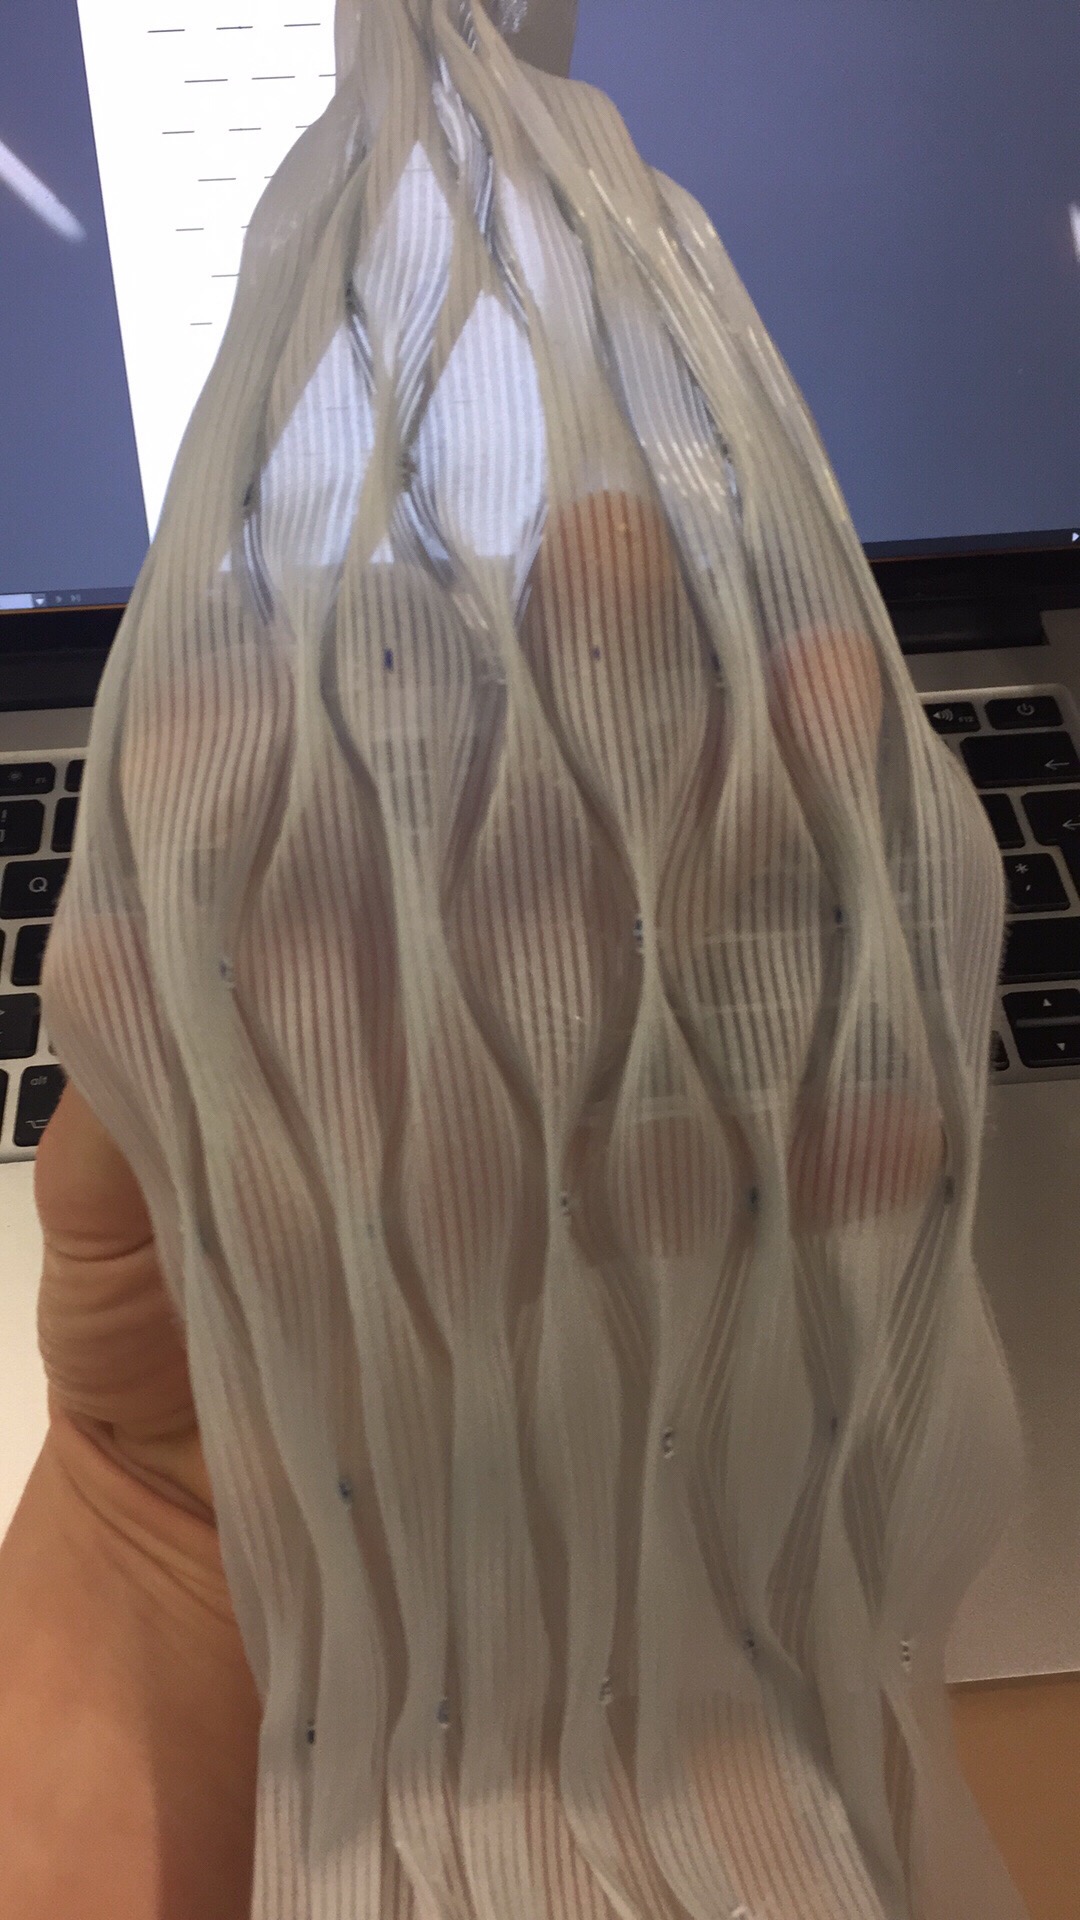
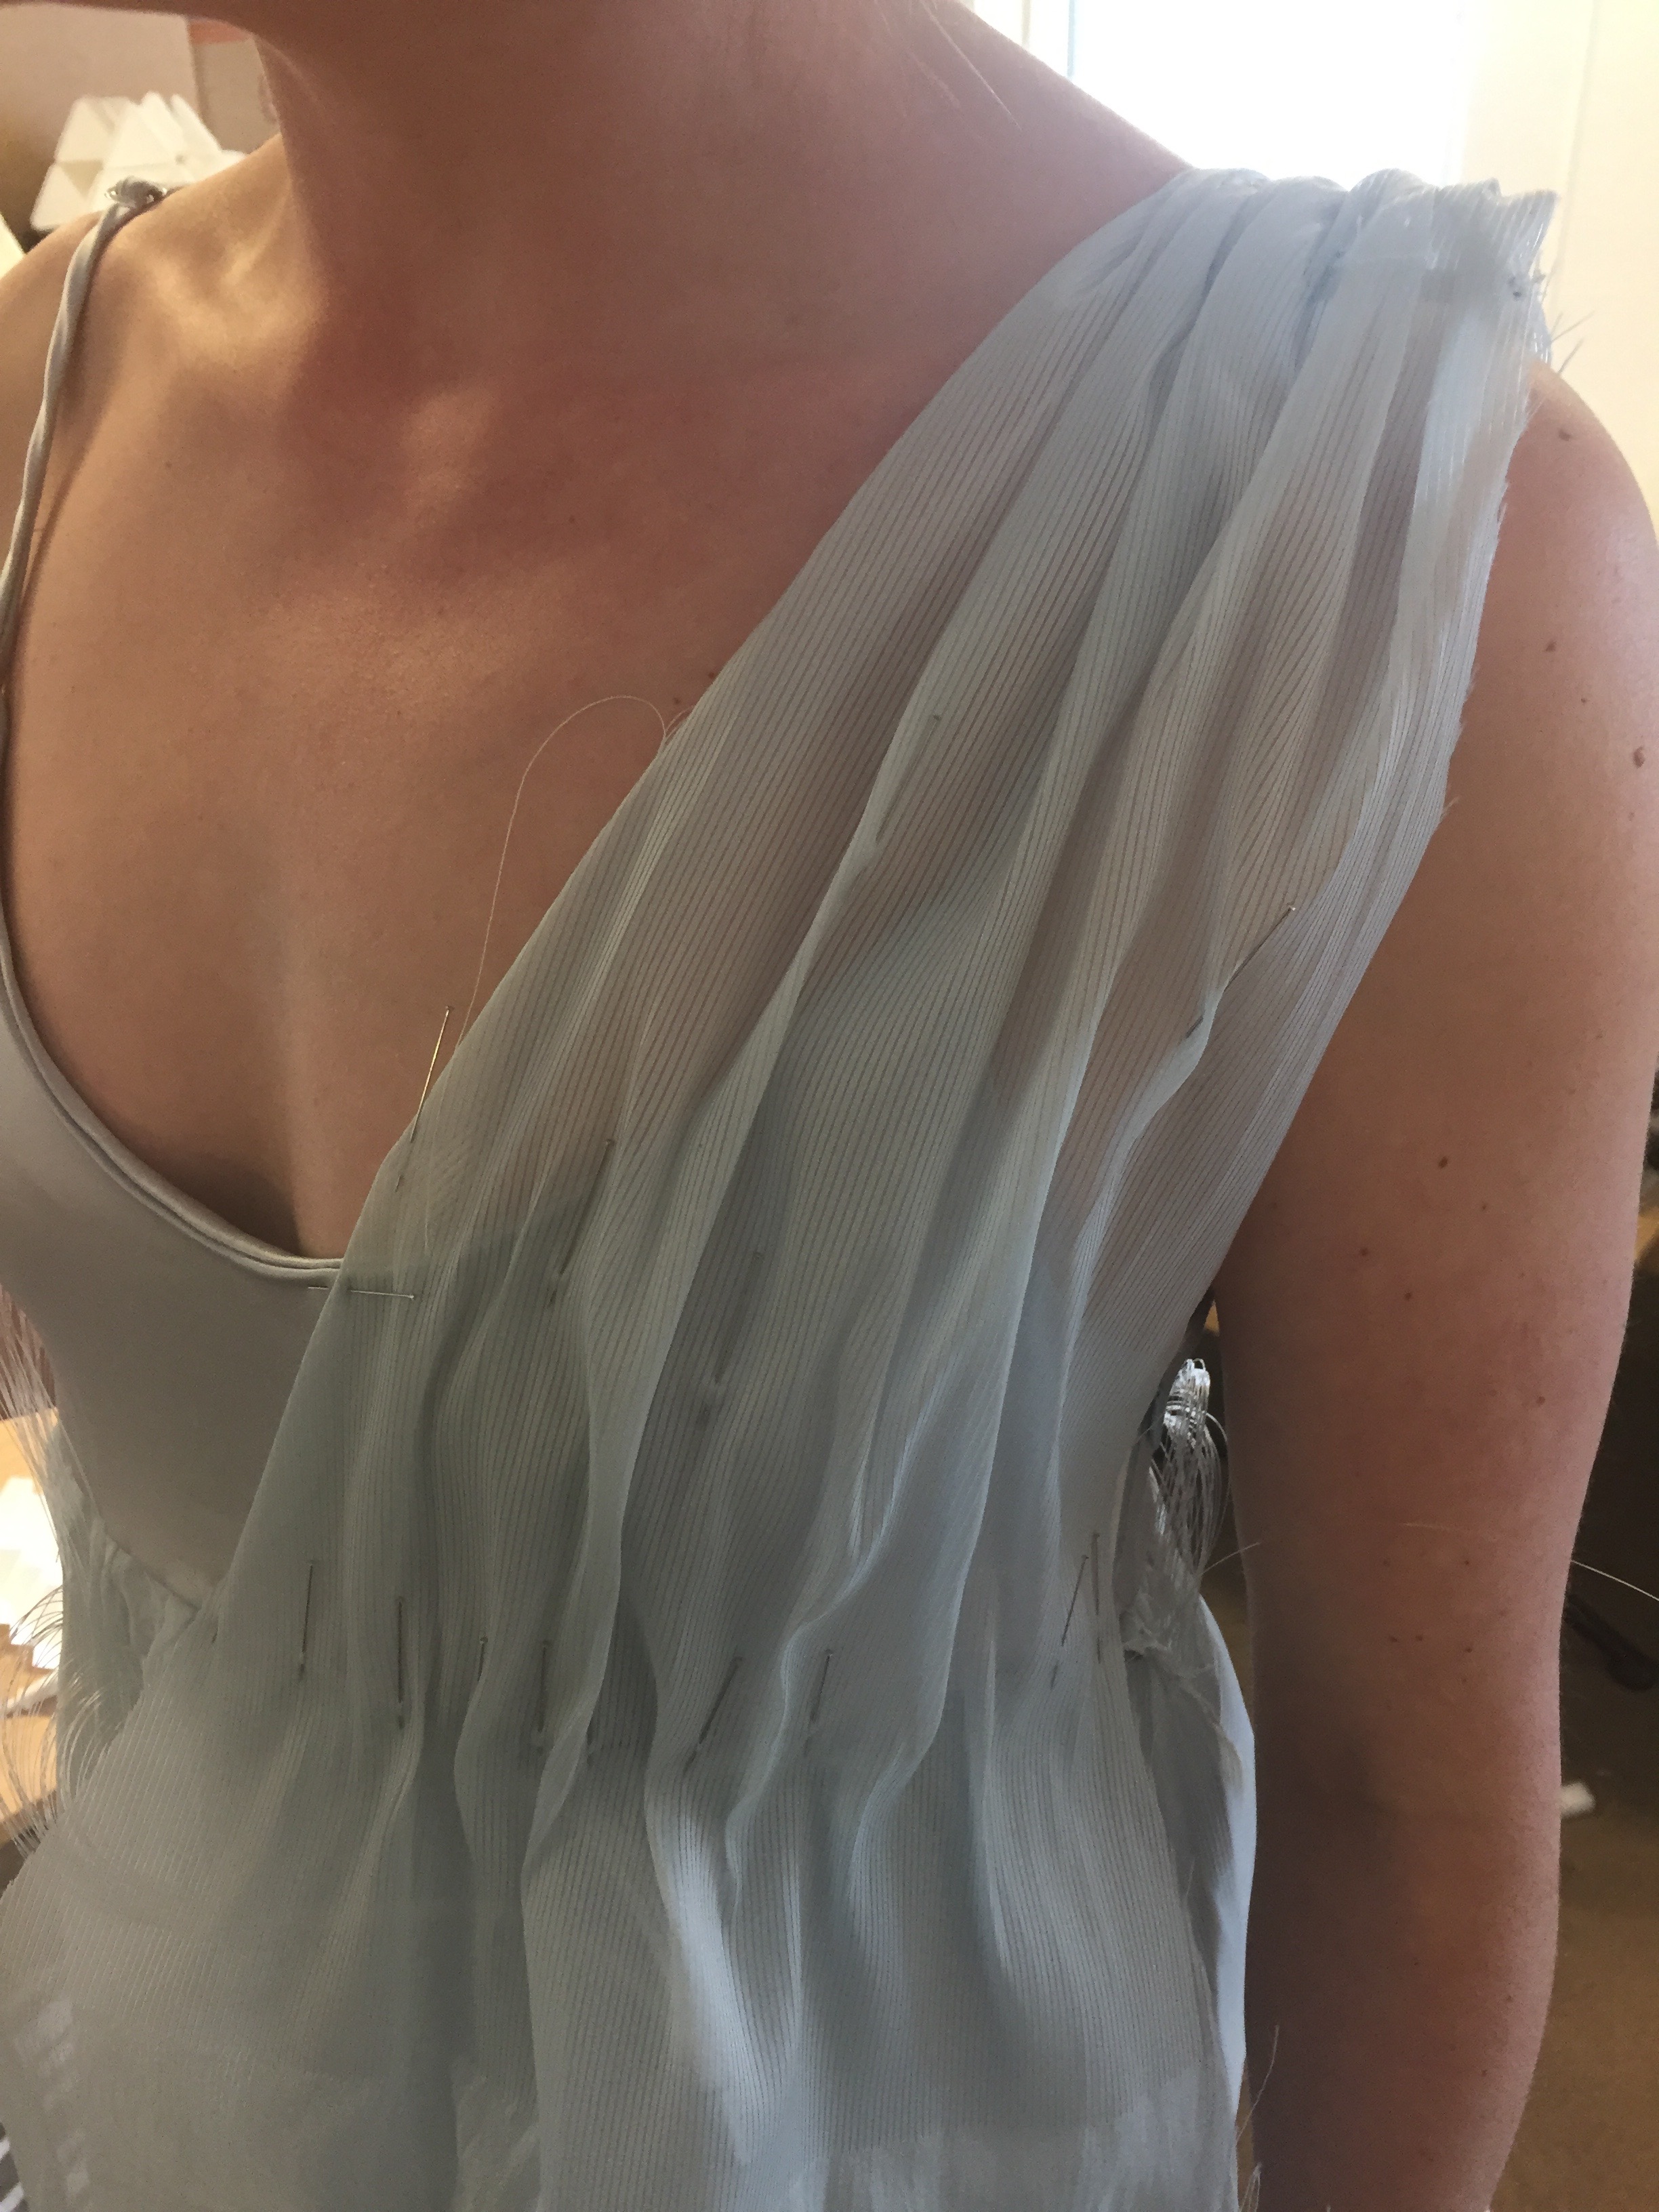
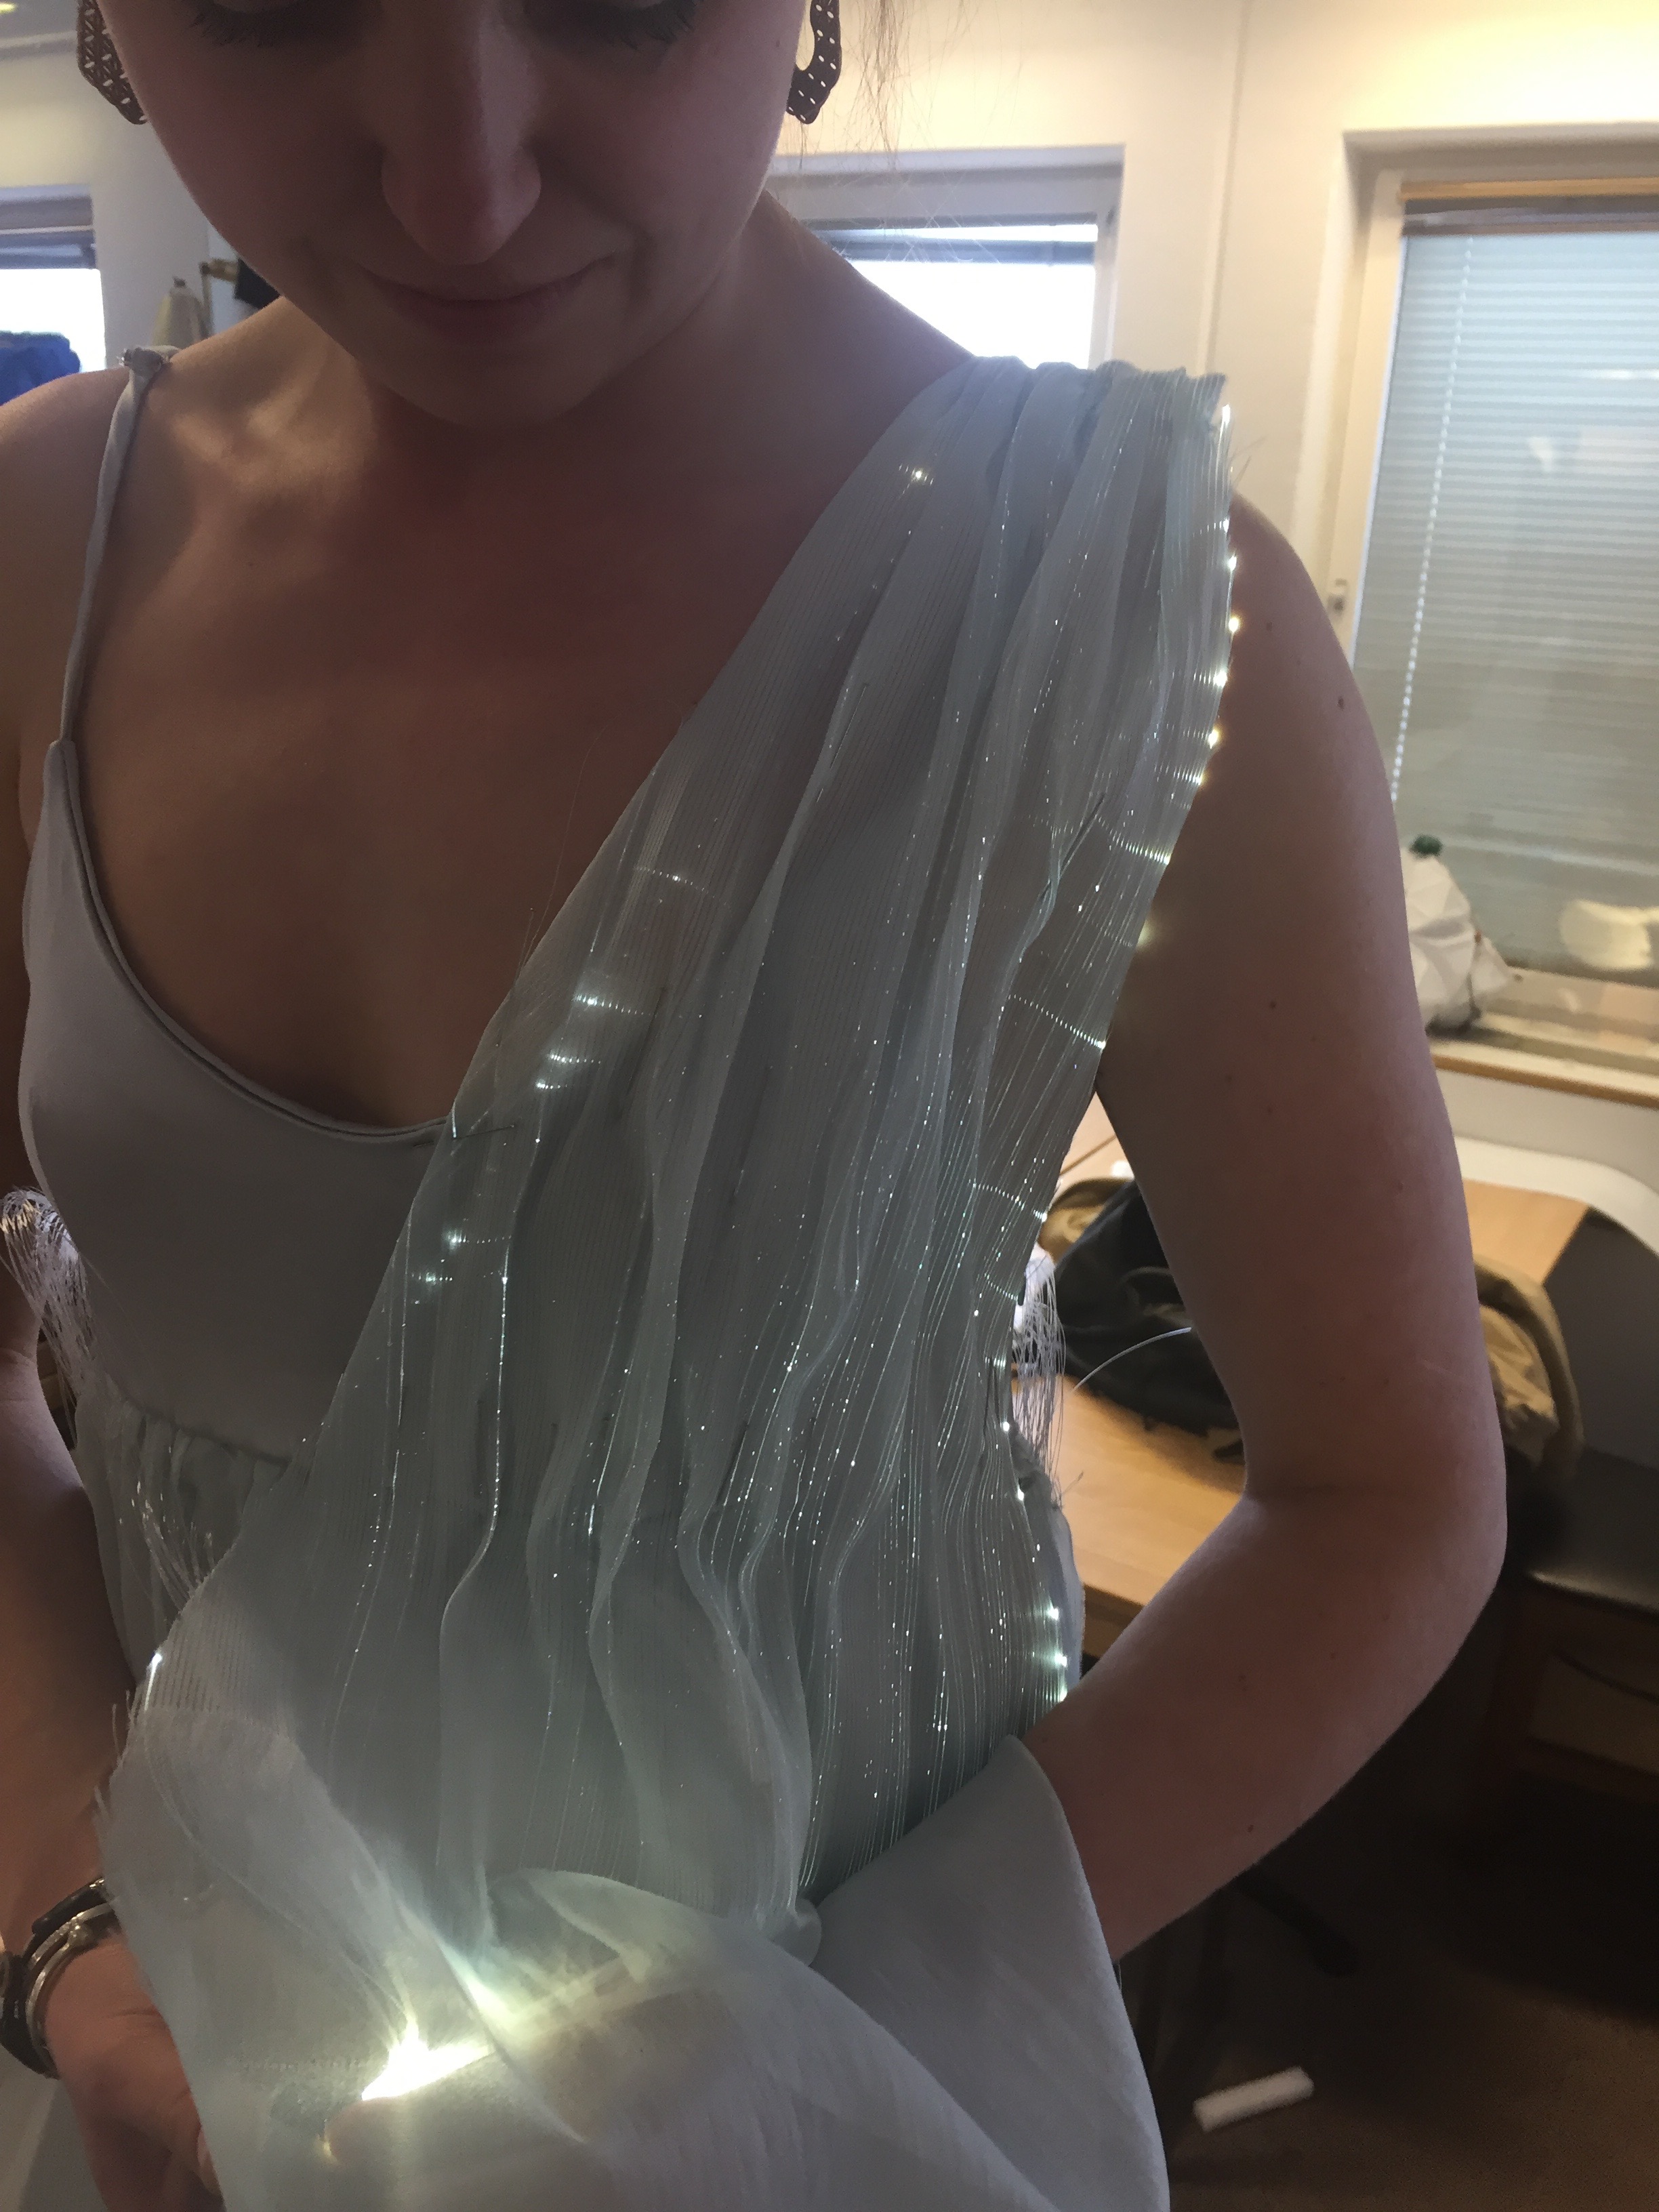
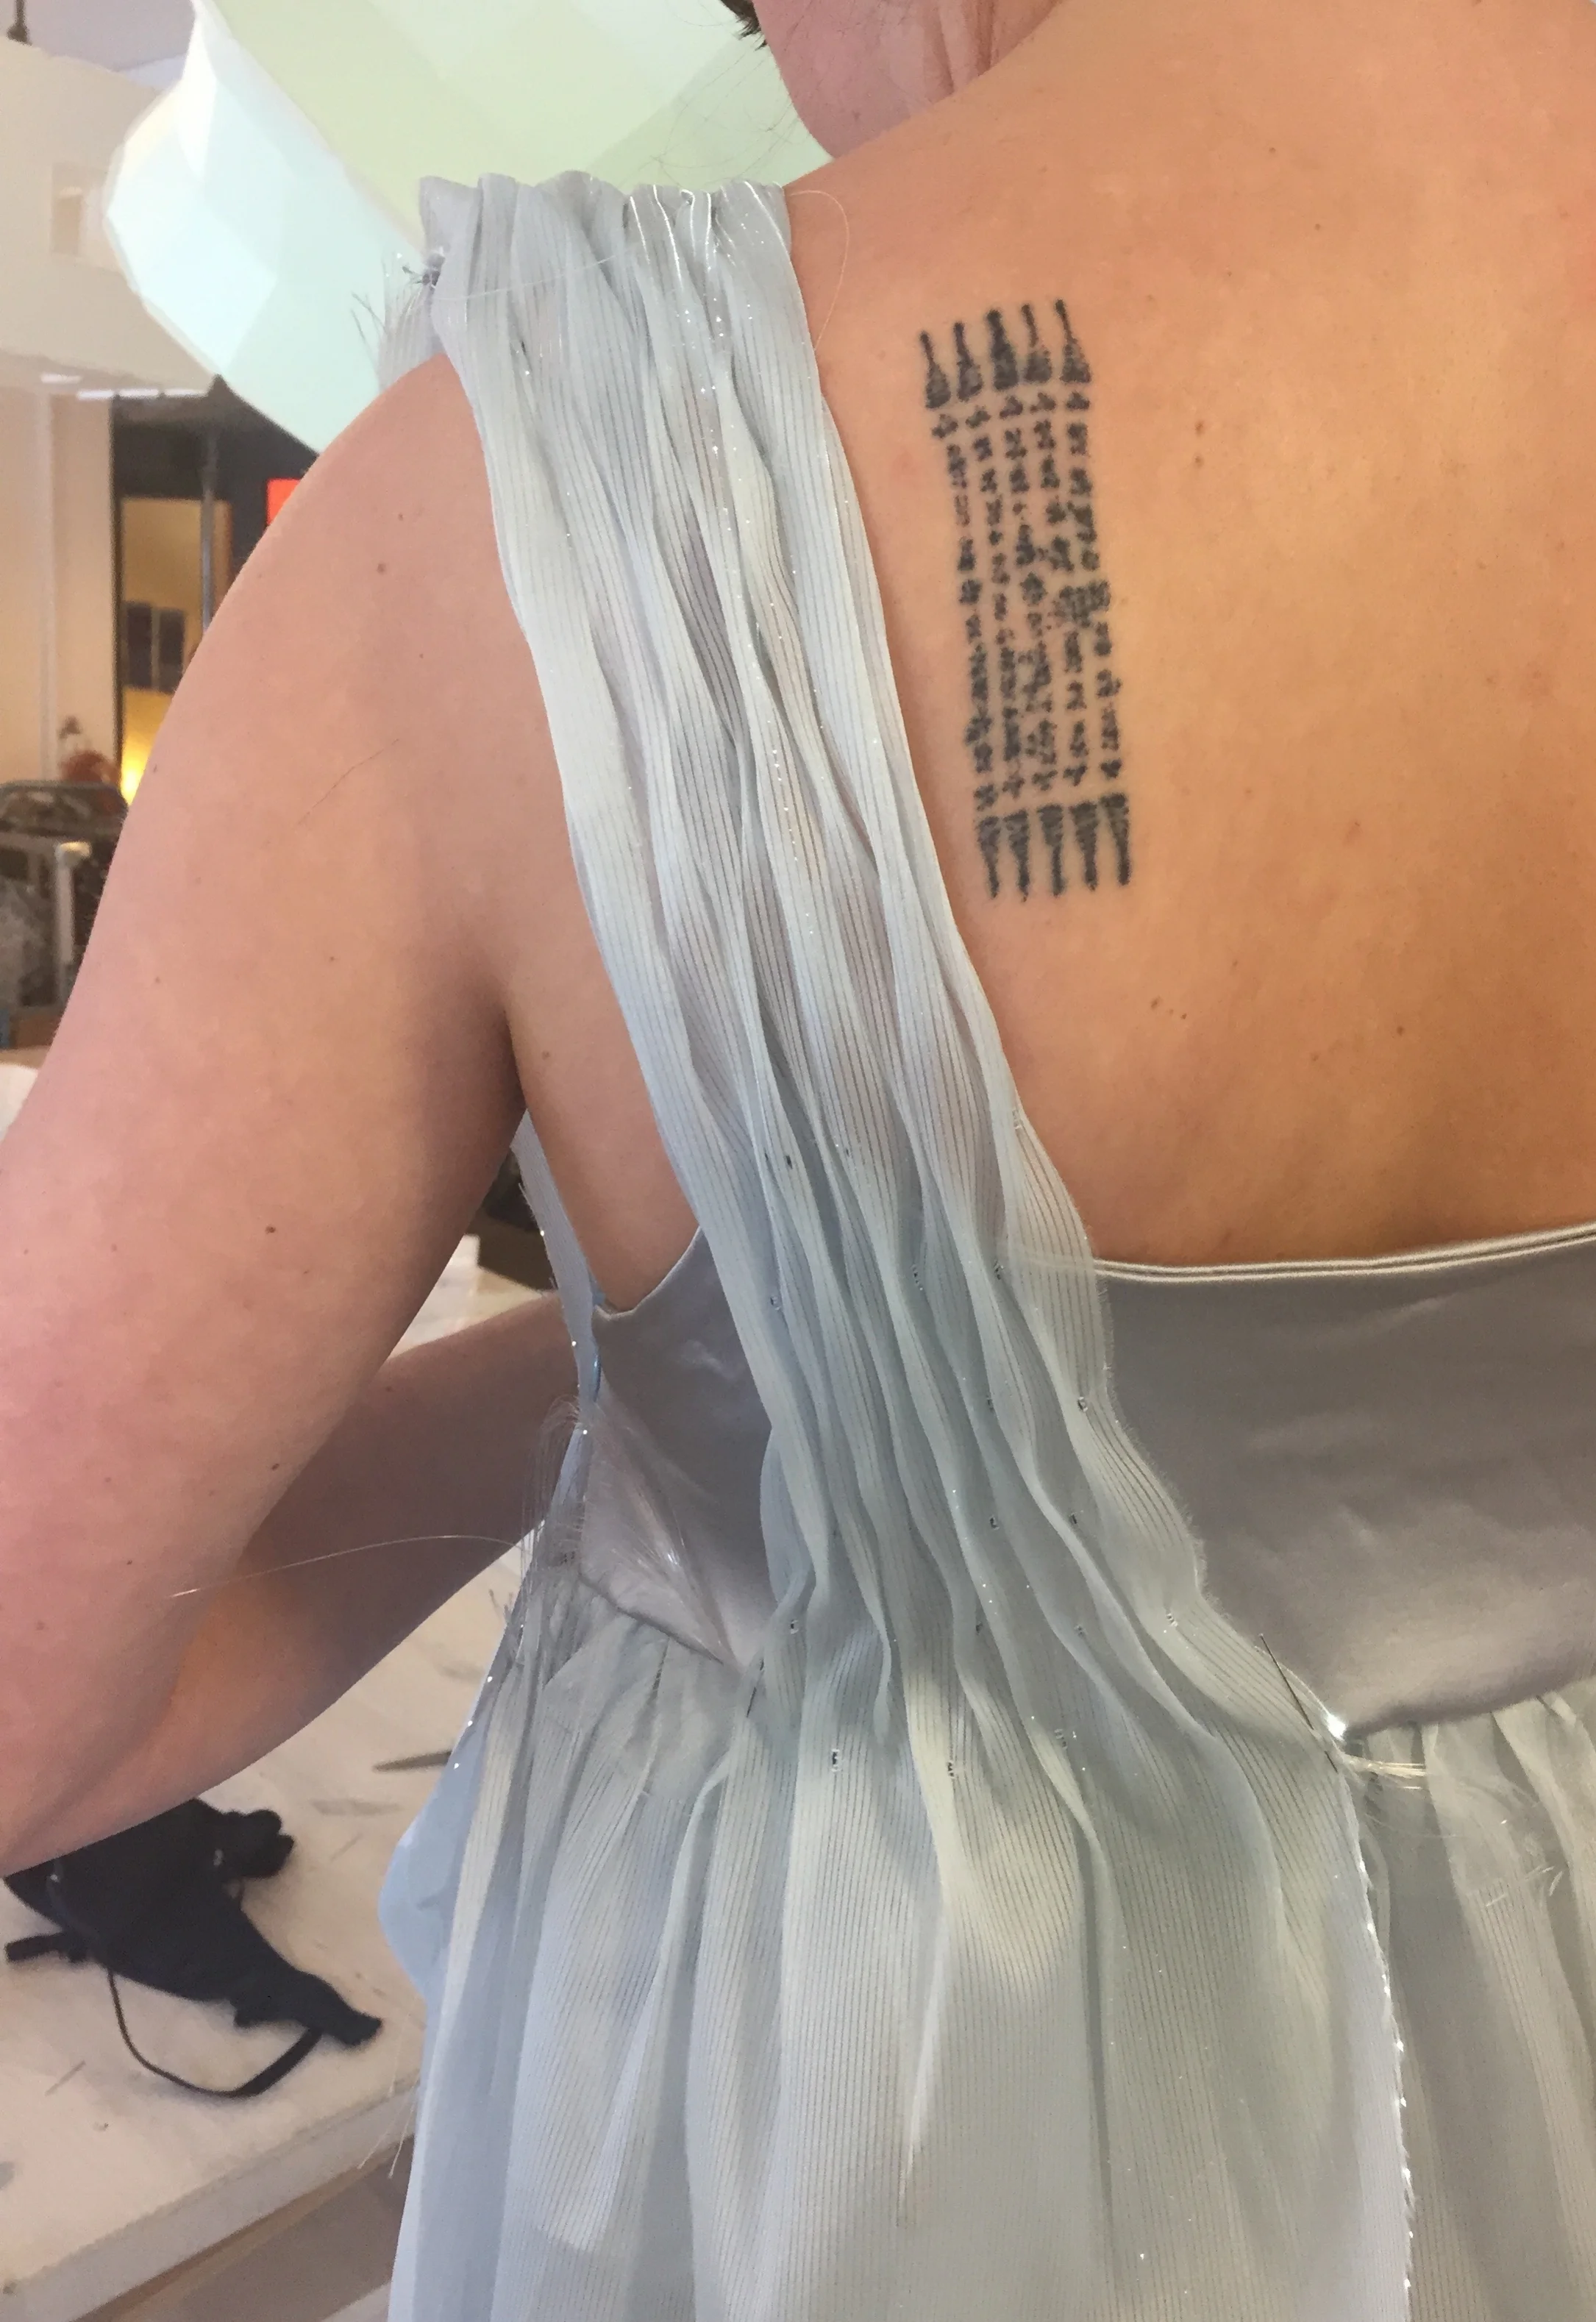
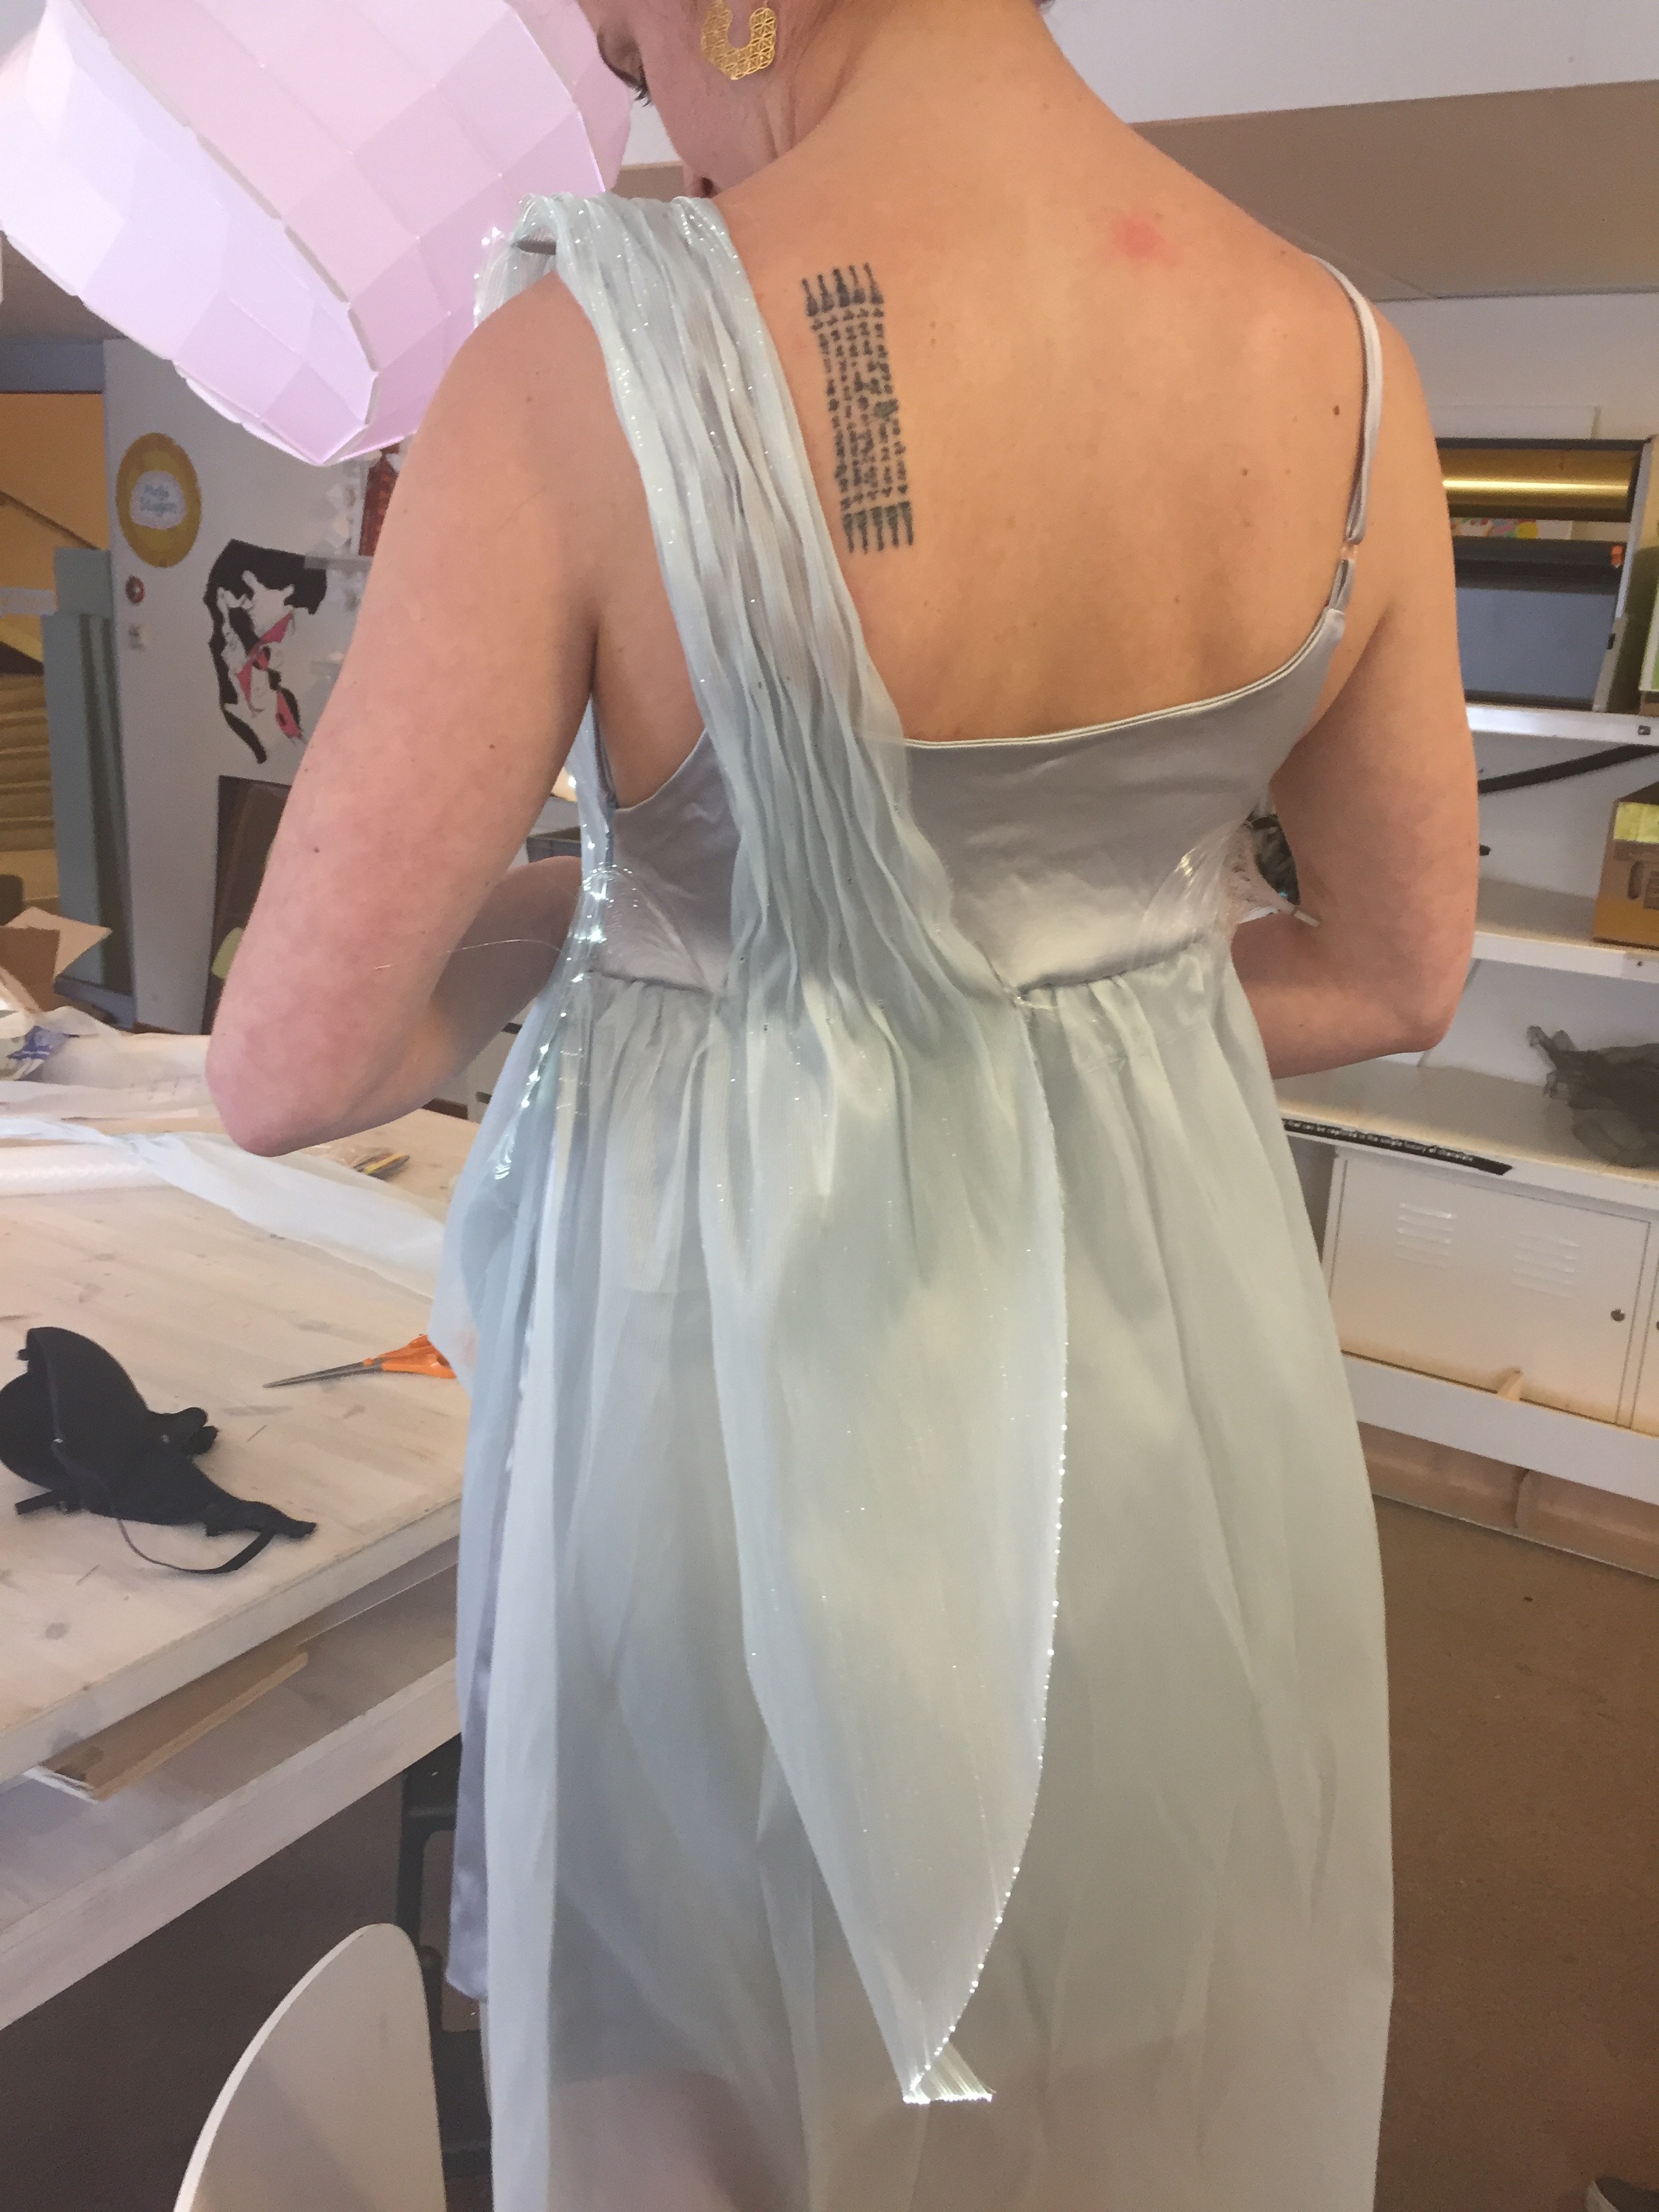
We tried on the slip and pinned the skirt and shoulders to the waist. We tested the fiber optics with my cell phone light and it is already looking fantastic! Because we used more material and pinned it in little pleats, this allowed for more fiber optics and blinky. Note how the smocking is collapsing a bit on itself, as it did not have the 3d printed parts attached yet.
DETAILS
I made a super quick script for the width the smocking was supposed to be at small intervals. Then I scrounged up some silver PLA, printed out two of every size, and attached to the back of the dress.
LIGHT IT UP!
in progress...